Sign In
Upload
Manuals
Brands
MikroScan Manuals
Thermal cameras
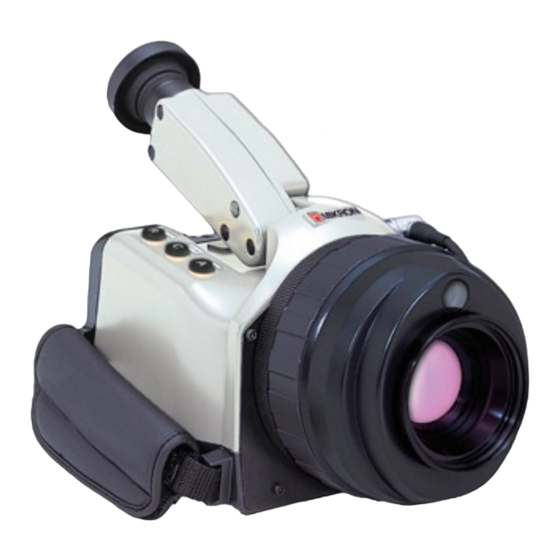
7600PRO
MikroScan 7600PRO Manuals
Manuals and User Guides for MikroScan 7600PRO. We have
1
MikroScan 7600PRO manual available for free PDF download: Operator's Manual
MikroScan 7600PRO Operator's Manual (309 pages)
Thermal Imager
Brand:
MikroScan
| Category:
Thermal cameras
| Size: 8 MB
Table of Contents
Table of Contents
3
General Information
11
How to Use this Manual
11
Conventions
11
Operator Training
11
Section 1 General Information
11
Precautions
12
Power
12
Battery Pack
12
Cable, Adapter, Cord
13
Neck Strap
13
Environmental Conditions for Use and Storage
13
Warranty
14
Regulatory Information
14
Unpacking and Inspection
15
Procedure for Factory Repair and Return
16
Introduction
17
System Overview
17
Section 2 Introduction
17
Construction
18
Construction
19
Key Panel Functions
20
Camera Interfaces
21
On Board Image Processing Software
22
On Board Image Processing Software -Standard Type Menu
23
On Board Image Processing Software -Classic Type Menu
24
Camera Functions
25
Button Control Features
25
Main Menu Functions
25
Standard Camera Accessories
38
Getting Started
39
Charging the Batteries
39
Section 3 Getting Started
39
Connecting the Power Supply
40
Before You Begin
40
Attaching the Battery Pack
41
Connecting the AC Adapter
41
Handling the Lens Protection Cap
42
Removing the Lens Cap
42
Attaching the Lens Cap
42
Handling the Memory Card
43
Inserting the Memory Card
43
Mikroscan 7600PRO Operator's Manual
43
Removing the Memory Card
43
Viewing Your First Image
44
V15.4F
44
Accessing the Mikroscan 7600PRO Expanded Menu Functions
45
Using the Standard Type Navigational Structure
45
Using the Classic Type Navigational Structure
46
Working with the LCD Display
48
Selecting a Lens Option
49
Customizing Your Mikroscan 7600PRO
50
Establishing the Initial Setup Values
50
SelectNg the Temperature UnT
50
CustomZNg the Memory Card FLe Name
52
SettNg the Auto Mode FunctOn
55
SettNg the Language
57
ActVatNg the IEEE 1394 FunctOnalTy
58
SettNg the Date Format
58
SettNg The Date
60
SettNg the TMe
61
DSplayNg the Date and TMe
63
SelectNg a NavGatOnal Structure
64
Establishing the Save Setup Values
66
SelectNg a VoCe Memo RecordNg OptOn
66
SelectNg the Image Save Format
68
SelectNg the VSBle Save OptOn
69
Establishing the Analyze Setup Values
71
SettNg the MultPoNt DSplay Mode
71
ActVatNg/DeactVatNg the Box Temperature OptOn
74
Establishing the Display Setup Values
76
SettNg the NUC (Non UnFormTy CorrectOn) Mode
76
SettNg the L&S (Level & SensTVTy or Level & Span) Mode
79
SettNg the Threshold for SpatAl FLterNg
81
ClearNg/ShowNg DSplay Elements
83
ClearNg/ShowNg the Status Bar
87
ClearNg/ShowNg the Color Bar
89
ClearNg/ShowNg the Battery Status IndCator
90
SettNg the TV System (VDeo Output Mode)
92
SettNg the TV ScannNg Mode
92
AdjustNg the LCD BrGhtness Level
92
Establishing the Auto Standby Parameters
94
ActVatNg the Auto Standby Feature
94
DeactVatNg the Auto Standby Feature
96
Working with Configuration Files
98
Saving a Configuration File
98
Loading a Saved Configuration File
100
Mikroscan 7600PRO Operator's Manual
100
Information on the Mikroscan 7600PRO Firmware Version
101
Finishing
101
V15.4F
101
Basic Operation
103
Toggling between the Run and Freeze Modes
103
Switching to Freeze Mode
103
Returning to Run Mode
103
Section 4 Basic Operation
103
Using the Power Standby Mode
104
Working with the Power Standby on Function
104
Working with the Power Standby Auto Function
105
Selecting the Temperature Range and Mode
105
Selecting the Temperature Range (Option 1)
105
Selecting the Temperature Range Mode Setting
107
Switching between Ranges
108
Using the Manual Range Formatting Option with L/S Link
108
Working with the Color Palette Options
110
Choosing a Color Palette
110
Switching between the Color and Monochrome Display
112
UsNg the Standard Type Menu
112
UsNg the ClassC Type Menu
113
Adjusting the Focus
114
Using the Focus Indicator Bar with the Standard Type Menu
114
Using the Focus Indicator Bar with the Classic Type Menu
115
Manual Focusing
117
Adjusting the Temperature Level
117
Adjusting the Temperature Span
118
Adjusting the Sensitivity
119
Using the Auto Processing Functions
120
Performing the Full Auto Function
120
Performing the Auto Focus Function
121
Performing the Auto Level & Sens/Level & Span Function
121
Working with the Averaging Function (S/N Improvement)
122
Working with the Image Zoom Function
123
Using the Memo Function
125
Creating a Memo Using the Character Input Method
125
Adding Multiple Memos Using the Character Input Method
128
Applying a Memo Designation Using the File Selection Method
130
Changing a Memo
131
Deleting an Memo Designation
134
DeletNg a SNgle Character
134
V15.4F
135
DeletNg All Characters at Once
137
Images and Image Files
139
Working with the Save Function
139
Saving Image Data as .SIT Files
139
Saving Image Data as .BMP Files
141
Adding a Voice Memo to a New Image
142
Reviewing Saved Images Using the Mikroscan 7600PRO
145
Reviewing .SIT Images Using the Replay File Feature
145
Reviewing .BMP Images Using the Replay File Feature
147
Reviewing Images Using the Thumbnail Feature
149
Working with Images Stored to Real-Time Memory
151
Saving RTM Images to the Compact Flash Memory Card
152
SavNg IndVDual Image Frames as .SIT FLes
153
SavNg IndVDual Image Frames as .BMP FLes
154
UsNg the RTM Save All Feature
155
Using the Memory Card Management Options
158
Making Directories
158
Selecting Directories
159
Deleting Files
161
Renumbering Files
163
Formatting the Memory Card
164
Working with Memory Card Error Messages
165
Data Analysis
167
Adjusting for Ambient Compensation
167
Accessing the Ambient Compensation Mode Settings
167
Section 6 Data Analysis
167
Setting Ambient Compensation Using the Parameter Mode
168
SettNg the AtmospherC Temperature Value
169
SettNg the RelatVe HumDTy Value
171
SettNg the Object DStance
172
Setting Ambient Compensation Using the Value Mode
174
SettNg the AtmospherC Temperature Value
175
SettNg the CompensatOn Value
176
Deactivating the Ambient Compensation Mode
178
Adjusting for Background Compensation
179
Working with the Gain Control Function
181
Selecting a Gain Control Option
181
Disabling the Gain Control Option
183
Working with the Multi-Point Temperature Display Options
184
Setting a Single Point
185
Setting Multiple Points
187
Changing Set Point Positions
189
Deleting Individual Set Point Positions
191
Deleting All Set Point Positions
194
Working with Emissivity Settings
195
Setting the Display Emissivity Using a Numerical Value (Run Mode)
195
UsNg the Standard Type Menu
195
V15.4F
195
UsNg the ClassC Type Menu
196
Setting the Display Emissivity and Ambient Temperature Using a Numerical Value (Freeze Mode)
197
UsNg the Standard Type Menu
197
UsNg the ClassC Type Menu
200
Setting the Display Emissivity Using the On-Board Emissivity Tables
203
Working with Point Emissivities
205
SettNg EmSsVTy Values for One or more PoNts
207
DeletNg IndVDual EmSsVTy Values
208
DeletNg All Set EmSsVTy Values
211
Working with Boxes
212
Adding a Box
212
Adding Multiple Boxes
216
Deleting a Box
219
Deleting All Boxes
221
Working with the Max/Min Temperature Display
222
Selecting the Max/Min Temperature Option-Whole Display
223
Setting the Max/Min Temperature Option-Defined Box
225
Canceling the Max/Min Temperature Option
227
Working with the Composite Image Function
229
Creating a Composite Image
229
Fitting the Composite Image
231
Working with the Multi Sense Display Settings
232
Working with the ISO Thermal Function
233
Customizing the Range of a Single ISO Thermal Band
233
Adding Multiple ISO Thermal Bands
235
Modifying Existing ISO Thermal Bands
237
Erasing an Individual ISO Thermal Band
239
Erasing All ISO Thermal Bands
241
Working with the Wave Function
243
Working with the Event Functions
245
Setting the Event Condition
245
Selecting a Range Area
248
Choosing to Display an Alarm Warning Message
249
Choosing to Sound an Audible Warning
251
Choosing to Freeze Measurements
253
Saving Measurements to a Compact Flash Card
254
SelectNg the PC Card OptOn
254
V15.4F
255
SelectNg the PC Card Interval OptOn
256
SelectNg the PC Card TMe Delay OptOn
258
SelectNg the PC Card Save VSBle Image OptOn
259
Saving Measurements to Real-Time Memory (RTM)
261
SelectNg the RTM OptOn
261
SettNg the RTM Freeze OptOn
263
SelectNg the RTM Interval OptOn
266
SelectNg the RTM Frame Delay OptOn
268
Advanced Operations
271
Working with External LCD Displays
271
Connecting the LCD Display
271
Disconnecting the LCD Display
271
Section 7 Advanced Operations
271
Setting the RS-232C Baud Rate (if Necessary)
272
Setting the RS-232C Data Format (if Necessary)
273
Working with External Video Displays
275
Connecting the Video Display Cable
275
Setting the Video Display Parameters
275
SettNg the TV System (VDeo Output Mode)
275
SettNg the TV ScannNg Mode
277
Working with Communication Interfaces
279
Connecting the Communication Cable
279
Activating the IEEE 1394 Functionality
280
Calibrating the Instrument
281
Performing a REF CAL (Reference Calibration)
282
Performing a ERSP CAL (External Response Calibration)
282
Returning All Settings to Default Values
283
Principle of Thermal Imaging
285
Infrared Radiation
285
Emissivity
286
Blackbody Radiation
287
Blackbody Type Source and Emissivity
289
Determining Emissivity
290
Background Noise
291
Practical Measurement
292
Emissivity of Various Materials
293
V15.4F
294
Advertisement
Advertisement
Related Products
MikroScan Categories
Thermal cameras
More MikroScan Manuals
Login
Sign In
OR
Sign in with Facebook
Sign in with Google
Upload manual
Upload from disk
Upload from URL