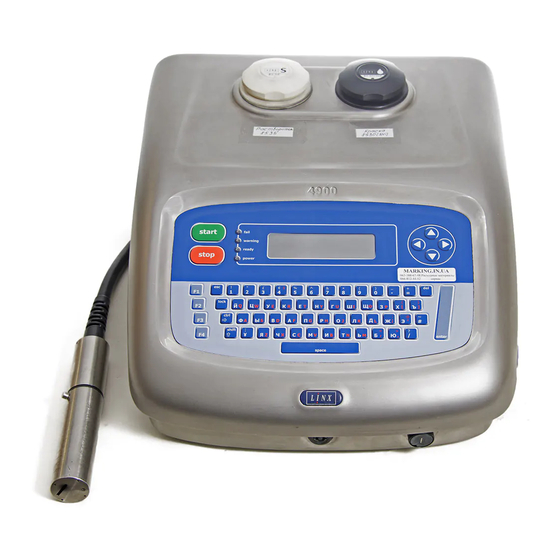
Sign In
Upload
Manuals
Brands
Linx Manuals
Printer
4900
Linx 4900 Manuals
Manuals and User Guides for Linx 4900. We have
1
Linx 4900 manual available for free PDF download: Operating Manual
Linx 4900 Operating Manual (284 pages)
Brand:
Linx
| Category:
Printer
| Size: 9.73 MB
Table of Contents
Copyright Notice
2
Disclaimer
2
About this Manual
3
Equipment Information
3
Safety
4
Introduction
4
Operating the Printer
6
Inks and Solvents
7
First Aid
7
Noise Emissions
9
Table of Contents
10
Using this Manual
16
How this Manual Is Organized
16
How to Use this Manual
17
Related Publications
18
Document Conventions
18
Introduction
20
About the 4900 Printer System
20
Overview
20
Printer System Features
21
Operating the Printer
22
Printer Display Features
22
Navigating the System Menus
23
About Continuous Ink Jet Printing
24
Password Security System
26
Getting Started
28
Before You Start
29
Installation
29
Power Connection
29
Mains Power Supply Switch
29
Switching on and Starting up
30
Switching the Printer on
30
Checking the Power Indicator
30
Viewing the Power-Up Sequence
31
Introducing the Current Message Screen
32
Getting to Know the Printer Display
32
How to Print a Message
33
To Select a Message
33
To Start Printing
35
To Stop Printing
36
Working with the System Menus
37
To Enter the Password
37
To Change the System Time
37
Typing Keyboard Characters
39
Shutting down and Switching off
40
To Shut down the Jet
40
To Power down and Switch off
40
Emergency Stop
42
Day-To-Day Operations
44
Introducing the Current Message Screen
45
Selecting and Printing Messages
46
Before You Start Printing
46
To Select a Message for Printing
46
To Start Printing
48
To Stop Printing
50
To Shutdown the Jet
51
To Power down and Switch off
52
Emergency Stop
54
Editing the Current Message
55
To Select the Message for Editing
55
To Edit the Message
56
Viewing the Printer Status
57
To View the Current Printer Status
57
To Reset the Print Count
58
Handling System Events
59
To View Events in the List
60
Working with Passwords
61
To Enter the Password
61
To Switch the Password System On/Off
62
Getting Help
64
Creating and Editing Messages
66
Introduction
67
Message Fundamentals
67
About Field Types
68
Choosing the Message Type
69
Selecting the Size
70
Using a Bold Ratio
71
Reversing the Printed Message
72
Creating a New Message
73
To Name the Message and Select the Message Type
73
Getting to Know the EDIT MESSAGE Screen
75
Creating a Text Field
77
To Select the Character Size
77
To Add Text
77
To Turn the Text into a Field
78
Saving the Message
78
Working with Message Fields
79
Navigating the Message Display Area
79
Fine Tuning the Field Start Position
80
Applying Bold to a Field
80
Entering Text
81
To Select a Field for Editing
81
To Edit a Text Field
81
To Edit a Field
82
To Delete a Field
82
Handling a Field Overlap Message
82
Selecting, Editing and Deleting Messages
83
To Select a Message for Editing
83
To Edit a Message
84
To Delete a Message
85
To Delete the Current Message
86
Creating a Time Field
87
To Create a Time Field
87
Creating a Timed Message Field
89
To Create a Timed Message Field
89
Editing a Timed Message Field
90
Creating a Sequential Number Field
91
Creating a Date Field
94
To Create a Date Field
95
Creating a Remote Field
97
Inserting a Logo Field
99
Creating a Message: Worked Example
101
To Create a New Message
102
To Create a Text Field
103
To Insert a Sell-By Date
104
To Insert a Batch Number
106
To Insert a Timed Message
108
To Print the Message
109
Changing the System Setup
110
Accessing the Setup Menu
111
Option Availability
112
Adjusting the Message Parameters
113
To Adjust the Message Height
113
To Adjust the Message Width
115
To Set the Print Width Value: Shaft Encoder
116
To Set the Print Delay
117
Defining the Bold Ratio
118
Reversing the Printed Message
119
Changing the Line Settings
120
To Set the Print Trigger
120
To Enable a Shaft Encoder
122
To Set the Alarm
123
To Set the Auto Power down Options
125
Changing the Installation Settings
127
To Set the Time
127
To Set the Date
128
To Specify the Julian Date Format
129
To Set the Head Height
130
To Set the System Language
132
About Language Groups
133
To Set the Display Contrast
134
Changing the Passwords
135
Remote Interface Setup
136
About the Linx Remote Communications Interface
136
Introducing the Remote Setup Menu
137
To Access the Remote Setup Menu
137
Option Availability
137
Configuring the Remote Interface Settings
138
Transfer Parameters Menu
138
Serial Parameters Menu
140
Flow Control Menu
141
Message Delimiters Menu
142
Print Control Menu
142
Print Mode Menu
144
Diagnostics and Maintenance
148
Introducing the Diagnostics Menu
148
To Access the Diagnostics Menu
148
Option Availability
149
Performing Diagnostic Functions
150
To View the Jet State
151
To View the Scheduled Maintenance Interval
153
To View the System Configuration
154
To View the System Pressure Values
155
To Generate and Print Test Patterns
157
To View the Type of Ink in Use
158
To View the Solvent Add Time
159
Performing Routine Maintenance
160
To Clean the Printer Cabinet
161
To Clean or Replace the Air Filter
162
To Refill with Ink or Solvent
163
To Clean the Printhead
165
To Flush the Nozzle
169
To Clear the Nozzle
170
Appendix A: Installation and Setup
172
Locating the Printer
173
Connecting to a Power Source
174
Attaching the Printhead to the Production Line
175
Routing the Printhead Conduit
176
Setting up Product Sensors
177
To Connect a Product Sensor
178
Setting up Line Speed Detection
179
To Connect a Shaft Encoder
179
To Enable a Shaft Encoder
180
To Select the Encoder, Gearing and Print Width
181
Appendix B: Printer Controls and System Menus
192
General Control Keys and Indicators
194
General Control Keys
194
LED Status Indicators
194
Function Keys
195
Keyboard Control Keys
196
Keyboard Status Indicator
198
System Menu Options
199
System Menus: Hierarchy Overview
199
Current Message Screen
200
Print Status Screen
201
Message Options Screen
201
Edit Message Screen
202
Setup Menu
203
Remote Setup Menu
205
Diagnostics Menu
206
Keyboard Shortcuts
207
Current Message Screen
207
Setup Menu
207
Diagnostics Menu
207
Appendix C: Line Speeds and Print Quality
208
Introduction
208
Printable Line Speeds
209
Ultima Printhead
209
Ultima Plus Printhead
210
Ideal Raster Pitch
211
Calculation Formula
212
Appendix D: System Event Messages
214
System Event Messages Summary
215
System Failures
216
Print Failures
217
System Warnings
223
Appendix E: Extended Character Sets
228
Typing Characters from Extended Character Sets
229
European Characters
231
Greek Characters
233
Russian Characters
235
Appendix F:technical Specification
238
Technical Data
238
Printer Configurations
238
Cabinet
238
Power Requirements
239
Environmental
239
Ink System
239
Memory Capacity
240
Printhead
240
Printing Performance Data
242
Regulatory Approvals
243
Appendix G: EC Declaration of Conformity Certificates
244
English
245
Czech
246
Danish
247
Dutch
248
Estonian
249
Finnish
250
French
251
German
252
Greek
253
Hungarian
254
Italian
255
Latvian
256
Lithuanian
257
Maltese
258
Norwegian
259
Polish
260
Portuguese
261
Slovak
262
Slovenian
263
Spanish
264
Swedish
265
Appendix H: Training Documentation
266
Course One: Printer Operation (User Level A)
266
Course Overview
266
Introduction
268
Aims
268
Key Points
268
Activities
268
Equipment
268
Getting Started
269
Aims
269
Key Points
269
Activities
269
Printing
270
Aims
270
Key Points
270
Activities
270
Navigating the Linx 4900
271
Aims
271
Key Points
271
Activities
271
Stopping Print and Shutting down
272
Aims
272
Key Points
272
Activities
272
Equipment
272
Looking after Your Printer
273
Aims
273
Key Points
273
Activities
273
Review
275
Aims
275
Key Points
275
Activities
275
Advertisement
Advertisement
Related Products
Linx 5900
Linx 7900
Linx 7900 Food Grade
Linx Categories
Printer
Transmitter
Transceiver
Tablet
Motherboard
More Linx Manuals
Login
Sign In
OR
Sign in with Facebook
Sign in with Google
Upload manual
Upload from disk
Upload from URL