Sign In
Upload
Manuals
Brands
Lexmark Manuals
All in One Printer
CX532
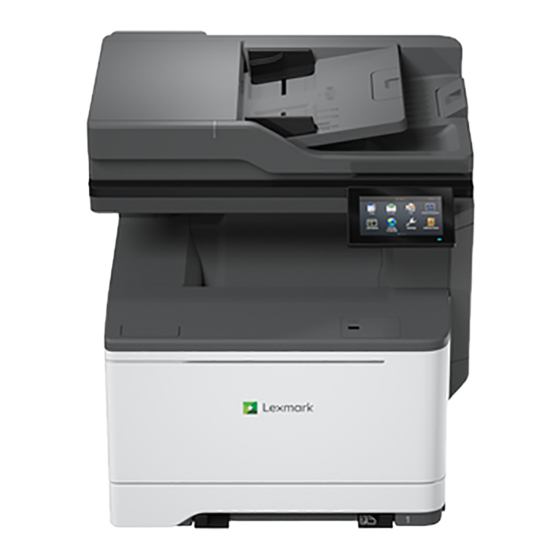
User Manuals: Lexmark CX532 Laser Multifunction Printer
Manuals and User Guides for Lexmark CX532 Laser Multifunction Printer. We have
2
Lexmark CX532 Laser Multifunction Printer manuals available for free PDF download: Service Manual, User Manual
Lexmark CX532 Service Manual (441 pages)
Brand:
Lexmark
| Category:
All in One Printer
| Size: 22 MB
Table of Contents
Product Information
2
Edition Notice
3
Table of Contents
4
Notices, Conventions, and Safety Information
7
Laser Notice
7
Conventions
7
Conventions
8
Safety Information
8
Consignes de Sécurité
10
Información de Seguridad
11
Change History Change History
15
General Information
19
Printer Model Configurations
19
Finding the Printer Serial Number
19
Selecting Paper
19
Paper Characteristics
20
Moisture Content
20
Grain Direction
20
Unacceptable Paper
21
Storing Paper
21
Supported Paper Sizes
22
Supported Paper Types
29
Supported Paper Weights
30
Tools Required for Service
30
Diagnostics and Troubleshooting
31
Troubleshooting Precautions
31
Troubleshooting Overview
35
Performing the Initial Troubleshooting Check
35
Replace Cartridge, Printer Region Mismatch
35
Securing the Printer
36
Data Security Notice
37
Erasing Printer Memory
38
Fixing Print Quality Issues
39
Initial Print Quality Check
39
Toner Easily Rubs off
41
Blank or White Pages
44
Horizontal White Lines
45
Text or Images Cut off
47
Mottled Print and Dots
48
Vertical White Lines
49
Ghost Images
50
Dark Print
52
Uneven Print Density
54
Repeating Defects
55
Light Print
57
Skewed Print
58
Fixing Scan Quality Issues
63
Vertical Lines (Process Direction Using the ADF)
63
Paper Jams
66
Avoiding Jams
66
Identifying Jam Locations
67
Paper Jam Messages
69
Sensor (Input): Static Jam Service Check
77
Sensor (Fuser Exit): Static Jam Service Check
81
29Y Paper Jams
97
User Attendance Messages
98
User Attendance Messages
121
Insufficient Memory Service Check
124
Non-Lexmark Supply
124
Printer Hardware Errors
148
Error Messages
148
Main Fan Service Check
161
Procedure before Starting the 9Yy Service Checks
166
Collecting the History Information from the SE Menu
166
Collecting the Firmware Logs (Fwdebug and Logs.tar.gz) from the SE Menu
167
Collecting the Settings from the Menu Settings Page
167
Collecting Information from the User
168
Error Service Check
168
Adf/Scanner Hardware Errors
174
Service Menus
177
Understanding the Printer Control Panel
177
Entering the Diagnostics Menu
178
Advanced Print Quality Samples
180
Format Fax Storage
180
Scanner Diagnostics
180
Sensor Tests
181
Scanner Calibration Reset
182
Printer Setup
183
Permanent Page Count
183
Engine Setting [X]
184
Printer Diagnostics and Adjustments
184
Registration Adjust
186
Out of Service Erase
187
Event Log
187
Print Log Summary
188
Input Tray Quick Print
188
Entering the Configuration Menu
190
Entering Invalid Engine Mode
196
Entering Recovery Mode
197
Service Engineer Menu
199
Network SE Menu
201
Parts Removal
205
Important Removal Information
205
Removal Precautions
205
Handling ESD-Sensitive Parts
208
Restoring Solutions, Licenses, and Configuration Settings
213
Updating Firmware
215
Backing up Esf Solutions and Settings
217
Disconnecting Ribbon Cables
218
Ribbon Cable Connectors
218
Zero Insertion Force (ZIF) Connectors
218
Horizontal Top Contact Connector
219
Horizontal Bottom Contact Connector
221
Vertical Mount Contact Connector
223
Horizontal Sliding Contact Connector
225
Low Insertion Force (LIF) Connector
227
Adjustments
228
Registration Adjustment
228
Scanner Manual Registration
231
ADF Registration Adjustment
232
Flatbed Registration Adjustment
232
Removal Procedures
233
Left Side Removals
233
Left Cover Removal
233
Installation Note
234
LVPS Removal
237
Sensor (Fuser Exit) Removal
238
Speaker Removal
240
Right Side Removals
241
HVPS Removal
246
Right Cover Removal
252
Toner Cartridge Contacts Removal
254
Waste Toner Bottle Contact Block Removal
256
Front Removals
259
Front Door Removal
259
Sensor (Front Door) Removal
262
Fuser Removal
266
Transfer Module Removal
271
Control Panel Removal
275
Bottom Removals
276
Pick Tires Removal
276
Lower Left Frame Removal
277
Lower Right Frame Removal
283
Installation Note
287
Sensor (Tray Present) Removal
291
Rear Side Removals
295
Rear Cover Removal
295
Controller Board Removal
295
Top Side Removals
297
Top Cover Removal
297
Printhead Removal
299
Adf/Scanner Removals
300
Flatbed Scanner Removal
300
ADF Removal
313
ADF Top Cover Removal
315
ADF Right Hinge Removal
315
ADF Left Hinge Removal
316
Options Removals
316
Dust Cover Removal
317
Replacing Parts and Supplies
318
Replacing a Toner Cartridge
318
Replacing the Waste Toner Bottle
330
Replacing a Developer Unit
334
Replacing the Pick Tires
342
Resetting the Supply Usage Counters
363
Component Locations
365
Printer Configurations
365
Installing Optional Trays
366
Adding Available Options in the Print Driver
368
For Macintosh Users
368
Port Locations
368
Roller Locations
369
Duplex Paper Path
370
Sensor Locations
370
Maintenance
371
Inspection Guide
371
Scheduled Maintenance
372
Resetting the Maintenance Counter
373
Cleaning Printer Parts
374
Cleaning the Printer
374
Cleaning the Touch Screen
375
Cleaning the Scanner
376
Cleaning the ADF Rollers
378
Loading Paper and Specialty Media
382
Setting the Paper Size and Type
382
Configuring Universal Paper Settings
383
Loading Trays
383
Loading the Manual Feeder
385
Loading the Multipurpose Feeder
386
Linking Trays
389
Parts Catalog
390
Legend
390
Covers
391
Covers 2
393
Control Panel
394
EP Components
395
Electronics
396
Motors
397
Sensors
398
Cables
399
Trays
401
Imaging
402
Electronic Options
403
Convenience Stapler
404
Printer Stand
405
Maintenance Kits
406
Power Cords
407
Printer Specifications
408
Product Power Consumption
408
Sleep Mode
408
Hibernate Mode
409
Off Mode
409
Total Energy Usage
409
Selecting a Location for the Printer
410
Noise Emission Levels
411
Temperature Information
411
Options and Features
413
Available Internal Options
413
Theory of Operation
414
POR Sequence
414
Printer Control
414
Electrophotographic (EP) Process
414
Service Tips
416
First Transfer
418
Second Transfer
419
Printer Operation
422
Printer Sections
422
Printer Paper Path Sensors
424
ADF and Scanner Operation
425
Flatbed Scanner Drive
425
ADF Paper Path Sensors
426
Index
430
Advertisement
Lexmark CX532 User Manual (336 pages)
Brand:
Lexmark
| Category:
All in One Printer
| Size: 29 MB
Table of Contents
Table of Contents
2
Safety Information
6
Conventions
6
Product Statements
6
Learn about the Printer
9
Finding Information about the Printer
9
Finding the Printer Serial Number
10
Printer Configurations
10
Using the Control Panel
12
Understanding the Status of the Indicator Light
12
Selecting Paper
12
Set Up, Install, and Configure
22
Selecting a Location for the Printer
22
Attaching Cables
23
Setting up and Using the Home Screen Applications
24
Setting up and Using the Accessibility Features
30
Setting up the Printer to Fax
33
Configuring the E-Mail SMTP Settings
39
Loading Paper and Specialty Media
47
Installing and Updating Software, Drivers, and Firmware
54
Installing Hardware Options
56
Networking
68
Secure the Printer
72
Locating the Security Slot
72
Erasing Printer Memory
72
Erasing Printer Storage Drive
73
Restoring Factory Default Settings
73
Statement of Volatility
73
Print
75
Printing from a Computer
75
Printing from a Mobile Device
75
Printing from a Flash Drive
77
Supported Flash Drives and File Types
78
Configuring Confidential Jobs
78
Printing Confidential and Other Held Jobs
79
Printing a Font Sample List
80
Printing a Directory List
80
Placing Separator Sheets between Copies
80
Canceling a Print Job
80
Adjusting Toner Darkness
80
Copy
81
Using the Automatic Document Feeder and Scanner Glass
81
Making Copies
81
Copying Photos
81
Copying on Letterhead
82
Copying on both Sides of the Paper
82
Reducing or Enlarging Copies
82
Collating Copies
82
Placing Separator Sheets between Copies
82
Copying Multiple Pages Onto a Single Sheet
83
Copying Cards
83
Creating a Copy Shortcut
83
E-Mail
84
Using the Automatic Document Feeder and Scanner Glass
84
Sending an E-Mail
84
Creating an E-Mail Shortcut
84
Fax
85
Using the Automatic Document Feeder and Scanner Glass
85
Sending a Fax
85
Scheduling a Fax
86
Creating a Fax Destination Shortcut
86
Changing the Fax Resolution
86
Adjusting the Fax Darkness
87
Printing a Fax Log
87
Blocking Junk Faxes
87
Holding Faxes
87
Forwarding a Fax
87
Scan
89
Using the Automatic Document Feeder and Scanner Glass
89
Scanning to a Computer
89
Scanning to an FTP Server
90
Creating an FTP Shortcut
91
Scanning to a Network Folder
91
Creating a Network Folder Shortcut
91
Scanning to a Flash Drive
92
Use Printer Menus
93
Menu Map
93
Device
94
Print
109
Paper
118
Copy
120
Fax
124
E-Mail
139
Ftp
145
USB Drive
149
Network/Ports
154
Security
168
Cloud Services
175
Reports
176
Troubleshooting
177
Forms Merge
177
Printing the Menu Settings Page
179
Maintain the Printer
180
Checking the Status of Parts and Supplies
180
Configuring Supply Notifications
180
Setting up E-Mail Alerts
180
Viewing Reports
181
Ordering Parts and Supplies
181
Replacing Parts and Supplies
184
Cleaning Printer Parts
229
Saving Energy and Paper
237
Moving the Printer to Another Location
237
Shipping the Printer
238
Troubleshoot a Problem
239
Print Quality Problems
239
Printer Error Codes
240
Printing Problems
247
The Printer Is Not Responding
273
Unable to Read Flash Drive
274
Enabling the USB Port
275
Clearing Jams
275
Network Connection Problems
284
Hardware Options Problems
287
Issues with Supplies
288
Paper Feed Problems
289
E-Mailing Problems
292
Faxing Problems
293
Scanning Problems
299
Color Quality Problems
306
Contacting Customer Support
308
Recycle and Dispose
309
Recycling Lexmark Products
309
Recycling Lexmark Packaging
309
Notices
310
Index
330
Advertisement
Related Products
Lexmark CX510e
Lexmark CX517de
Lexmark CX725R
Lexmark CX927
Lexmark CX417 Series
Lexmark CX417de
Lexmark CX930
Lexmark CX725de
Lexmark CX942
Lexmark CX737
Lexmark Categories
Printer
All in One Printer
Printer Accessories
Software
Print Server
More Lexmark Manuals
Login
Sign In
OR
Sign in with Facebook
Sign in with Google
Upload manual
Upload from disk
Upload from URL