Lexmark 352 Monochrome Laser Printer Manuals
Manuals and User Guides for Lexmark 352 Monochrome Laser Printer. We have 3 Lexmark 352 Monochrome Laser Printer manuals available for free PDF download: User Manual
Lexmark 352 User Manual (258 pages)
X54x Series
Brand: Lexmark
|
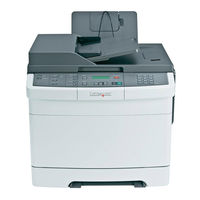
Category: All in One Printer
|
Size: 3 MB
Table of Contents
-
Basic Models16
-
Recycling47
-
Printing65
-
Copying75
-
E-Mailing83
-
Faxing87
-
Sending a Fax101
-
Original Size106
-
Content106
-
Sides (Duplex)106
-
Resolution106
-
Darkness106
-
Forwarding a Fax107
-
Sides (Duplex)112
-
Darkness112
-
Clearing Jams114
-
Avoiding Jams114
-
200 Paper Jam116
-
202 Paper Jam117
-
230 Paper Jam119
-
250 Paper Jam120
-
Menus List122
-
Supplies Menu123
-
Paper Menu123
-
Size/Type Menu124
-
Reports Menu132
-
Network/Ports133
-
Active NIC Menu133
-
Network Menu133
-
Network Setup134
-
Wireless Menu134
-
USB Menu135
-
Settings Menu137
-
Display Language137
-
Quiet Mode137
-
Date Format138
-
Time Format138
-
Factory Defaults140
-
Memory Use143
-
Automatic Redial144
-
Auto Answer146
-
Auto Reduction146
-
Fax Log Settings147
-
Speaker Settings147
-
Flash Drive Menu148
-
Print Settings150
-
Print Settings151
-
Setup Menu151
-
Finishing Menu151
-
Quality Menu153
-
Color Correction153
-
Print Resolution153
-
Toner Darkness153
-
Utilities Menu155
-
Pdf Menu155
-
Postscript Menu156
-
Image Smoothing156
-
Pcl Emul Menu156
-
Image Menu158
-
Fax Failed163
-
Do Not Touch163
-
Fax Complete163
-
Hex Trace163
-
Maintenance164
-
No Dial Tone165
-
Menus Disabled165
-
Power Saver165
-
Reading Data166
-
Printing Error166
-
Programming Code166
-
Replace Pc Kit167
-
Short Paper169
-
Memory Full169
-
Ppds Font Error169
-
Paper Missing173
-
Scanner Disabled174
-
Storing Supplies176
-
Viewing Reports205
-
Troubleshooting206
Advertisement
Lexmark 352 User Manual (245 pages)
Lexmark X543DN: User Guide
Brand: Lexmark
|
Category: All in One Printer
|
Size: 4 MB
Table of Contents
-
-
-
-
Printing
52 -
Copying
61 -
E-Mailing
69 -
Faxing
73-
-
-
Content93
-
Resolution94
-
Darkness94
-
-
Clearing Jams
100-
Avoiding Jams100
-
200 Paper Jam102
-
202 Paper Jam103
-
230 Paper Jam105
-
250 Paper Jam106
-
-
-
Menus List108
-
Supplies Menu109
-
Paper Menu109
-
Size/Type Menu110
-
Units of Measure117
-
Reports Menu118
-
Network/Ports119
-
Active NIC Menu119
-
Network Menu119
-
Network Setup120
-
Wireless Menu120
-
USB Menu121
-
-
Settings Menu123
-
-
Display Language123
-
Quiet Mode123
-
Date Format124
-
Factory Defaults126
-
-
-
Number of Copies127
-
Paper Source127
-
-
Memory Use129
-
Automatic Redial130
-
Dial Prefix130
-
Auto Reduction132
-
Auto Answer132
-
Speaker Volume133
-
Ringer Volume133
-
Fax Log Settings133
-
Speaker Settings133
-
Flash Drive Menu134
-
Print Settings136
-
Setup Menu137
-
Print Settings137
-
Finishing Menu137
-
Color Correction139
-
Print Resolution139
-
-
Quality Menu139
-
Utilities Menu141
-
Pdf Menu141
-
Postscript Menu142
-
Image Smoothing142
-
Pcl Emul Menu142
-
Symbol Set142
-
Image Menu144
-
-
-
-
-
Fax Failed149
-
Do Not Touch149
-
Fax Complete149
-
Hex Trace149
-
No Dial Tone151
-
-
Menus Disabled151
-
Power Saver151
-
-
Reading Data152
-
Replace Pc Kit153
-
-
Tray <X> Missing154
-
Unsupported Mode154
-
Memory Full155
-
Ppds Font Error155
-
Paper Missing159
-
Scanner Disabled160
-
-
-
Storing Supplies162
-
Lexmark 352 User Manual (257 pages)
X54x Series
Brand: Lexmark
|
Category: All in One Printer
|
Size: 7 MB
Table of Contents
-
Recycling47
-
Printing65
-
Copying74
-
E-Mailing82
-
Faxing86
-
Sending a Fax100
-
Original Size105
-
Content105
-
Sides (Duplex)105
-
Resolution105
-
Darkness105
-
Forwarding a Fax106
-
Sides (Duplex)111
-
Darkness111
-
Clearing Jams113
-
Avoiding Jams113
-
200 Paper Jam115
-
202 Paper Jam116
-
230 Paper Jam118
-
250 Paper Jam119
-
Menus List121
-
Supplies Menu122
-
Paper Menu122
-
Size/Type Menu123
-
Reports Menu131
-
Network/Ports132
-
Active NIC Menu132
-
Network Menu132
-
Wireless Menu134
-
USB Menu134
-
Settings Menu136
-
Flash Drive Menu147
-
Print Settings150
-
Quality Menu152
-
Utilities Menu154
-
Postscript Menu155
-
Image Menu158
-
Pictbridge Menu158
-
Close Door163
-
Fax Failed163
-
Hex Trace163
-
Incoming Call164
-
Insert Tray <X164
-
Menus Disabled165
-
No Dial Tone165
-
Power Saver166
-
Printing Error166
-
Reading Data166
-
Replace Pc Kit167
-
Short Paper169
-
Memory Full170
-
Ppds Font Error170
-
Paper Missing174
-
Scanner Disabled175
-
Storing Supplies177
-
Viewing Reports207
-
Troubleshooting208
Advertisement