Sign In
Upload
Manuals
Brands
LEMKEN Manuals
Farm Equipment
JUWEL 7M
LEMKEN JUWEL 7M Manuals
Manuals and User Guides for LEMKEN JUWEL 7M. We have
5
LEMKEN JUWEL 7M manuals available for free PDF download: Operating Instructions Manual, Instruction Manual
LEMKEN JUWEL 7M Operating Instructions Manual (145 pages)
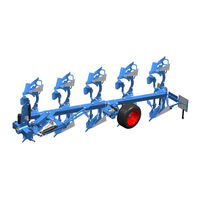
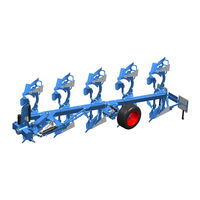
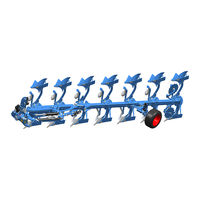
Mounted Reversible Ploughs
Brand:
LEMKEN
| Category:
Farm Equipment
| Size: 5 MB
Table of Contents
Table of Contents
5
General Information
11
Liability
11
Guarantee
11
Copyright
12
Optional Accessories
12
Type Plate
13
Symbols Used in the Operating Instructions
15
Hazard Classes
15
Information
15
Environmental Protection
15
Indication of Passages
16
Safety Measures and Precautions
17
Target Group
17
Intended Use
17
Safety Features of the Device
18
Safety and Warning Stickers
18
General
18
Position of Warning Stickers
19
Meaning of Warning Signs
20
Meaning of Other Symbols
22
Special Safety Instructions
23
Danger Areas During Implement Operation
25
Residual Risks
25
Hazard Caused by Mechanical Systems
26
Hazard Caused by Hydraulic Systems
26
Applicable Rules and Regulations
26
Operation on Public Highways
27
Lighting System and Identification
27
Requirements of the Tractor
27
Axle Loads
28
Check before Departure
32
Correct Behaviour in Road Traffic
32
Obligation of the Operator
32
Safe Use of the Implement
33
General
33
Personnel Selection and Qualifications
34
Hydraulic System
35
Handing over the Implement
36
Layout and Description
37
Description
38
Headstock
38
Basic Frame
38
Stand
39
Turnover Device
39
Depth Wheel
40
Plough Body
41
Additional Tools
43
Disc Coulters
44
Overload Safety Devices
45
The Optiquick Adjustment Centre
46
Lighting Equipment
47
Preparations on Tractor
48
Tyres
48
Lifting Rods
48
Top Link
48
Chains and Stabilisers of the Three-Way Linkage
48
Checking the Tractor's Three-Point Linkage
49
Hydraulics
50
Required Hydraulic Equipment
51
Required Power Sources
52
Determining Axle Loads and Required Ballasting
52
Preparing the Implement
53
Initial Start-Up
53
Depth Wheel or Depth and Transport Wheel
53
Skimmer
53
Attaching the Implement
54
Specific Safety Information
54
Uncoupling the Implement
58
Specific Safety Information
58
Detaching the Implement
58
Driving on Public Highways
61
General Information
61
Laws and Regulations
61
Warning Boards and Lighting
61
Transport Speed
61
Preparation for Driving on Public Roads
61
Switching Depth and Transport Wheel
62
Attaching the Lighting Equipment
63
Subsoilers
64
Operation
65
Specific Safety Information
65
Rotating Plough Frame
66
Adjusting Front Furrow Width
68
Implement with Mechanical Frontfurrowadjustment
68
Implement with Mechanical Frontfurrowadjustment in Conjunction with Hydraulic Frame Swing-In
69
Implement with Hydraulic Frontfurrowadjustment
70
Tractor/Plough Traction Line
71
On-Land Design (OF)
72
General Information
72
Switching F-Operation to O-Operation / O-Operation to F-Operation
73
Adjustment Centre
75
Inclination
78
Working Depth
80
Hydraulic Frame Swing-In
80
Pitch Angle
82
Duramaxx Plough Body
82
DURAL Plough Body
84
Working Width for each Body
86
Juwel 8M V
86
Juwel 8M
87
Landside
89
Sword Coulter
91
Trashboard
92
Subsoilers
95
Wide Furrow Cutter
96
Skimmers
97
General Information
97
Working Depth
98
Turning Forwards or Backwards
98
Projection Angle Adjustment
99
Disc Coulters
100
General Information
100
Working Depth
101
Side Distance
102
Swivel Restriction
103
Depth Wheel and Depth and Transport Wheel
105
Switching Depth and Transport Wheel from Working to Transport Position
105
Switching Depth and Transport Wheel from Transport to Working Position
109
Working Depth Adjustment
112
Overload Safety Devices
116
Shearing Protection
116
Mechanical Non-Stop Overload Safety Device
118
Hydromatic Hydraulic Overload Protection
119
General
119
Setting the Release Force
120
Operation
122
Depressurising the Hydraulic System
122
Attachment Arm
123
Put the Implement out of Operation
124
Shutting down the Implement in an Emergency
124
Disposal
124
Maintenance and Repairs
125
Special Safety Instructions
125
General
125
Working under the Raised Device
125
Immobilise the Implement for Maintenance and Repairs
126
Working on the Hydraulics
126
Personnel Qualifications
126
Protective Equipment
127
Utilised Tool
127
Environmental Protection
128
Maintenance Intervals
128
After the Initial Start-Up (at the Latest after 2 Hours)
128
Daily Inspection
128
Weekly Inspection
129
Tightening Torques
129
General
129
Bolts and Nuts Made of Steel
130
Wheel Bolts and Wheel Nuts
130
Tyre Pressure
131
Hydromatic Overload Protection - Depressurising the Hydraulic System
131
Check the Connections to the Tractor
132
Hydraulic Connections
132
Electrical Connections
132
Lubrication Chart
133
Troubleshooting
134
Hydraulic Equipment
134
Plough Intake and Depth Control, Slippage
137
Miscellaneous
137
Technical Data
138
Permitted Power Range
138
Weight
139
Permitted Shear Bolts for Overload Safety Device
142
Depth Wheels
142
Index
143
Advertisement
LEMKEN JUWEL 7M Instruction Manual (136 pages)
MOUNTED REVERSIBLE PLOUGH
Brand:
LEMKEN
| Category:
Farm Equipment
| Size: 31 MB
Table of Contents
Table of Contents
3
1 About These Instructions
7
Introduction
7
Target Groups
8
Applied Symbols
8
Design of Warning Signs
8
Signal Words and Hazard Statements
9
Warning of Property Damage
9
Other Notices and Information
9
Symbols and Text Markings
10
Direction Specifications
10
Further Applicable Documents
11
2 Safety
12
Intended Use
12
Personnel Qualification Requirements
14
Hazardous Areas
14
Workplaces and Passengers
16
Technically Perfect Condition
17
Safe Handling
19
Personal Protective Equipment
19
Driving the Tractor-Machine Combination
19
Safety Devices and Labels
20
3 Design and Description
21
Machine Overview
21
Machine Safety
22
Position of the Label
22
Meaning of the Labels
22
Safety Devices
24
Type Plate
26
Headstock
27
Basic Frame
27
Working Width Adjustment
27
Turnover Device
28
Support Wheels
29
Overload Safety Devices
29
Optiquick Adjustment Centre
30
Onland Version
31
Plough Body
31
Additional Tools
32
Disc Coulter
33
Subsoiler
34
4 Attaching
35
Checking Suitability of the Tractor
35
Preparations at the Tractor
36
Mounting the Machine
37
5 Road Travel
40
Information on Road Travel
40
Preparing for Road Travel
40
Preparing the Lighting Equipment for Road Travel
41
Subsoilers
43
6 Operation
44
Basic Operation
44
Turning the Plough Frame
44
Moving the Plough with Depth and Transport Wheel to Transport Position
45
Moving the Plough with Depth and Transport Wheel to Operating Position
48
Operating the On-Land Version
50
Changing the Setup State
52
All Setup Options at a Glance
52
Mounting the Sword Coulter
52
Mounting the Wide Furrow Cutter
53
Mounting the Attachment Arm
53
Adjusting the Machine
53
All Adjustments at a Glance
53
Adjusting the Depth
54
Adjusting the Inclination
57
Adjusting Front Furrow Width
59
Adjusting the Front Furrow Width - On-Land Version
61
Adjusting the Distance of the Tractor to the Furrow Edge - On-Land Version
62
Adjusting the Tractor/Plough Traction Line
62
Adjusting the Tractor/Plough Traction Line - On-Land Version
63
Adjusting the Pitch Angle of the Plough Bodies
65
Adjusting the Working Width of the Plough Bodies
68
Adjusting the Landside of Duramaxx Plough Bodies
71
Adjusting the Working Depth of the Subsoilers
72
Adjusting the Trashboard
72
Adjusting the Skimmer
74
Adjusting the Disc Coulter
76
Adjust the Release Force of the Mechanical Overload Safety Device
80
Adjusting the Release Force of the Hydraulic Overload Safety Device
81
Working with the Machine
84
Standard Procedure
84
Driving on the Headland
85
7 Cleaning and Care
86
After Working in the Field
86
Cleaning with High-Pressure Cleaner
86
8 Detaching
87
Removing the Machine
87
9 Maintenance and Repair Work
89
Maintaining the Machine Properly
89
Preparations
89
During the Maintenance and Repair
89
Maintenance
90
Maintenance Schedule
90
Notes on Bolted Connections
91
Tractor Connection
92
Frame
93
Hydraulics
95
Electrics
96
Checking the Soil Cultivation Tools
97
Lubricating
97
Lubrication Schedule
97
Lubricating Components Via Grease Nipples
98
Grease Components
101
10 Troubleshooting and Error Correction
102
Find and Eliminate Errors Correctly
102
Prior to Troubleshooting at the Implement
102
When Troubleshooting and Eliminating Errors
102
Error - Cause - Remedies at a Glance
103
Replacing the Shear Bolt
104
11 Shutdown and Disposal
107
Shutdown
107
Disposal
107
12 Technical Data
108
Dimensions
108
Machine Weights
109
Permissible Mass and Loads
109
Required Drawbar Load
109
Performance Data
110
Connection Data
110
Electrical Connections
110
Hydraulic Connections
111
Noise, Airborne Sound
112
Operating Materials
112
Tyres and Wheels
113
12.10 Permitted Shear Bolts
113
Index
114
Appendix
118
A Type Plate Variants
119
B Tightening Torques
120
C Bolted Connections
122
D Calculating the Axle Load and Ballasting for Mounted Implements
130
E Cross Shaft Overview
134
LEMKEN JUWEL 7M Operating Instructions Manual (125 pages)
MOUNTED REVERSIBLE PLOUGH
Brand:
LEMKEN
| Category:
Farm Equipment
| Size: 28 MB
Table of Contents
Table of Contents
3
About These Instructions
7
Introduction
7
Target Groups
8
Applied Symbols
8
Design of Warning Signs
8
Other Notices and Information
9
Warning of Property Damage
9
Signal Words and Hazard Statements
9
Symbols and Text Markings
10
Direction Specifications
10
Further Applicable Documents
11
Safety
12
Intended Use
12
Personnel Qualification Requirements
14
Hazardous Areas
14
Workplaces and Passengers
16
Technically Perfect Condition
17
Safe Handling
19
Personal Protective Equipment
19
Driving the Tractor-Machine Combination
19
Safety Devices and Labels
20
Design and Description
21
Machine Overview
21
Meaning of the Labels
22
Position of the Label
22
Machine Safety
22
Safety Devices
24
Type Plate
26
Headstock
27
Basic Frame
27
Working Width Adjustment
27
Turnover Device
28
Support Wheels
28
Overload Safety Devices
28
Optiquick Adjustment Centre
29
Plough Body
30
Additional Tools
31
Disc Coulter
32
Subsoiler
33
Attaching
34
Checking Suitability of the Tractor
34
Preparations at the Tractor
35
Preparing the Machine
36
Mounting the Machine
37
Road Travel
40
Information on Road Travel
40
Preparing for Road Travel
40
Preparing the Lighting Equipment for Road Travel
41
Subsoilers
43
Operation
44
Basic Operation
44
Turning the Plough Frame
44
Switching the Depth and Transport Wheel to Transport Position
45
Switching the Depth and Transport Wheel to Working Position
46
Moving the Plough with Depth and Transport Wheel to Transport Position
48
Moving the Plough from Transport Position to Operating Position
49
Changing the Setup State
49
All Setup Options at a Glance
49
Mounting the Sword Coulter
50
Mounting the Wide Furrow Cutter
50
All Adjustments at a Glance
51
Adjusting the Machine
51
Mounting the Attachment Arm
51
Adjusting the Depth
52
Adjusting the Inclination
55
Adjusting Front Furrow Width
56
Adjusting the Tractor/Plough Traction Line
58
Adjusting the Pitch Angle of the Plough Bodies
59
Adjusting the Working Width of the Plough Bodies
62
Adjusting the Landside of Duramaxx Plough Bodies
65
Adjusting the Working Depth of the Subsoilers
66
Adjusting the Trashboard
66
Adjusting the Skimmer
68
Adjusting the Disc Coulter
70
Adjust the Release Force of the Mechanical Overload Safety Device
74
Adjusting the Release Force of the Hydraulic Overload Safety Device
75
Working with the Machine
78
Standard Procedure
78
Driving on the Headland
79
Cleaning with High-Pressure Cleaner
80
Cleaning and Care
80
After Working in the Field
80
Detaching
81
Removing the Implement
81
Maintenance and Repair Work
83
Maintaining the Machine Properly
83
Preparations
83
During the Maintenance and Repair
83
Maintenance and Repair Work 9.2 Maintenance 9.2.1 Maintenance Schedule
84
Maintenance
84
Maintenance Schedule
84
Notes on Bolted Connections
85
Check Air Pressure
86
Check Tyres
86
Checking the Top Link Pin
86
Frame
86
Tractor Connection
86
Check Grid Plate of the Hydraulically Dampened Pendulum Wheel
87
Check Ratchets of the Hydraulically Dampened Pendulum Wheel
87
Check the Wheel Nuts
87
Checking the Bolted Connections
87
Check Hydraulic Connections
88
Checking Hydraulic Hoses
88
Hydraulics
88
Replacing Hydraulic Hoses
88
Check Soil Cultivation Implements
89
Checking Connector Plugs and Lines
89
Electrics
89
Soil Working Tools
89
Lubricating
90
Lubrication Schedule
90
Lubricating Components Via Grease Nipples
91
Grease Components
94
10 Troubleshooting and Error Correction
95
Find and Eliminate Errors Correctly
95
Prior to Troubleshooting at the Implement
95
When Troubleshooting and Eliminating Errors
95
Error - Cause - Remedies at a Glance
96
Replacing the Shear Bolt
98
Disposal
100
Shutdown
100
Shutdown and Disposal
100
Dimensions
101
Machine Weights
101
Technical Data
101
Performance Data
102
Permissible Mass and Loads
102
Required Drawbar Load
102
Connection Data
103
Electrical Connections
103
Hydraulic Connections
103
Noise, Airborne Sound
103
12.10 Permitted Shear Bolts
104
Operating Materials
104
Tyres and Wheels
104
12.11 Connecting Equipment at the Machine
105
Index
106
Appendix
110
A Type Plate Variants
111
B Tightening Torques
112
C Bolted Connections
114
D Calculating the Axle Load and Ballasting for Mounted Implements
119
E Cross Shaft Overview
123
Advertisement
LEMKEN JUWEL 7M Operating Instructions Manual (134 pages)
MOUNTED REVERSIBLE PLOUGH
Brand:
LEMKEN
| Category:
Farm Equipment
| Size: 28 MB
Table of Contents
Table of Contents
3
About These Instructions
7
Introduction
7
Target Groups
8
Applied Symbols
8
Design of Warning Signs
8
Signal Words and Hazard Statements
9
Warning of Property Damage
9
Other Notices and Information
9
Symbols and Text Markings
10
Direction Specifications
10
Further Applicable Documents
11
Safety
12
Intended Use
12
Personnel Qualification Requirements
14
Hazardous Areas
14
Workplaces and Passengers
16
Technically Perfect Condition
17
Safe Handling
19
Personal Protective Equipment
19
Driving the Tractor-Machine Combination
19
Safety Devices and Labels
20
Design and Description
21
Machine Overview
21
Machine Safety
22
Position of the Label
22
Meaning of the Labels
22
Safety Devices
24
Type Plate
26
Headstock
27
Top Link Damping
27
Basic Frame
27
Working Width Adjustment
28
Turnover Device
28
Support Wheels
29
Overload Safety Devices
29
Optiquick Adjustment Centre
30
Onland Version
31
Plough Body
32
Additional Tools
33
Disc Coulter
33
Subsoiler
34
Attaching
35
Checking Suitability of the Tractor
35
Preparations at the Tractor
36
Mounting the Machine
37
Road Travel
40
Information on Road Travel
40
Preparing for Road Travel
40
Preparing the Lighting Equipment for Road Travel
41
Subsoilers
43
Operation
44
Basic Operation
44
Turning the Plough Frame
44
Moving the Plough with Depth and Transport Wheel to Transport Position
45
Moving the Plough with Depth and Transport Wheel to Operating Position
48
Operating the On-Land Version
51
Changing the Setup State
52
All Setup Options at a Glance
52
Mounting the Sword Coulter
52
Mounting the Wide Furrow Cutter
52
Adjusting the Machine
53
All Adjustments at a Glance
53
Adjusting the Depth
54
Adjusting the Inclination
57
Adjusting Front Furrow Width
58
Adjusting the Front Furrow Width - On-Land Version
60
Adjusting the Distance of the Tractor to the Furrow Edge - On-Land Version
61
Adjusting the Tractor/Plough Traction Line
61
Adjusting the Tractor/Plough Traction Line - On-Land Version
62
Adjusting the Pitch Angle of the Plough Bodies
64
Adjusting the Working Width of the Plough Bodies
67
Adjusting the Landside of Duramaxx Plough Bodies
70
Adjusting the Working Depth of the Subsoilers
71
Adjusting the Trashboard
71
Adjusting the Skimmer
73
Adjusting the Disc Coulter
75
Adjusting the Release Force of the Hydraulic Overload Safety Device
79
Adjusting Top Link Damping
81
Working with the Machine
82
Standard Procedure
82
Driving on the Headland
83
Cleaning and Care
84
After Working in the Field
84
Cleaning with High-Pressure Cleaner
84
Detaching
85
Removing the Machine
85
Maintenance and Repair Work
87
Maintaining the Machine Properly
87
Preparations
87
During the Maintenance and Repair
87
Maintenance
88
Maintenance Schedule
88
Notes on Bolted Connections
89
Tractor Connection
90
Frame
91
Hydraulics
93
Electrics
94
Checking the Soil Cultivation Tools
95
Lubricating
95
Lubrication Schedule
95
Lubricating Components Via Grease Nipples
96
Grease Components
98
10 Troubleshooting and Error Correction
100
Find and Eliminate Errors Correctly
100
Prior to Troubleshooting at the Implement
100
When Troubleshooting and Eliminating Errors
100
Error - Cause - Remedies at a Glance
101
Replacing the Shear Bolt
102
Shutdown and Disposal
104
Shutdown
104
Disposal
104
Technical Data
105
Dimensions
105
Implement Weights
106
Permissible Mass and Loads
106
Required Drawbar Load
106
Performance Data
107
Connection Data
108
Electrical Connections
108
Hydraulic Connections
108
Noise, Airborne Sound
109
Operating Materials
109
Tyres and Wheels
110
12.10 Permitted Shear Bolts
110
12.11 Connecting Equipment at the Implement
111
Index
112
Appendix
116
A Type Plate Variants
117
B Tightening Torques
118
C Bolted Connections
120
D Calculating the Axle Load and Ballasting for Mounted Implements
128
E Cross Shaft Overview
132
LEMKEN JUWEL 7M Operating Instructions Manual (125 pages)
MOUNTED REVERSIBLE PLOUGH
Brand:
LEMKEN
| Category:
Farm Equipment
| Size: 31 MB
Table of Contents
Table of Contents
3
About These Instructions
7
Introduction
7
Target Groups
8
Applied Symbols
8
Design of Warning Signs
8
Signal Words and Hazard Statements
9
Warning of Property Damage
9
Other Notices and Information
9
Symbols and Text Markings
10
Direction Specifications
10
Further Applicable Documents
11
Safety
12
Intended Use
12
Personnel Qualification Requirements
14
Hazardous Areas
14
Workplaces and Passengers
16
Technically Perfect Condition
17
Safe Handling
19
Personal Protective Equipment
19
Driving the Tractor-Machine Combination
19
Safety Devices and Labels
20
Design and Description
21
Machine Overview
21
Machine Safety
22
Position of the Label
22
Meaning of the Labels
22
Safety Devices
24
Type Plate
26
Headstock
27
Basic Frame
27
Working Width Adjustment
27
Turnover Device
28
Support Wheels
28
Overload Safety Devices
28
Optiquick Adjustment Centre
29
Plough Body
30
Additional Tools
31
Disc Coulter
32
Subsoiler
33
Attaching
34
Checking Suitability of the Tractor
34
Preparations at the Tractor
35
Preparing the Machine
36
Mounting the Machine
37
Road Travel
40
Information on Road Travel
40
Preparing for Road Travel
40
Preparing the Lighting Equipment for Road Travel
41
Subsoilers
43
Operation
44
Basic Operation
44
Turning the Plough Frame
44
Moving the Plough with Depth and Transport Wheel to Transport Position
45
Moving the Plough with Depth and Transport Wheel to Operating Position
47
Changing the Setup State
49
All Setup Options at a Glance
49
Mounting the Sword Coulter
50
Mounting the Wide Furrow Cutter
50
Mounting the Attachment Arm
51
Adjusting the Machine
51
All Adjustments at a Glance
51
Adjusting the Depth
52
Adjusting the Inclination
55
Adjusting Front Furrow Width
56
Adjusting the Tractor/Plough Traction Line
58
Adjusting the Pitch Angle of the Plough Bodies
58
Adjusting the Working Width of the Plough Bodies
61
Adjusting the Landside of Duramaxx Plough Bodies
64
Adjusting the Working Depth of the Subsoilers
65
Adjusting the Trashboard
65
Adjusting the Skimmer
67
Adjusting the Disc Coulter
69
Adjust the Release Force of the Mechanical Overload Safety Device
73
Adjusting the Release Force of the Hydraulic Overload Safety Device
74
Working with the Machine
77
Standard Procedure
77
Driving on the Headland
78
Cleaning and Care
79
After Working in the Field
79
Cleaning with High-Pressure Cleaner
79
Detaching
80
Removing the Machine
80
Maintenance and Repair Work
82
Maintaining the Machine Properly
82
Preparations
82
During the Maintenance and Repair
82
Maintenance
83
Maintenance Schedule
83
Notes on Bolted Connections
84
Tractor Connection
85
Frame
85
Hydraulics
86
Electrics
87
Checking the Soil Cultivation Tools
87
Lubricating
88
Lubrication Schedule
88
Lubricating Components Via Grease Nipples
89
Lubricate Components at the Headstock
89
Lubricating the Components at the Optiquick Adjustment Centre
89
Lubricate Slotted Nuts on the Leg Brackets
90
Lubricating the Swivel Bearing of the Wheel
91
Lubricate Wheel Bearing
91
Grease Components
92
Grease Top Link Pin
92
Grease Piston Rods
92
Grease Surfaces
92
10 Troubleshooting and Error Correction
93
Find and Eliminate Errors Correctly
93
Prior to Troubleshooting at the Implement
93
When Troubleshooting and Eliminating Errors
93
Error - Cause - Remedies at a Glance
94
Replacing the Shear Bolt
95
Shutdown and Disposal
97
Shutdown
97
Disposal
97
Technical Data
98
Dimensions
98
Machine Weights
98
Permissible Mass and Loads
99
Required Drawbar Load
99
Performance Data
99
Connection Data
100
Electrical Connections
100
Hydraulic Connections
100
Noise, Airborne Sound
100
Operating Materials
101
Tyres and Wheels
101
12.10 Permitted Shear Bolts
101
12.11 Connecting Equipment at the Machine
102
Index
103
Appendix
107
A Type Plate Variants
108
Tightening Torques
109
C Bolted Connections
111
D Calculating the Axle Load and Ballasting for Mounted Implements
119
E Cross Shaft Overview
123
Advertisement
Related Products
LEMKEN Juwel 7
LEMKEN Juwel 7 V
LEMKEN Juwel 8
LEMKEN Juwel 8 V
LEMKEN JUWEL 8 I
LEMKEN Juwel 8M V
LEMKEN JUWEL 7 M X
LEMKEN 175 1467
LEMKEN 175 3652
LEMKEN 175 3753
LEMKEN Categories
Farm Equipment
Tiller
Drill
Controller
Paint Sprayer
More LEMKEN Manuals
Login
Sign In
OR
Sign in with Facebook
Sign in with Google
Upload manual
Upload from disk
Upload from URL