Sign In
Upload
Manuals
Brands
LEMKEN Manuals
Farm Equipment
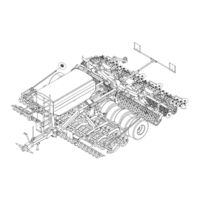
Compact-Solitair 9 K K
LEMKEN Compact-Solitair 9 K K Manuals
Manuals and User Guides for LEMKEN Compact-Solitair 9 K K. We have
2
LEMKEN Compact-Solitair 9 K K manuals available for free PDF download: Operating Instructions Manual
LEMKEN Compact-Solitair 9 K K Operating Instructions Manual (237 pages)
Brand:
LEMKEN
| Category:
Farm Equipment
| Size: 6 MB
Table of Contents
Table of Contents
5
1 General Information
15
Liability
15
Guarantee
15
Copyright
16
Optional Accessories
16
Notes
16
Type Plate
17
2 Symbols Used in the Operating Instructions
19
Hazard Classes
19
Information
20
Environmental Protection
20
Indication of Passages
20
3 Safety Measures and Precautions
21
Target Group
21
Intended Use
21
Safety and Warning Signs
22
General Information
22
Overview of the Position of Warning Symbols
22
Meaning of Warning Signs
23
Meaning of Other Symbols
26
Special Safety Instructions
29
Danger Areas During Implement Operation
31
Danger Areas When Folding and Unfolding
32
Residual Risks
33
Hazard Caused by Mechanical Systems
33
Hazard Caused by Hydraulic Systems
33
Hazard During Operation
33
Applicable Rules and Regulations
33
Operation on Public Highways
34
Lighting System and Identification
34
Requirements of the Tractor
34
Permissible Lateral Inclination During Transportation
35
Check before Departure
35
Correct Behaviour in Road Traffic
36
Obligation of the Operator
36
Safe Use of the Implement
37
General
37
Personnel Selection and Qualifications
38
Hydraulic System
39
When the Implement Is Parked
39
Stopping the Implement in an Emergency
39
4 Handing over the Implement
40
5 Layout and Description
41
Safety Features of the Device
42
Lighting Equipment
43
Safety Guard
44
Braking System
44
Stabiliser Equipment
44
Transport Locking Device
45
Shut-Off Valves
46
Description
47
Cross Shaft
47
Levelling Tines
47
Wheelmark Levelling
47
Track Markers
48
Heliodor Working Section
48
Side Limitation
49
Depth Control Wheels
49
Tyre Packer Roller
49
Harrow, Tyre Packer Roller
50
3-Point Interface
50
Leading Implements
50
Optidisc Coulter Bar / Double Disc Coulter
51
Sowing Harrow
51
Advance Marking
51
Pulse Wheel
51
Hopper
51
Metering
51
Weigher
52
Fan
52
Steps, Platform
52
Filler Hopper
52
Electronic Control System
52
Air Brake
53
Overview
53
Description of Functions
54
Hydraulic Braking System
57
Overview
57
Functional Description
58
6 Preparation of the Tractor
59
Tyres
59
Lift Rods
59
Check Chains or Sway Blocks of the Three Point Linkage
59
Brake System
59
Air Brake System
59
Hydraulic Brake System
59
Lower Control Link Coupling
60
Hydraulic System
61
Transport
61
Work Assignment
61
Coupling and Uncoupling
61
Power Supply, Electronic Control System
62
Connection to the Tractor Battery
63
Tractors with ISOBUS Implement Control
65
Sockets Required
66
Hydraulic Spool Valves Required
67
System Setup, Hydraulic Fan Drive
69
Hydraulic System Configuration
70
Signal Socket
71
7 Preparing the Implement
72
Fertiliser Version
72
Precision Seed Drill Connection
72
Changing the Metering Wheels
72
Installing Metering Wheels for Fertiliser on the Implement
75
Removing the Coulter Bar
81
Installing the Coulter Bar
85
8 Attaching the Implement
90
Attaching
91
9 Driving on Public Roads
94
General
94
Braking System
94
Transport Speed
94
Transport Dimensions
95
Preparing and Checking the Implement
95
Check the Transport Position
96
Check the Hydraulic Transport Locking Device
98
Close the Shut-Off Valves
99
Check the Shut-Off Valves
100
Switch off the Operating Terminal
100
Lights and Signs
101
Installing the Safety Guard
101
10 Operation
104
Unfolding and Folding
104
Unfolding the Implement
104
Folding the Implement
106
Sequence Control
109
Operating Modes
110
Stopping Sequence Control
111
Setting the Lift Sensor for the Soil Working Implement
112
Filling the Hopper
113
Opening the Hopper
113
Unfolding the Filling Screw
114
Operating the Filler Hopper
116
Emptying the Filling Screw
118
Folding the Filling Screw
119
Closing the Hopper
121
Working with the Implement
122
Stopping the Implement in an Emergency
122
Working Lights with Hopper Light
122
Turning at the Headland
123
11 Settings
124
Wheelmark Levelling
126
Adjusting the Wheelmark Eradicator Discs
126
Adjusting the Track Levelling Plates
127
Limiting the Lift with Hydro-Clips
129
Track Markers
130
General
130
Secure the Track Marker
131
Unlock the Track Marker
131
Adjust Track Marker
132
Sowing Shaft for Seeds
133
Sowing Shaft for Fertiliser
133
Switching the Sowing Rollers on or off
134
Activating the Sowing Rollers
135
Deactivating the Sowing Rollers
136
Stop Slides
137
Section Width Control
137
Shut-Off Slider - Manual
137
Shut-Off Slider - Hydraulic
138
Bottom Gates
138
Setting the Bottom Gates for Seed
139
Setting the Bottom Gates for Fertiliser
139
Unscrewing Test
140
Agitator Shaft
141
Using the Agitator Fingers
142
Electronic Level Indicator
143
Setting the Levelling Tine Section
143
Converting Coulter
144
Rotate Coulters
144
Working Depth Adjustment, Heliodor Working Section
145
Limiting the Lift with Hydro-Clips
145
Adjusting the Lateral Limiter
147
Adjusting the Depth Control Wheels
148
Lateral Draw
148
Setting the Working Depth, Harrow and Tyre Packer Roller
149
Leading Roller
149
Checking and Setting the Scraper
150
Harrow
151
Transport Position
151
Adjust the Contact Angle
152
Adjust the Frame Height of the Harrow
152
Levelling Bar
153
Coulter Bar
153
Checking and Setting the Height
153
Double Disc Coulter
155
Strippers for Double Disc Coulters
155
Strippers for Pressure Rollers
155
Deposition Depth of the Seeding Coulters
156
Adjusting the Coulter Pressure
157
Lane Mode
159
Pulse Wheel
160
Transport Position
161
Operating Position
162
Checking and Setting the Working Depth
163
Fan
164
Setting the Fan Speed
164
Tractor Spool Valve Without Flow Control Valve
165
Tractor Spool Valve with Flow Control Valve
165
Fertiliser Version
166
Direct Supply
166
Tractor Spool Valve Without Flow Control Valve
166
Tractor Spool Valve with Flow Control Valve
167
Double Flow Control Valve
168
Tractor Spool Valve Without Flow Control Valve
168
Tractor Spool Valve with Flow Control Valve
170
Sowing Harrow
172
Transport Position
173
Setting the Angle
174
Setting the Harrow Pressure
175
Setting the Working Depth
176
Hydraulic System for Raising the Sowing Harrow
177
Pre-Emergence Markers, Hydraulic
177
Setting the Track Width
178
Setting the Marker Depth
179
Adjusting the Transport Locking Device, Soil Working Implement
180
12 Cleaning and Care
181
Cleaning the Implement
181
Cleaning with Pressure Washer
181
Emptying the Hopper
182
Emptying Using the Distributor
182
Emptying Using the Calibration Tray
184
13 Uncoupling the Implement
185
Detaching
185
14 Maintenance and Servicing
189
Specific Safety Information
189
General
189
Personnel Qualifications
189
Protective Equipment
189
Immobilise the Implement for Maintenance and Repairs
190
Working on the Hydraulics
190
Working on the Electrics
190
Working under the Raised Device
191
Utilised Tool
191
Environmental Protection
192
Maintenance Schedule
193
Lubrication
197
Lubricating the Drawbar
198
Lubricating the Working Section
199
Lubricating the Track Markers
201
Lubricating the Tyre Packer Roller
202
Axle
203
Steps, Platform
204
Lubricating the Filling Screw
205
Lubricating the Three-Point Linkage
206
Checking the Lower Link Connection
206
Lubricating the Coulter Bar
207
Tyres
209
Wheel Nuts
210
Threaded Connections
210
Checking the Braking System
210
Air Brake System
211
Draining the Compressed Air Tank
211
Cleaning the Filter
211
Checking the Scrapers on the Trapeze Packer Roller
212
Checking the Distributors
213
Cleaning the Seed Metering Unit
213
Cleaning the Sowing Units for Fertiliser
215
Check the Sowing Rollers
216
Checking the Bottom Gates
218
Air Pipe
218
Fan
219
Checking the Cyclone
219
Cleaning the Cyclone
220
Checking Connections to the Tractor
221
Couplings
221
Connectors and Cables
221
Hydraulic Lines
222
15 Troubleshooting
223
16 Decommissioning and Disposal
224
Disposal
224
17 Technical Data
225
Dimensions
225
Weights
226
Connection Information
226
Compressed Air Supply
226
Performance Data
227
Fill Levels
227
Emission Data
227
Braking System
228
Tyres
229
Permissible Lateral Tilt
229
Equipment
229
Tightening Torques
230
General Information
230
Bolts and Nuts Made of Steel
231
Bolts and Nuts Made of V2A
232
Wheel Bolts and Wheel Nuts
232
18 Annex
233
Seed Table
233
Index
234
Advertisement
LEMKEN Compact-Solitair 9 K K Operating Instructions Manual (179 pages)
Seed drill
Brand:
LEMKEN
| Category:
Farm Equipment
| Size: 5 MB
Table of Contents
Contents
5
Table of Contents
5
1 General Information
14
Liability
14
Guarantee
14
Copyright
15
Optional Accessories
15
2 Symbols Used in the Operating Instructions
16
Hazard Classes
16
Information
16
Environmental Protection
16
Indication of Passages
17
3 Safety Measures and Precautions
18
Target Group
18
Intended Use
18
Safety Equipment on the Device
19
Safety and Warning Signs
21
General Information
21
Meaning of Warning Signs
21
Other Symbols
25
Position of Safety and Warning Stickers
27
Special Safety Instructions
27
Danger Areas
29
Danger Areas When Operating the Implement
29
Danger Area When Folding in and out
30
Residual Risks
30
Hazard Caused by Mechanical Systems
31
Hazard Caused by Hydraulic Systems
31
Hazard During Operation
31
Applicable Rules and Regulations
31
Operation on Public Highways
31
Lighting System and Identification
31
Permissible Transport Speed
32
Permissible Lateral Inclination During Transportation
33
Check before Departure
34
Correct Behaviour in Road Traffic
34
Obligation of the Operator
35
Operating the Device Safely
36
General Information
36
Personnel Selection and Qualifications
37
Hydraulic System
38
Power Take-Off Operation
38
4 Handing over the Device
40
5 Design and Function
41
Overview
41
Function
42
Drawbar
42
Track Levelling Discs / Wheel Track Eliminator
42
Circular Spike Harrow
42
Tyre Packer Roller
42
Leading Roller / Harrow
42
Seed Hopper
43
Feeding
43
Blower
43
Optidisc Coulter Bar / Double Disc Coulter
43
Sowing Harrow
43
Ascent/Platform
43
Pulse Wheel
43
Front/Rear Lighting System
44
Advance Marking
44
Electronic Control System
44
Feeding
45
Compressed Air Brake System
46
Overview
46
Function Description
48
Hydraulic Brake System
51
Function Description
52
6 Preparation of the Tractor
53
Tyres
53
Lift Rods
53
Check Chains or Sway Blocks of the Three Point Linkage
53
Air Brake System
53
Hydraulic Brake System
53
Brake System
53
Cardan Shaft
54
Inspect and Mount Cardan Shaft
54
Cardan Shaft Shortening
55
Lower Control Link Coupling
57
Hydraulic System
58
Transport
58
Work Assignment
58
Coupling and Uncoupling
58
Power Supply
59
Required Power Sockets
60
Required Hydraulic Control Units
61
Actuation and Adjustment of Blower Hydraulics
62
Hydraulic Equipment for the Blower Hydraulics
62
Implement Hydraulics
63
7 Preparations on Implement
64
Final Assembly
64
8 Coupling and Uncoupling
65
Coupling
66
Dismounting
69
9 Retraction/Extension
72
Retraction
73
Extension
76
10 Use
78
General Instructions
78
Optidisc Double Disc Coulters
79
Impulse Wheel
79
Track Markers
79
Sensors
79
Tramline Width
79
Blower Speed
79
Electronic Control System
80
Seeding Shafts
80
Switching Seed Wheels on or off
81
Switching on the Seed Wheels
82
Switching off the Seed Wheels
83
Stop Slides
84
Bottom Flaps
84
Calibration Test Sample
85
Hopper
86
Agitator Shafts
87
11 Sequence Control
88
Raising
90
Lowering
90
Deactivating the Raising and Lowering Process
91
12 Adjustments
92
Cardan Shaft Monitoring
92
Manual Gearbox
93
General
93
Rotor Speeds
94
Rotor Speed Adjustment
96
Change in the Direction of Rotation of the Rotors
97
Knife Tines with Quick-Coupling System
99
Power Take-Off
101
Side Blade
101
Side Blade Extension
102
Protective Guards
102
Wheel Track Eliminator
103
Relocation at the Side
103
Adjusting the Working Depth
104
Track Levelling Discs
105
Feed Discs
106
Relocation at the Side
106
Adjusting the Working Depth
106
Levelling Beam
107
Double Disc Coulter
108
Scrapers - Solid Plastic
108
Scraper - Carbide
108
Application Depth for Seeding Coulters
109
Coulter Pressure of the Seeding Coulter with Leading Roller
109
Harrow
110
Placing the Harrow in the Transport Position
110
Setting the Harrow
110
Tractor Bar
110
Track Markers
111
General Information
111
Securing the Track Marker
112
Configuring the Track Marker
113
Working Depth of Circular Spike Harrow
114
Tramline Shifting
114
Impulse Wheel
115
Blower
116
Section Width Control
117
Shut-Off Slider - Manual
117
Shut-Off Slider - Hydraulic
117
Spreaders
118
Electronic Level Monitoring
118
Sowing Harrow
119
Harrow Setting
119
Harrow Pressure
120
Hydraulic System for Raising the Sowing Harrow
120
Advance Marking
121
General Information
121
Adjustment to the Bout
121
Depth of the Marking Furrow
121
Leading Roller
122
13 Seedtable
123
14 Emptying the Seed Container
124
Emptying into the Calibration Tray
124
Emptying with the Spreaders
125
15 Tyres
126
16 Working Lights
127
17 Operation
128
Turning at the Headland
128
18 Tips for Driving on Public Roads
129
General Information
129
Brake System
129
Transport Speed
129
Transport Dimensions
130
Preparation for Driving on Public Roads
131
Harrow
132
Track Markers
132
Impulse Wheel
132
Control Terminal
133
Hydraulic Transport Lock
133
Shut-Off Valves
134
Protective Equipment
135
Lighting System
136
19 Technical Data
137
20 Switching off the Device
138
Shutting down the Device in an Emergency
138
Disposal
138
21 Maintenance and Repairs
139
Special Safety Instructions
139
General
139
Personnel Qualifications
139
Protective Equipment
139
Immobilise the Implement for Maintenance and Repairs
140
Working on the Hydraulics
140
Working on the Electrics
140
Working under the Raised Device
141
Utilised Tool
141
Environmental Protection
142
Lubrication
143
Lubricants - Gearbox
144
Manual Gearbox and Right Angle Drive
144
Gear Trough
144
Manual Gearbox
145
Checking the Oil Level
145
Changing the Oil
146
Topping up the Oil
147
Right Angle Drive
148
Checking the Oil Level
148
Changing the Oil
149
Topping up the Oil
150
Gear Trough
151
Checking the Free-Flowing Grease
151
Changing the Free-Flowing Grease
152
Topping up the Free-Flowing Grease
152
Maintenance Intervals
153
After the Initial Start-Up (at the Latest after 2 Hours)
153
Daily Check
153
Weekly Check
154
Lubrication Chart
154
Towbar
157
Circular Spike Harrow
157
Track Markers
159
Tyre Packer
159
Coulter Bar
161
Axle
164
Wheel Nuts
164
Hubcaps
165
Hub Bearings
165
Brake System
166
Draining the Compressed Air Tank
166
Adjusting the Brake
166
Cleaning the Filter
167
Rotor Bearings
167
Tines
168
Cardan Shaft
168
Cleaning the Feeder Units
169
Bolts
170
Checking Connections to the Tractor
171
Couplings
171
Connectors and Cables
171
Dust Filter
172
Testing the Dust Filter
172
Clean Dust Filter
172
Hydraulic Lines
173
22 Troubleshooting
174
General Information
174
Electrical Equipment
174
23 Identification Plate
175
24 Noise, Airborne Sound
176
25 Notes
176
Index
177
Advertisement
Related Products
LEMKEN Compact-Solitair 9 K HD
LEMKEN Compact-Solitair 9 K H
LEMKEN Combi-Liner
LEMKEN 175 1467
LEMKEN 175 3652
LEMKEN 175 3753
LEMKEN 175 3947
LEMKEN 175 4360
LEMKEN 175 4518
LEMKEN 17510318
LEMKEN Categories
Farm Equipment
Tiller
Drill
Paint Sprayer
Controller
More LEMKEN Manuals
Login
Sign In
OR
Sign in with Facebook
Sign in with Google
Upload manual
Upload from disk
Upload from URL