Sign In
Upload
Manuals
Brands
L-3 Communications Manuals
Telephone
CEU
L-3 Communications CEU Telephone Set Manuals
Manuals and User Guides for L-3 Communications CEU Telephone Set. We have
1
L-3 Communications CEU Telephone Set manual available for free PDF download: User Manual
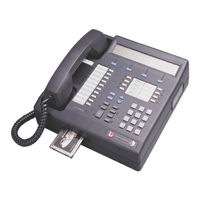
L-3 Communications CEU User Manual (312 pages)
SECURE TERMINAL EQUIPMENT
Brand:
L-3 Communications
| Category:
Telephone
| Size: 6.72 MB
Table of Contents
Revision Log
9
Table of Contents
13
List of Illustrations
18
Chapter 1 INTRODUCTION
27
Office Ste and Tactical Ste Desk Sets
27
Figure 1-1. STE Configurations
27
Data Ste and Ste-R Terminals
28
Figure 1-2. Typical Office/Tactical STE Desk Set
28
L-3 Ste Service Center
29
Figure 1-3. Typical Data STE, STE-R and STE-RT
29
Figure 1-4. Typical CEU and STE-RI
29
Technical Specifications
30
Table 1-1. Technical Specifications
30
Safety Instructions
31
Chapter 2 INSTALLATION
33
Unpacking
33
Inspection and Inventory
33
Table 2-1. Office STE Packing Container Contents
33
Table 2-2. Tactical STE Packing Container Contents
33
Table 2-3. Data STE Packing Container Contents
34
Table 2-4. STE-R Packing Container Contents
34
Table 2-5. STE-RT Packing Container Contents
34
Table 2-6. STE-RI Packing Container Contents
34
Table 2-7. CEU Packing Container Contents
34
Ste Arrangement
35
2-2.1 Ports and Controls Located in the STE Rear Panel
35
Figure 2-1. STE Rear Views
35
2-2.2 Ports Located in the Wedges
36
General Pre-Installation Requirements
36
Power Port Pre-Installation Requirements
37
Console Port Pre-Installation Requirement
37
Table 2-8. Power Port Pin-Out
37
Table 2-9. Power Requirements
37
2-3.3 Red Audio Port Pre-Installation Requirements
38
Table 2-10. Console Port Connector Pin-Out
38
Table 2-11. Console Cable Pin-Out
38
Table 2-12. Red Audio Port Pin-Out
38
Table 2-13. Audio Specifications
38
General Installation Procedures
39
2-4.1 Wall Mounting Instructions for Office and Tactical Stes
39
Figure 2-2. Wall Mounting Plate and Wedge Positioning
40
2-4.2 Install Handset
41
2-4.3 Connect the Console Terminal
41
2-4.4 Connect Power
41
Figure 2-3. Handset Cradle
41
2-4.5 Install, Program, and Connect Service(S)
42
Figure 2-4 Terminal Resetting
42
Figure 2-5 Terminal Reset - Continue
42
Install Isdn
43
2-5.1 ISDN Pre-Installation Requirements
43
Table 2-14. ISDN Service Installation Information
43
2-5.2 Set ACTIVE NETWORK PORT to ISDN
45
Table 2-15. ISDN Connector Pin-Outs
45
Table 2-16. Active Network Port - ISDN
45
Figure 2-6. TERMINAL MANAGEMENT Menu
46
Figure 2-7. NETWORK SETTINGS Menu
46
Figure 2-8. ACTIVE NETWORK PORT: ISDN Menu
46
Set the ISDN SWITCH TYPE
47
Set SERVICE PROFILE ID (SPID) #1
47
Figure 2-9. SWITCH TYPE Menu
47
Figure 2-10. SERVICE PROFILE ID #1 (SPID) Menu
47
Figure 2-11. ENTER SERVICE PROFILE ID (SPID) #1 Menu
47
Set DIRECTORY NUMBER #1
48
Set SERVICE PROFILE ID (SPID) #2
48
Set DIRECTORY NUMBER #2
48
Figure 2-12. DIRECTORY NUMBER #1 Menu
48
Figure 2-13. ENTER DIRECTORY NUMBER #1 Menu
48
2-5.8 Set FEATURE CODES
49
Figure 2-14. FEATURE CODES Menu
49
Figure 2-15. CONFERENCE FEATURE CODE Menu
49
Figure 2-16. ENTER CONFERENCE FEATURE CODE Menu
49
Figure 2-17. TRANSFER FEATURE CODE Menu
50
Figure 2-18. ENTER TRANSFER FEATURE CODE
50
Figure 2-19. DROP FEATURE CODE Menu
50
Advanced Terminal Settings for Installation Personnel (Isdn)
51
Figure 2-20. ENTER DROP FEATURE CODE: Menu
51
Figure 2-21. ADVANCED TERMINAL SETTINGS for INSTALLATION PERSONNEL Menu
51
Figure 2-22. STU-III ACK/NACK: ENABLED Menu
52
Figure 2-23. STU/SCIP EXTENDED TIMEOUT: Menu
52
Figure 2-24. STU/SCIP EXTENDED TIMEOUT: Menu
52
Figure 2-25. STE EXTENDED TIMEOUT: Menu
53
Figure 2-26. ENTER STE EXTENDED TIMEOUT Menu
53
Figure 2-27. Fade Timeout Menu
54
Figure 2-28. ENTER FADE TIMEOUT Menu
54
Figure 2-29. INITIATE DIRECT DIAL Menu
54
Figure 2-30. INITIATE STE on VOICE BEARER Menu
55
Figure 2-31. Receive STE-210 Secure Dial Display
55
2-5.10 Connect ISDN Port
56
Install Pstn
56
2-6.1 PSTN Pre-Installation Requirements
56
Figure 2-32. ISDN ECHO Cancellation Display
56
2-6.2 Set ACTIVE NETWORK PORT to PSTN
57
Figure 2-33. TERMINAL MANAGEMENT Menu
57
Table 2-17. PSTN Connector Pin-Outs
57
Table 2-18. Active Network Port - PSTN
57
Figure 2-34. NETWORK SETTINGS Menu
58
Figure 2-35. ACTIVE NETWORK PORT: PSTN Menu
58
Figure 2-36. International PSTN Wedge Arrangement
59
Table 2-19. International PSTN Wedge Characteristic Settings
59
2-6.3 Configure the International STE for PSTN Operation
60
Figure 2-37. ADVANCED PSTN SETTINGS for INSTALLATION PERSONNEL Menu
60
Figure 2-38. PSTN COUNTRY SELECTION Menu
61
Table 2-20. International PSTN Wedge Default Settings
61
Figure 2-39. MODEM OUTPUT LEVEL Menu
62
Figure 2-40. ENTER MODEM OUTPUT LEVEL Menu
62
Figure 2-41. MODEM REFERENCE LEVEL Menu
62
Figure 2-42. PRE-EMPHASIS CURVE Menu
63
Figure 2-43. DTMF LEVELS Menu
63
Figure 2-44. HOOKFLASH DURATION Menu
63
2-6.4 Set PSTN DIALING MODE
64
2-6.5 Set PREEMPT TONE DETECTION
64
Advanced Terminal Settings for Installation Personnel (Pstn)
64
Figure 2-45. DIALING MODE Menu
64
Figure 2-46. PREEMPT TONE DETECTION Menu
64
Figure 2-47. ADVANCED TERMINAL SETTINGS for INSTALLATION PERSONNEL Menu
64
Figure 2-48. STU-III ACK/NACK Menu
65
Figure 2-49. STU/SCIP EXTENDED TIMEOUT Menu
65
Figure 2-50. STU/SCIP EXTENDED TIMEOUT Menu
65
Figure 2-51. FADE TIMEOUT Menu
66
Figure 2-52. ENTER FADE TIMEOUT Menu
66
2-6.7 Connect PSTN Port
67
Install Tri-Tac
67
2-7.1 TRI-TAC Pre-Installation Requirements
67
Table 2-21. TRI-TAC Connector Pin-Outs
67
2-7.2 Set the ACTIVE NETWORK PORT to TRI-TAC
68
Figure 2-53. Tactical Wedge Adapter Assembly
68
Table 2-22. Active Network Port - TRI-TAC
68
Advanced Terminal Settings for Installation Personnel (Tri-Tac)
69
Figure 2-54. TERMINAL MANAGEMENT Menu
69
Figure 2-55. NETWORK SETTINGS Menu
69
Figure 2-56. ACTIVE NETWORK PORT: TRI-TAC
69
Figure 2-57. ADVANCED TERMINAL SETTINGS for INSTALLATION PERSONNEL Menu
69
Figure 2-58. STU-III ACK/NACK Menu
70
Figure 2-59. STU/SCIP EXTENDED TIMEOUT Menu
70
Figure 2-60. Enter STU/SCIP EXTENDED TIMEOUT Menu
70
Figure 2-61. FADE TIMEOUT Menu
71
Figure 2-62. ENTER FADE TIMEOUT Menu
71
2-7.4 Connect TRI-TAC Port
72
Install Bdi
72
2-8.1 BDI (EIA-530A/EIA-232) Pre-Installation Requirements
72
Figure 2-63. INITIATE STU MODEM SIGNALING Menu
72
2-8.2 Set the ACTIVE NETWORK PORT to EIA-232 or EIA-530A
73
Table 2-23. BDI (EIA-530A/EIA-232) Connector Pin-Outs
73
Table 2-24. Active Network Port - BDI
73
Set NETWORK RATE
74
Figure 2-64. TERMINAL MANAGEMENT Menu
74
Figure 2-65. NETWORK SETTINGS Menu
74
Figure 2-66. ACTIVE NETWORK PORT: BDI-232
74
Figure 2-67. NETWORK RATE Menu
74
Set DCE READY
75
Advanced Terminal Settings for Installation Personnel (Bdi)
75
Figure 2-68. DCE READY Menu
75
Figure 2-69. ADVANCED TERMINAL SETTINGS for INSTALLATION PERSONNEL Menu
75
Figure 2-70. STU-III ACK/NACK Menu
76
Figure 2-71. STU-III EXTENDED TIMEOUT Menu
76
Figure 2-72. STU-III EXTENDED TIMEOUT Menu
76
2-8.6 Connect BDI Port
77
Figure 2-73. FADE TIMEOUT Menu
77
Figure 2-74. ENTER FADE TIMEOUT Menu
77
Red Serial Data Port 1
78
Red Serial Data Port 2
78
2-11. Initial Operational Call
78
Table 2-25. Red Serial Data Port Pin-Outs
78
Figure 2-75. Initial Call - SECURE COMMUNICATIONS DISABLED Menu
79
Figure 2-76. Initial Call - NON-SECURE MODE Dial Menu
79
Figure 2-77. Initial Call - ALERTING Menu
79
Figure 2-78. Initial Call - NON-SECURE MODE Menu
79
Chapter 3 CONTROLS, INDICATORS and INTERFACES
81
Office and Tactical Ste Desk Set Overview
81
3-1.1 Crypto Card Slot
81
3-1.2 Crypto Card Ejector Button
81
3-1.3 Front Panel
81
Figure 3-1. Office and Tactical Desk Set Overview
81
Figure 3-2. Office and Tactical STE Desk Set Front Panel
83
Figure 3-3. Alphanumeric Display Arrangement
83
Figure 3-4. Scrollable Display
84
Figure 3-5. Soft Key Selection Display
84
Figure 3-6. Acknowledgement Display
85
Figure 3-7. Data Entry Display
85
3-1.4 Terminal Reset
87
3-1.5 Audible Alerts
87
Ceu, Data Ste, Ste-R, Ste-Ri, Ste-Rt Overview
87
3-2.1 Front Panel
87
Figure 3-8. CEU, Data STE, STE-R, STE-RI and STE-RT Front Panel
88
3-2.2 Ste Tool/Ste Virtual Front Panel
89
Figure 3-9. Virtual Front Panel
90
Chapter 4 TPA FUNCTIONS
93
Class of Users
93
4-1.1 Tpa
93
4-1.2 User
93
Fortezza Plus Krypton™ Enhanced Cryptocard
93
4-2.1 Crypto Card States and Functions
94
4-2.2 TPA Card
95
Figure 4-3. TPA Establishment
97
Figure 4-4. STE TPA Setup Display
97
4-2.3 User Card
98
Figure 4-5. TERMINAL MANAGEMENT Menu
98
Figure 4-6. NETWORK SETTINGS Menu
98
Figure 4-7. TERMINAL PRIVILEGES, ASSOCIATION and SOFTWARE UPDATE MANAGEMENT
99
Figure 4-8. VALIDATING TPA CRYPTO CARD Menu
99
Figure 4-9. TERMINAL CONFIGURATION CONTROL Menu
99
Figure 4-10. REMOVE ASSOCIATION by NUMBER/CREATE a NEW ASSOCIATION Menu
100
Figure 4-11. CREATE ASSOCIATION Menu
100
Figure 4-12. CREATE ASSOCIATION COMPLETE Menu
100
4-2.4 Carry Card
101
Figure 4-13. Create User Card
101
Figure 4-14. REMOVE CRYPTO CARD ASSOCIATION/PREPARE REMOTE ASSOCIATION Menu
102
Figure 4-15. PREPARE REMOTE ASSOCIATION Menu
102
Figure 4-16. Prepare Remote Association - User Card
103
Figure 4-17. PREPARE REMOTE ASSOCIATION Menu
103
Figure 4-18. PREPARE REMOTE Association/Complete Menu
104
Figure 4-19. Associated Carry Card
105
Transfer Tpa Privileges
106
Figure 4-20. User Card - Dual Association
106
4-3.1 Install TPA Password
107
4-3.2 Transfer Privileges
107
Figure 4-21. CHANGE TPA PASSWORD Menu
107
Figure 4-22. ENTER NEW TPA PASSWORD Menu
107
MENU Hierarchy
108
Figure 4-23. TRANSFER TPA PRIVILEGES Menu
108
Figure 4-24. ENTER TPA PASSWORD Menu
108
Figure 4-25. TPA ESTABLISHMENT SUCCESSFUL Menu
108
Figure 4-26. TERMINAL MANAGEMENT Menu
109
Figure 4-27. CRYPTO CARD MANAGEMENT Menu
109
Figure 4-28. ZEROIZE TERMINAL Menu
109
TERMINAL PRIVILEGES, ASSOCIATION, and SOFTWARE UPDATE MANAGEMENT - TPA Settings
110
Table 4-1. Terminal Privilege Defaults
110
4-5.1 Terminal Configuration Control
111
Figure 4-29. TERMINAL PRIVILEGES, ASSOCIATION and SOFTWARE UPDATE MANAGEMENT Menu
111
Figure 4-30. TERMINAL CONFIGURATION CONTROL Menu
111
Figure 4-31. INITIAL SECURE MODE Menu
112
Figure 4-32. REMOTE CONTROL Menu
112
Figure 4-33. REMOTE AUTHENTICATION (DISABLED) Menu
113
Figure 4-34. REMOTE AUTHENTICATION (ENABLED) Menu
114
Figure 4-35. REMOTE NON-SECURE VOICE (DISABLED) Menu
114
Figure 4-36. REMOTE NON-SECURE VOICE Menu
114
4-5.2 Secure Access Control System (SACS)
115
Figure 4-37. CARD PRIVILEGES Menu
115
Figure 4-38. SECURE ACCESS CONTROL SYSTEM Menu
115
Figure 4-39. Secure Data Applications Menu
116
Figure 4-40. Secure Data ACL Menu
116
Figure 4-41. Secure Data Security Level Menu
117
Figure 4-42. Secure Data Minimum Security Level Menu
117
Figure 4-43. Secure Data Maximum Security Level Menu
118
Figure 4-44. Secure Voice Application Menu
118
Figure 4-45. Secure Voice ACL Menu
118
Figure 4-46. Secure Voice Security Level Menu
119
Figure 4-47. Secure Voice Minimum Security Level Menu
119
Figure 4-48. Secure Voice Maximum Security Level Menu
120
Figure 4-49. Access Control List Menu
120
Figure 4-50. Edit Access Control List
121
Figure 4-51. Add ACL Elements Menu
121
Figure 4-52. Enter DAO Code Menu
121
Figure 4-53. Enter DAO Code Confirmation Menu
123
Figure 4-54. Enter KMID Menu
123
Figure 4-55. Remove ACL Elements Menu
123
Figure 4-56. Remove DAO Code Confirmation Menu
124
Figure 4-57. DAO Code Removed Menu
124
Figure 4-58. Enter KMID Menu
125
Figure 4-59. Remove KMID Confirm Menu
125
Figure 4-60. KMID Removed Menu
125
4-5.3 Speakerphone Control
126
Figure 4-61. Remove All ACL Elements Menu
126
Figure 4-62. All ACL Elements Removed Menu
126
Figure 4-63. Speakerphone Control Menu
126
4-5.4 Remove Association by Number/Create a New Association
127
Figure 4-64. Non-Secure Speakerphone Menu
127
Figure 4-65. Secure Speakerphone Menu
127
Figure 4-66. Remove Association by Number/Create a New Association Menu
128
Figure 4-67. View Association/Remove Association Menu
128
Figure 4-68. Enter Crypto Card Serial Number Menu
129
Figure 4-69. Remove Crypto Card Association Confirmation Menu
129
Figure 4-70. Association Removed Menu
129
4-5.5 Update Software
130
Figure 4-71. Software Version Menu
130
Table 4-2. Software Versions History
131
Chapter 5 USER FUNCTIONS
133
User Settings
133
Figure 5-1. Terminal Management Menu
133
Table 5-1. Miscellaneous Variables/Features
133
5-1.1 Terminal Audit Information
134
Figure 5-2. Network Settings Menu
134
Figure 5-3. Terminal Privileges, Association and Software Update Management Menu
134
Figure 5-4. Terminal Audit Information Menu
134
Figure 5-5. Software Update Tpa/Configuration TPA Menu
135
Figure 5-6. Current Tpa:/Software Serial # Menu
135
5-1.2 Remove Crypto Card Association/Prepare Remote Association
136
Figure 5-7. Release Identifier
136
Figure 5-8. Software Version Menu
136
Figure 5-9. NP Memory Display
136
Figure 5-10. Remove Crypto Card Association/Prepare Remote Association Menu
137
Figure 5-11. Insert Crypto Card Menu
137
Figure 5-12. Remove Terminal/Card Association Menu
137
5-1.3 Transfer TPA Privileges
138
5-1.4 Audible Alerts
138
5-1.5 Terminal Control
138
Figure 5-13. Audible Alerts Menu
138
5-1.6 Auto-Answer
139
Figure 5-14. Terminal Control Menus
139
5-1.7 Data Port
140
Figure 5-16. Rings before Auto Answer Menu
140
Figure 5-17. Enter Auto Answer Rings Menu
140
Figure 5-18. Data Port Menu
140
5-1.8 Remote Control Data Port Rate
141
5-1.9 Handset Sidetone
141
Figure 5-19. Remote Control Data Port Rate Menu
141
5-1.10 Ring Selection
142
5-1.11 Terminal Tests
142
Figure 5-20. Handset Sidetone Menu
142
Figure 5-21. Ring Selection Menu
142
Figure 5-22. Initiate Terminal Test/Initiate Front Panel Test Menu
143
Figure 5-23. Failure Codes Menu
143
View Tpa Settings
144
Figure 5-24. Press any Key Menu
144
Figure 5-25. Terminal Configuration Control Menu
144
Figure 5-26. Initial Secure Mode Menu
145
Figure 5-27. Remote Control Menu
145
Figure 5-28. Card Privileges Menu
145
Figure 5-29. Secure Access Control System Menu
146
Figure 5-30. Secure Data Application Menu
146
Figure 5-31. Secure Data ACL Menu
147
Figure 5-32. Secure Data Maximum/Minimum Security Level Menu
147
Figure 5-33. Secure Voice Application Menu
147
Figure 5-34. Secure Voice ACL Menu
148
Figure 5-35. Secure Voice Maximum/Minimum Security Level Menu
148
Figure 5-36. Access Control List Menu
148
Figure 5-37. View Access Control List Menu
149
Figure 5-38. ACL Daos Menu
149
Figure 5-39. ACL Kmids Menu
149
Figure 5-40. Speakerphone Control Menu
150
Figure 5-41. Non-Secure Speakerphone Menu
150
MODE Hierarchy
151
5-3.1 On-Hook Mode Settings
151
Figure 5-42. Secure Speakerphone Menu
151
Figure 5-43. Secure Signaling Mode Menu
151
Figure 5-44. Mode Setting Menu
152
Figure 5-45. Secure Data (Mode) Menu
152
Figure 5-46. Secure Data (Rate) Menu
153
Figure 5-47. Secure Voice Menu
153
5-3.2 Off-Hook Settings
154
Figure 5-48. SCIP Line Quality Menu
154
Speed Dial Keys
155
Figure 5-49. Speed Dial Number Entry Menu
155
Figure 5-50. Speed Dial Number Action Menu
155
Chapter 6 CRYPTO CARD MANAGEMENT
157
Crypto Card Management Privileges
157
Figure 6-1. Crypto Card Management Menu
157
Figure 6-2. Card Management Privileges Menu
157
Rekey Functions
158
6-2.1 Update Rekey Phone Number/Perform Rekey
158
Figure 6-3. Rekey Functions Menu
158
Figure 6-4. Update Rekey Phone Number / Perform Rekey Menu
158
Figure 6-5. Update Stored Phone Number Menu
159
Figure 6-6. STU-III Enter New Number to Change Menu
159
Figure 6-7. STU-III New Number Entry Menu
159
Figure 6-8. SDNS Rekey Phone Number / Select Type Menu
160
Figure 6-9. SDNS Enter New Number to Change Menu
160
6-2.2 Perform Rekey
161
Figure 6-10. SDNS New Number Entry Number
161
Figure 6-11. Perform Rekey - Invalid Card Menu
162
Figure 6-12. Perform Rekey Menu
162
Figure 6-13. STU-III Rekey Mode Menu
163
Figure 6-14. STU-III ISDN STU-III Rekey in Progress "Proceeding To" Menu
163
Figure 6-15. ISDN STU-III Rekey in Progress "Alerting" Menu
163
Figure 6-16. ISDN STU-III Rekey in Progress "Non-Secure To" Menu
163
Figure 6-17. ISDN, PSTN or TRI-TAC STU-III Rekey in Progress "Going Secure To" Menu
164
Figure 6-18. ISDN, PSTN or TRI-TAC STU-III Rekey in Progress "Classification" Menu
164
Figure 6-19. ISDN, PSTN or TRI-TAC STU-III Rekey in Progress "Key ID" Menu
164
Figure 6-20. ISDN, PSTN or TRI-TAC STU-III Rekey in Progress "Key Exp." Menu
164
Figure 6-21. ISDN, PSTN or TRI-TAC STU-III Rekey in Progress "Key Class." Menu
164
Figure 6-22. ISDN, PSTN or TRI-TAC STU-III Rekey in Progress "DAO Code" Menu
165
Figure 6-23. ISDN, PSTN or TRI-TAC STU-III Rekey in Progress "Caller ID" Menu
165
Figure 6-24. STU-III Rekey Successful
165
Figure 6-25. SDNS Rekey Mode - Select Type Menu
166
Figure 6-26. SDNS Rekey Mode - Dial: Menu
166
Figure 6-27. STE ISDN Rekey in Progress "Proceeding To" Menu
167
Figure 6-28. STE ISDN Rekey in Progress "Alerting" Menu
167
Figure 6-29. STE ISDN Rekey in Progress "Non-Secure To" Menu
167
Figure 6-30. STE ISDN/STE SCIP Rekey in Progress "Going Secure To" Menu
167
Figure 6-31. SDNS Rekey in Progress Status Menu
167
View Card Key Data
168
6-3.1 View STU-III Key Data
168
Figure 6-32. SDNS Rekey Successful Menu
168
Figure 6-33. View Card Key Data Menu
168
Figure 6-34. STU-III Key Data/Key ID Menu
169
Figure 6-35. STU-III Key Data/Dao Code Menu
169
Figure 6-36. STU-III Key Data/Key Classification Menu
169
Figure 6-37. STU-III Key Data/Key Exp. Date Menu
170
Figure 6-38. STU-III Key Data/Dao Descriptor Menu
170
Figure 6-39. STU-III Key Data/Key State Menu
170
6-3.2 View SDNS Key Data
171
Figure 6-40. SDNS Key Data/Key ID Menu
171
Figure 6-41. SDNS Key Data/Dao Code Menu
171
Figure 6-42. SDNS Key Data/Key Classification Menu
172
Figure 6-43. SDNS Key Data/Special ID Field Menu
172
Figure 6-44. SDNS Key Data/Key Expiration Date Menu
173
Figure 6-45. SDNS Key Data/Dao Descriptor Menu
173
Figure 6-46. SDNS Key Data/Universal ID
173
Figure 6-47. SDNS Key Type Menu
174
Figure 6-48. SDNS Key Data/Universal Edition Menu
174
Zeroize Key
175
Figure 6-49. SDNS Key Data/Key State Menu
175
Figure 6-50. Zeroize Key Menu
175
Figure 6-51. Zeroize Specific Key Menu
176
Figure 6-52. Confirm Zeroize Specific Key Menu
176
Figure 6-53. Key Zeroized Menu
176
Remove Terminal/Card Association
177
Figure 6-54. Remove Terminal/Card Association Menu
177
Figure 6-55. Remove Terminal/Card Association Confirm-Abort Menu
177
View Ckl/CIM
178
Figure 6-56. Association Removed Menu
178
Figure 6-57. Terminal and Card Not Associated Menu
178
6-6.1 View CKL Version
179
6-6.2 View CIM Version
179
Figure 6-58. View CKL/CIM Version Numbers Menu
179
Figure 6-59. CKL Version Number Menu
179
Figure 6-60. CIM Version Number Menu
179
Zeroize Terminal
180
Figure 6-61. Zeroize Terminal Menu
180
Figure 6-62. Zeroize Confirm Menu
180
Chapter 7 CALLS
183
General Management
183
Voice Call Management Overview
184
Table 7-1. Secure Voice Call Service
184
Crypto Card Insertion/Removal
185
Table 7-2. Secure Data Call Service
185
7-1.3 Initiating Voice Calls
186
7-1.4 Special Dialing Procedures
186
7-1.5 In-Call Operations
187
7-1.6 Terminating a Call
188
Pstn Voice Calls
188
7-2.1 PSTN - Initiating Calls
188
Figure 7-1. PSTN Auto-Secure Off-Hook Menu
188
Figure 7-2. PSTN Traditional Off-Hook Menu
188
7-2.2 PSTN - Answering Calls
189
Figure 7-3. PSTN Secure-Only Off-Hook Menu
189
Figure 7-4. PSTN Incoming Call Menu
189
7-2.3 PSTN - Call Hold
190
7-2.4 PSTN - Call Transfer
190
7-2.5 PSTN - Conference Call
190
Figure 7-5. PSTN Incoming Call - Off-Hook Menu
190
Isdn Voice Calls
191
7-3.1 Achieving the Highest Quality of ISDN Service
191
7-3.2 ISDN - Initiating Calls
191
Figure 7-6. ISDN Auto-Secure Off-Hook Menu
191
Figure 7-7. ISDN Traditional Off-Hook Menu
192
Off-Hook Menu ISDN - Answering Calls
193
Figure 7-8. ISDN Secure-Only Off-Hook Menu
193
Figure 7-9. ISDN Incoming Call Menu
193
Figure 7-10. ISDN Incoming Call Off-Hook Menu
194
ISDN - Non-Secure Call Hold
195
ISDN - Secure Call Hold
195
ISDN - Call Transfer
195
7-3.7 ISDN - Conference Call
196
7-3.8 ISDN - STE Secure Casual Conference
196
Figure 7-11. STE Secure Casual Conference Network Diagram
196
Figure 7-12. Secure Casual Conference First Call Connect Menu
196
Figure 7-13. Secure Casual Conference Call Suspended Menu
197
Figure 7-14. Secure Casual Conference Second Call Menu
197
Figure 7-15. Secure Casual Conference Default Traffic Menu
197
Figure 7-16. Secure Casual Conference Downgrade Menu
198
7-3.9 ISDN - Managing Multiple Calls
199
Figure 7-17. Line 1 In-Progress Call Menu
199
Figure 7-18. Line 1 Call on Hold Menu
199
Figure 7-19. Line 2 Dial Menu
200
Figure 7-20. Line 2 Alerting Menu
200
Figure 7-21. Line 2 Call Connected Menu
200
Figure 7-22. Line 1 Active Call Menu
200
Figure 7-23. Line 1 Call In-Progress Menu
201
Figure 7-24. Line 2 Incoming Unanswered Call Menu
201
Figure 7-25. Line 1 Call In-Progress Menu
201
Figure 7-26. Line 1 Call Hold Menu
202
Figure 7-27. Line 2 Call In-Progress Menu
202
Figure 7-28. Line 2 Call on Hold Menu
202
Figure 7-29. Line 1 Call In-Progress Menu
202
Tri-Tac Voice Calls
203
7-4.1 TRI-TAC - Initiating Calls
203
Figure 7-30. Line 2 Call In-Progress Menu
203
Figure 7-31. TRI-TAC Auto-Secure Off-Hook Menu
203
7-4.2 TRI-TAC - Answering Calls
204
Figure 7-32. TRI-TAC Traditional Off-Hook Menu
204
Figure 7-33. TRI-TAC Secure-Only Off-Hook Menu
204
7-4.3 TRI-TAC - Call Hold
205
7-4.4 TRI-TAC - Call Transfer
205
7-4.5 TRI-TAC - Conference Call
205
7-4.6 TRI-TAC - Calls to and from PSTN Terminals
205
Figure 7-34. TRI-TAC Incoming Call Menu
205
Figure 7-35. TRI-TAC to PSTN Phone Call Diagram
205
Bdi Voice Calls
206
7-5.1 BDI - Initiating Calls
206
Figure 7-36. BDI-To-BDI Connection Alerting Menu
206
Figure 7-37. Modem Clear-Idle Display
206
7-5.2 BDI - Answering Calls
207
Table 7-3. Procedures for Initiating BDI Calls
207
7-5.3 BDI - Call Hold
208
7-5.4 BDI - Call Transfer
208
7-5.5 BDI - Conference Call
208
Voice Call Failures
208
Figure 7-38. BDI Incoming Call Menu
208
Table 7-4. STE Voice Call Failures and Displays
208
Chapter 8 REMOTE CONTROL OPERATIONS
211
General Information - Remote Control Operations
211
Data Modes
211
Table 8-1. Data STE Secure Modes
211
8-2.1 Rate Negotiation
212
Feature Settings for Remote Control
213
8-3.1 Remote Control
213
8-3.2 Terminal Control
213
Auto_Answer
213
8-3.4 Data Port
213
Concept of Operation
213
8-4.1 Remote Authentication
213
8-4.2 Remote Control States
214
Table 8-2. Configuration Commands
215
8-4.3 Secure Dial
216
Table 8-3. Summary of Result Codes
216
At Interface
217
8-5.1 General Rules of Operation
217
8-5.2 at Commands
217
Table 8-4. Command and Response Summary
218
Table 8-5. Atdn Command Codes - Dial Parameters
221
Table 8-6. S-Register Summary
227
Remote Control Examples
233
8-6.1 Dialing an Outgoing Call on PSTN
233
8-6.2 Manually Answer an Incoming Call
233
8-6.3 Auto_Answer an Incoming Call
233
Chapter 9 8510 Capabilities
235
Introduction
235
9-1.1 Introducing the New STE-8510 Capabilities
235
9-1.2 Organization of this Chapter
235
Overview of New Features
235
9-2.1 Description of New STE-8510 Features
235
Figure 9-1. STE-8510 Buttons and Indicators
236
Non-Secure Calling
238
Switch Feature Support
238
9-4.1 Common Switch Features
238
9-4.2 5ESS Supported Features
242
9-4.3 DEFINITY Supported Features
243
5Ess Secure Calling
245
9-5.1 Secure Voice Calls on 5ESS
245
9-5.2 Secure Data Calls on 5ESS
246
Figure 9-2. Data Bearer Call Annunciation
246
Definity Secure Calling
247
Table 9-1. DEFINITY STE-8510 Directory Number Usage
247
9-6.1 Placing Secure Voice Calls on DEFINITY with STE-8510
248
9-6.2 Receiving Secure Voice Calls on DEFINITY with STE-8510
248
9-6.3 Secure Data Calls on DEFINITY
248
Setting up Ste-8510
249
9-7.1 Setting the STE 8510 Switch Type
249
Figure 9-3. Default Switch Setting
250
Figure 9-4. 5ESS-CUST Switch Setting
250
Figure 9-5. STE-8510 Switch Setting
250
Figure 9-6. Default Switch Setting
250
Figure 9-7. 5ESS-CUST Switch Setting
251
Figure 9-8. STE-8510 Switch Setting
251
Figure 9-9. Service Profile ID #1 Menu
251
Figure 9-10. Directory Number #1 Menu
251
Figure 9-11. Last Call Appearance Assigned (3) Menu
252
Figure 9-12. Last Call Appearance Assigned (4) Menu
252
Figure 9-13. Last Call Appearance Assigned (1) Menu
252
9-7.2 5ESS Configuration
253
9-7.3 DEFINITY Configuration
254
Figure 9-14. DEFINITY 8510 Station
254
Figure 9-15. DEFINITY 8510 Station
255
Figure 9-16. DEFINITY 8510 Station
256
Figure 9-17. DEFINITY 8510 Station
257
Chapter 10 EXTERNAL UTILITIES
259
10-1. Install Acl from Computer
259
10-1.1 Electronic ACL File Formats
259
Table 10-1. STE File Special Characters
259
10-1.2 Computer Setup
260
10-1.3 Software Script
260
Procedures to Load Electronic ACL Files
261
10-2. Ste Toolset Program
261
STE Toolset Program General Information
261
Figure 10-1. ACL Installation Menu
261
Figure 10-2. Software Download Log File
263
10-2.2 STE Virtual Front Panel Tool
265
Figure 10-3. STE Virtual Front Panel Tool
266
Figure 10-4. STE Logfile Notepad Window
267
Figure 10-5. STE Toolset Options ─ Terminal Type (Default Window)
268
Figure 10-6. STE Toolset Options ─ Terminal Type
269
Figure 10-7. STE Toolset Options ─ Comm Port
270
Figure 10-8. STE Toolset Options ─ Debug/Flags
271
Figure 10-9. STE Toolset Options ─ Override
272
Figure 10-10. STE Toolset Help ─ about
273
Figure 10-11. STE Local Control from a Distance
274
10-2.3 Software Download Tool
276
Chapter 11 USER MAINTENANCE
279
11-1. Preventive Maintenance
279
11-2. Cleaning
279
11-3. Self Test and Software Verification
279
11-4. Software Version Number
279
11-5. Terminal Failure Indications
280
Table 11-1. STE Failures and Displays
280
11-6. Troubleshooting Guide
281
Table 11-2. STE Failures and Displays
281
Chapter 12 NOTES
285
12-1. Warranty
285
12-2. Fcc Information
286
12-3. Ste Use in Canada
286
12-4. Ce Declaration of Conformity
288
Index
289
FO 1. User/Installer Tree
307
FO 2. User Tree
308
FO 3. MODE Tree
309
FO 4. TPA Tree
310
Advertisement
Advertisement
Related Products
L-3 Communications Data STE
L-3 Communications Office STE
L-3 Communications PSTN
L-3 Communications STE-R
L-3 Communications STE-RI
L-3 Communications STE-RT
L-3 Communications Tactical STE
L-3 Communications Categories
Thermal cameras
Telephone
Storage
Monocular
Avionics Display
More L-3 Communications Manuals
Login
Sign In
OR
Sign in with Facebook
Sign in with Google
Upload manual
Upload from disk
Upload from URL