Sign In
Upload
Manuals
Brands
Kramer Manuals
Switch
VP-553
Kramer VP-553 Manuals
Manuals and User Guides for Kramer VP-553. We have
1
Kramer VP-553 manual available for free PDF download: User Manual
Kramer VP-553 User Manual (81 pages)
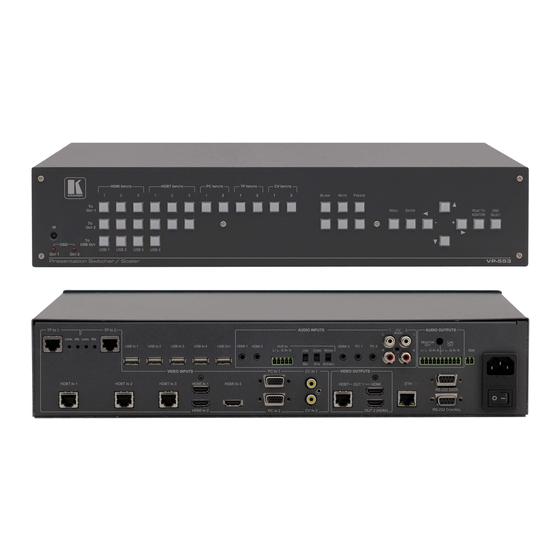
Presentation Switcher/Scaler
Brand:
Kramer
| Category:
Switch
| Size: 3 MB
Table of Contents
Table of Contents
4
1 Introduction
6
2 Getting Started
7
Achieving the Best Performance
7
Safety Instructions
8
Recycling Kramer Products
8
3 Overview
9
Using the USB Switcher
11
Using Twisted Pair Cable for HDBT
11
Shielded Twisted Pair (STP) / Unshielded Twisted Pair (UTP)
12
Defining the VP-553 Presentation Switcher/Scaler
12
Figure 1: VP-553 Presentation Switcher/Scaler Front Panel
13
Figure 2: VP-553 Presentation Switcher/Scaler Rear Panel
14
4 Installing in a Rack
16
5 Connecting the VP-553
17
Figure 3: Connecting the VP-553 Presentation Switcher / Scaler
19
Connecting the Balanced Stereo Audio Input and Outputs
20
Figure 4: Balanced Stereo Audio Connection
20
Figure 5: Unbalanced Stereo Audio Output Connection
20
Figure 6: Balanced Stereo Audio Input Connection
20
Figure 7: Unbalanced Stereo Audio Input Connection
20
6 Controlling the VP-553
21
Controlling Via the Front Panel Buttons
21
Using the OSD Menu
22
Connecting to the VP-553 Via RS-232
27
Operating Via Ethernet
28
Figure 8: Local Area Connection Properties Window
29
Figure 9: Internet Protocol Version 4 Properties Window
30
Figure 10: Internet Protocol Version 6 Properties Window
30
Figure 11: Internet Protocol Properties Window
31
Controlling Via the Infrared Remote Control Transmitter
32
Figure 12: Infrared Remote Control Transmitter
32
7 Using the Embedded Web Pages
33
Browsing the VP-553 Web Pages
33
The Switching Page
34
Figure 13: the Loading Page
34
Figure 14: Enter Username and Password
34
Figure 15: the Switching Page
35
Figure 16: Switching Page - Input and Output Icons
35
Figure 17: Edit Output Buttons
36
Figure 18: Edit Output Buttons
36
Figure 19: Edit Input Buttons
37
Figure 20: Switching Page - HDMI Input Window
38
Figure 21: Switching Page - HDBT Input Window
38
Figure 22: Switching Page - SID-X2N Setup Icon
39
Figure 23: Switching Page - SID-X2N Setup Window
39
Figure 24: Switching Page - PC, TP or CV Input Window
39
Figure 25: HDBT IR Transmission Example
40
The Scaler Page
41
Figure 26: the Scaler Page - Output 1
42
Figure 27: the Scaler Page - Output 1 for an Analog Input
42
Figure 28: the Scaler Page - Output 2
43
The Device Settings Page
44
Figure 29: the Device Settings Page
44
Figure 30: the Device Settings Page - Static IP Confirmation
44
Figure 31: the Device Settings Page - Uploading the New Firmware File
45
Figure 32: the Device Settings Page - New Firmware Updated
45
The USB Routing Page
46
Figure 33: the Device Settings Page - Soft Factory Reset Message
46
Figure 34: the USB Routing Page
46
The Audio Settings Page
47
Figure 35: the USB Tied to a Selected Input
47
Figure 36: the Audio Settings Page - Inputs
48
Figure 37: the Audio Settings Page - Output 1
48
Figure 38: the Audio Settings Page - Output 2
49
Figure 39: the Audio Settings Page - Monitor
49
The EDID Page
50
Figure 40: the EDID Page
50
Figure 41: the EDID Page - Copying the Native Timing
51
Figure 42: the EDID Page - Copying the Default
51
The Data Routing Page
52
Figure 43: the EDID Page -The Copy EDID Results
52
The Authentication Page
53
Figure 44: the Data Routing Page
53
The about Page
54
Figure 45: the Authentication Page
54
Figure 46: the about Page
54
8 Technical Specifications
55
Default Communication Parameters
56
Input Resolutions
57
9 The VP-553 RS-232 Communication Protocol
58
Kramer Protocol 3000 Syntax
58
Kramer Protocol 3000 - Command List
61
Kramer Protocol 3000 - Detailed Commands
63
Advertisement
Advertisement
Related Products
Kramer VP-558
Kramer VP-551X
Kramer VP-553xl
Kramer VP-550X
Kramer VP-720x1
Kramer VP-23N
Kramer VP3216
Kramer VP-411DS
Kramer VP-773AMP
Kramer VP-440
Kramer Categories
Matrix Switcher
Switch
Media Converter
Amplifier
Receiver
More Kramer Manuals
Login
Sign In
OR
Sign in with Facebook
Sign in with Google
Upload manual
Upload from disk
Upload from URL