Sign In
Upload
Manuals
Brands
Konica Minolta Manuals
All in One Printer
bizhub C525
Konica Minolta bizhub C525 Manuals
Manuals and User Guides for Konica Minolta bizhub C525. We have
1
Konica Minolta bizhub C525 manual available for free PDF download: User Manual
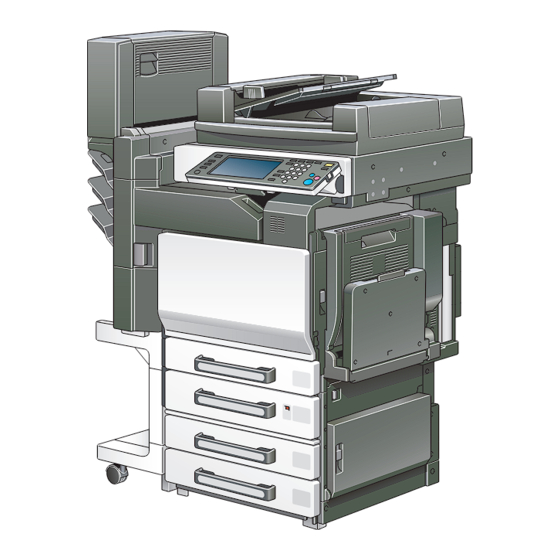
Konica Minolta bizhub C525 User Manual (660 pages)
bizhub C525
Brand:
Konica Minolta
| Category:
All in One Printer
| Size: 27.13 MB
Table of Contents
Energy Star
2
What Is an ENERGY STAR ® Product
2
Trademarks and Registered Trademarks
3
Table of Contents
6
Available Features
19
Selecting the Print Color
19
Automatically Selecting the Paper
19
Adjusting Copies to the Size of the Paper
19
Specifying Separate Horizontal and Vertical Zoom Ratios
19
Scanning the Document in Separate Batches
19
Center Binding
20
Sorting Copies
20
Stapling Copies
20
Punching Holes in Copies
20
Copying Multiple Document Pages Onto a Single Page
21
Adjusting Copies According to the Image Quality of the Original
21
Inserting Paper between Copies of Overhead Projector Transparencies
21
Adding a Cover Page
22
Inserting Different Paper into Copies
22
Inserting Pages from a Different Document at Specified
22
Printing Double-Sided Copies with the Specified Page on the Front Side
23
Copying with Reversed Colors
23
Copying with a Background Color
24
Improving the Copy Color Quality
24
Creating Booklets from Copies of Pamphlets
24
Repeating Copy Images
25
Printing the Enlarged Image on Multiple Pages
25
Making Copies for Filing
25
Copying with the Page Layout of a Magazine
26
Erasing Sections of Copies
26
Adjusting the Image to Fit the Paper Size
26
Printing Distribution Numbers or Copy Protection Text on
27
Checking the Copy Settings
27
Enlarging the Size of Text in Touch Panel Screens
27
Displaying Explanations of Functions and Settings
27
Interrupting a Copy Job
28
Printing a Sample Copy
28
Adjust Color Parameters
29
General Information about Color
31
Relationship between Hue, Brightness and Saturation (Color Model
32
Red" Parameter
33
Green" Parameter
34
Blue" Parameter
35
Color Balance" Parameter (CMYK Color Adjustment
36
Brightness" Parameter
38
Contrast" Parameter
39
Saturation" Parameter
40
Sharpness" Parameter
41
Hue" Parameter
42
Copy Density" Parameter
43
Single Color" Function
44
Color" Function
45
Background Color" Function
46
Neg-/Pos. Reverse" Function
47
Monotone Copy
47
Full-Color Copy and "Background Color" Function
47
Mirror Image" Function
48
Explanation of Manual Conventions
49
Descriptions and Symbols for Documents and Paper
51
Width" and "Length
51
Paper Orientation
51
User's Guides
53
User's Guide [Copy Operations] <This Manual
53
User's Guide [Network Scanner Operations
53
User's Guide [Box Operations
53
User's Guide [Enlarge Display Operations
53
User's Guide [FK-502 Facsimile Operations
53
User's Guide [Network Facsimile Operations
53
User's Guide [Print Operations
54
Quick Guide [Print Operations
54
Legal Restrictions on Copying
55
1 Installation and Operation Precautions
56
Safety Information
57
Warning and Precaution Symbols
57
Meaning of Symbols
57
Regulation Notices
64
CE Marking (Declaration of Conformity) for Users of the European Union (EU)
64
USER INSTRUCTIONS FCC PART 15 - RADIO FREQUENCY DEVICES (for U.S.A. Users)
64
INTERFERENCE-CAUSING EQUIPMENT STANDARD (ICES-003 ISSUE 4) (for Canada Users)
64
For Users in Countries Not Subject to Class B Regulations
65
Laser Safety
65
Internal Laser Radiation
65
CDRH Regulations
66
For European Users
67
For Denmark Users
67
For Finland, Sweden Users
67
For Norway Users
68
Laser Safety Label
69
Ozone Release
69
Acoustic Noise (for European Users Only)
70
For EU Member States Only
70
Caution Notations and Labels
71
Space Requirements
72
Operation Precautions
73
Power Source
73
Operating Environment
73
Storage of Copies
73
2 Before Making Copies
74
Part Names and Their Functions
75
Options
75
Outside of Machine
78
Inside of Machine
84
Saddle Stitcher SD-503/Mailbin Kit MT-501
86
Finisher FS-514/Output Tray OT-601/Punch Kit PK-510
87
Finisher FS-603/Punch Kit PK-501
89
Finisher FS-501/Job Separator JS-601
91
Control Panel
94
Basic Settings Screen (Basic Screen)
97
Icons that Appear in the Screen
99
Adjusting the Angle of the Control Panel
100
To Adjust the Angle of the Control Panel
100
Turning on the Main Power and the Auxiliary Power
102
To Turn on the Machine
102
To Scan During Warm-Up
104
To Turn off the Machine
106
Automatically Canceling the Settings (Automatic Panel Reset)
107
Automatically Canceling the Mode Screen (Automatic System Reset)
107
Automatically Conserving Energy (Low Power Mode)
108
Automatically Conserving Energy (Sleep Mode)
109
Manually Conserving Energy
110
Automatically Turning the Machine On/Off (Weekly Timer)
111
Controlling each User's Use of this Machine (User Authentication)
113
Controlling each Account's Use of this Machine (Account Track)
116
Loading Paper into the 1St Tray
120
To Load Paper (1St Tray)
120
Loading Paper into the 2Nd, 3Rd or 4Th Tray
126
To Load Paper (2Nd, 3Rd or 4Th Tray)
126
Loading Paper into the LCT
128
To Load Paper (LCT)
128
Loading Paper into the Bypass Tray
131
To Load Paper (Bypass Tray)
131
3 Basic Copy Operations
138
General Copy Operation
139
To Make a Copy
139
Copies
141
Operations that Cannot be Combined
142
Operations Where the Setting Specified Last Is Given Priority
142
Operations Where the Setting Specified First Is Given Priority
143
Feeding the Document
144
To Load the Document into the ADF
144
To Place the Document on the Original Glass
146
Scanning the Document in Separate Batches ("Separate Scan" Setting)
148
Scanning a Multi-Page Document from the Original Glass
152
Specifying Original Settings
157
Copying Documents of Mixed Sizes ("Mixed Original" Setting)
157
Copying Thick Documents ("Thick Original" Setting)
159
Selecting the Document Orientation (Original Direction Settings)
161
To Specify an Original Direction Setting
162
Selecting the Position of the Binding Margin (Margin Settings)
163
To Specify a Margin Setting
164
To Change Scan Settings for each Document
166
Selecting a Color Setting
169
To Select a Color Setting
170
Selecting a Paper Setting
172
Automatically Selecting the Paper Size ("Auto Paper Select" Setting)
172
Manually Selecting the Desired Paper Size
174
Specifying a Zoom Setting
175
Automatically Selecting the Zoom Ratio ("Auto Zoom" Setting)
175
Specifying the same Zoom Ratio as the Document ("×1.0" Setting)
176
Slightly Reducing the Copy ("Minimal" Setting)
177
Selecting a Preset Zoom Ratio (Enlarge and Reduce Settings)
178
Typing in the Zoom Ratio (XY Zoom Setting)
179
Typing in Separate X and y Zoom Ratios (Independent Zoom Settings)
181
Selecting a Stored Zoom Ratio
183
Storing the Desired Zoom Ratio
184
Selecting the Document and Copy Type Settings (Simplex/Duplex Settings)
186
To Select Single-Sided Copies
188
To Select Double-Sided Copies
190
Selecting the Quality of the Document
192
Loading Documents with Small Print or Photos (Original Type Settings)
192
To Specify an Original Type Setting
193
Specifying the Density Settings
196
Adjusting the Print Density (Density Settings)
197
Adjusting the Background Density (Background Removal Settings)
198
Adjusting the Reproduction Quality of Text
200
Selecting a Combine Originals Setting
201
Copying Multiple Document Pages Onto a Single Page (Combine Originals)
203
Selecting Finishing Settings
204
Separating Copies by Sets ("Sort" Setting)
207
Separating Copies by Pages ("Group" Setting)
208
Stapling Copies (Staple Settings)
209
To Bind Copies with Staples
212
Punching Holes in Copies (Punch Settings)
214
To Punch Holes in Copies
215
Specifying Center Binding
217
Scanning the Next Document to be Copied While a Copy Job Is Being Printed (Next Job Reservation)
221
To Reserve a Copy Job
221
Stopping Scanning/Printing
223
To Stop Scanning/Printing
223
Deleting a Stopped Job
224
To Delete a Stopped Job
224
4 Additional Copy Operations
226
Checking the Copy Settings (Mode Check)
227
To Check the Settings
227
To Change the Settings
229
Printing a Proof Copy to be Checked (Proof Copy)
230
To Make Test Prints
230
Interrupting a Copy Job (Interrupt Mode)
233
To Interrupt a Copy Job
233
Registering Copy Programs (Mode Memory)
235
To Store a Copy Program
235
To Delete a Copy Program
238
Copying with Programmed Copy Settings (Mode Memory)
239
To Recall a Stored Job
239
Displaying Function Descriptions (Help)
242
Overview of Help Screens
242
To Display the Main Help Menu Screen
245
To Display the Help Screen While Specifying a Setting
247
Specifying Control Panel Settings (Accessibility Mode)
248
Displaying the Accessibility Setting Screen
248
To Set the "Key Repeat Start/Interval Time" Function
248
To Set the "Enlarge Display Timer Setting" Function
251
To Set the "Message Display Time" Function
253
To Set the "Sound Setting" Function
255
To Set the "Touch Panel Adj." Function
258
To Set the "Auto Reset Notification" Function
260
To Set the "Enlarge Display Confirmation Screen" Function
263
5 Troubleshooting
266
When the Message "Malfunction Detected." Appears (Call Technical Representative)
267
To Call the Technical Representative
268
When the Message "Misfeed Detected." Appears
270
Location of Paper Misfeed
270
Paper Misfeed Indications
272
To Clear a Paper Misfeed in the Bypass Tray
274
To Clear a Paper Misfeed in the Automatic Duplex Unit
275
To Clear a Paper Misfeed in the 1St Tray
276
To Clear a Paper Misfeed in the 2Nd Tray
277
To Clear a Paper Misfeed in a Paper Tray (3Rd or 4Th Tray)
278
To Clear a Paper Misfeed in the LCT
279
To Clear a Paper Misfeed in the Right-Side Door
281
To Clear a Paper Misfeed in the Fusing Unit
284
To Clear a Banner Paper Misfeed
288
To Clear a Paper Misfeed in the ADF
293
To Clear a Paper Misfeed in the Mailbin
301
To Clear a Paper Misfeed in the Saddle Stitcher
303
When the Message "Replenish Paper." Appears
314
To Replenish Paper
314
When the Message
315
Memory Becomes Full While Scanning
315
Memory Becomes Full While Queuing a Job
316
When "Please Replace Following Unit(S)." Appears
317
When the Message "Need to Replace XXXX." Appears
318
Simple Troubleshooting
320
Main Unit
320
Adf
322
Finisher
323
Main Messages and Their Remedies
324
6 Specifications
328
Specifications
328
Bizhub C252
329
Option Specifications
332
Automatic Duplex Unit Ad
332
Automatic Document Feeder Df
332
Paper Feed Cabinet Pc
334
Punch Kit Pk
336
Saddle Stitcher Sd
336
Output Tray Ot
336
Job Separator Js
340
7 Copy Paper/Original Documents
342
Copy Paper
343
Possible Paper Sizes
343
Paper Types and Paper Capacities
345
Special Paper
346
Precautions for Paper
348
Paper Storage
348
Auto Tray Switch Feature
349
Order for Selecting the Paper Trays
349
Selecting the Paper Settings
350
To Automatically Detect the Paper Size ("Auto Paper Select" Setting)
350
To Specify a Paper Size (Set Size Settings)
352
To Specify a Non-Standard Paper Size (Custom Size Settings)
354
To Store a Non-Standard Paper Size (Custom Size Settings)
356
To Specify a Setting for Oversized Paper (Oversized Paper Settings)
359
To Specify a Setting for Special Paper
362
To Print Double-Sided Copies Manually
364
Original Documents
366
Documents that Can be Loaded into the ADF
366
Precautions for Loading Documents into the ADF
368
Documents that Can be Placed on the Original Glass
369
Precautions for Positioning Documents on the Original Glass
369
8 Application Functions
370
Inserting Paper between Overhead Projector Transparencies ("OHP Interleave" Function)
371
To Copy Using the "OHP Interleave" Function
372
Adding Cover Pages ("Cover Mode" Function)
374
To Copy Using the "Cover Mode" Function
375
Inserting Different Paper into Copies ("Insert Sheet" Function)
377
To Copy Using the "Insert Sheet" Function
378
Inserting Copies of a Different Document for a Specified Page ("Insert Image" Function)
381
To Copy Using the "Insert Image" Function
381
Specifying Pages to be Printed on the Front Side ("Chapters" Function)
385
To Copy Using the "Chapters" Function
386
Scanning Documents with Different Settings and Printing Copies All Together ("Program Job" Function)
388
To Copy Using the "Program Job" Function
389
Producing Separate Copies of each Page in a
393
To Copy Using the "Book Copy" Function
394
Copying Pamphlets ("Booklet Original" Function)
398
To Copy Using the "Booklet Original" Function
399
Tiling Copy Images ("Image Repeat" Function)
402
To Copy Using the "Image Repeat" Function
403
Copying an Enlarged Image on Multiple Pages ("Poster Mode" Function)
407
To Copy Using the "Poster Mode" Function
407
Copying with the Page Layout of a Magazine ("Booklet" Function)
412
To Copy Using the "Booklet" Function
413
Copying with Image Colors Inversed ("Neg-/Pos. Reverse" Function)
414
To Copy Using the "Neg-/Pos. Reverse" Function
415
Copying in a Mirror Image ("Mirror Image" Function)
416
To Copy Using the "Mirror Image" Function
416
Adding a Background Color to Copies ("Background Color" Function)
420
To Copy Using the "Background Color" Function
420
Adjusting the Copy Color Quality (Adjust Color Parameters)
422
To Adjust the Adjust Color Parameters
423
Checking the Print Result of the Adjust Color Settings (Sample Copy)
425
To Make Sample Copies
426
Adding Filing Margins to Copies ("Page Margin" Function)
427
To Copy Using the "Page Margin" Function
428
Erasing Specified Areas of Copies ("Erase" Function)
430
To Copy Using the "Erase" Function
430
Adjusting the Image to Fit the Paper (Image Adjustment Settings)
432
To Copy Using the Image Adjustment Settings
433
Printing the Date/Time, Page Number or Distribution Number on Copies (Stamp Functions)
436
Printing the Date/Time ("Date/Time" Function)
437
To Copy Using the "Date/Time" Function
437
Printing the Page Number ("Page #" Function)
440
To Copy Using the "Page #" Function
440
Printing the Distribution Number ("Set Numbering" Function)
444
To Copy Using the "Set Numbering" Function
444
Printing Copy Protection Text ("Copy Protect" Function)
446
To Copy Using the "Copy Protect" Function
446
9 Replacing Toner Cartridges and Staples and Emptying Waste Containers
454
Replacing the Toner Cartridge
455
To Replace the Toner Cartridge
459
Replacing the Staples
463
To Replace the Staple Cartridge in Saddle Stitcher
466
Clearing a Staple Jam
477
To Clear Jammed Staples in the Saddle Stitcher
484
To Clear Jammed Staples in Finisher FS-603
490
Emptying the Waste Containers
496
Replacing the Waste Toner Box
501
To Replace the Waste Toner Box
503
10 Care of the Machine
506
Cleaning
507
Housing
507
Original Glass
508
Control Panel
508
Document Transfer Belt
509
Original Cover Pad
510
Paper Take-Up Roller
510
Electrostatic Charger Wire
511
Print Head
512
Viewing Counters (Meter Count)
513
Viewing Counters
513
To View the Counters
513
Viewing the Coverage Rate
514
To View the Coverage Rate
514
When the Message "Preventive Maintenance Time." Appears
515
Managing Jobs
516
11 Managing Jobs (Job List)
516
Overview of the Job List Screen
517
Jobs
517
Multi-Job Feature
517
Job List Screens
518
Performing Operations on Jobs
521
To Delete a Job
521
To Check the Job Settings
523
Displayed Information
524
To Check the Job Details
525
To Display Current Jobs (Held Jobs and Active Jobs Lists)
526
To Display Job History
527
To Print a Sample Copy of a Stored Job
528
To Print a Stored Job
530
To Increase Priority for Printing
532
12 Utility
534
Overview of Utility Mode Parameters
535
List of Registration Information and Parameters
535
Selecting a Destination Register
547
Scan
547
Fax
547
User Box
547
Displaying the Destination Register Screen
548
Specifying User Settings
550
System Setting
550
Display Setting
552
Fax Basic Screen Default Setting
553
Copy Screen
553
Fax Active Screen
553
Copy Initial Screen Setting
553
Initial Setting
554
Copier Setting
555
Printer Setting
557
Displaying the Utility Setting Screen
558
Specifying Administrator Settings
560
System Setting
560
Restrict User Access
563
Expert Adjustment
563
Reset Setting
568
Administrator/Machine Setting
570
One-Touch Registration
570
General Settings
571
User Authentication/Account Track
571
Network Setting
573
Copier Setting
573
Printer Setting
574
Fax Setting
574
System Connection
575
Security Setting
576
Administrator Password
576
Administrator Security Level
576
Security Details
577
Displaying the Administrator Setting Screen
580
Overview of Weekly Timer Settings
582
Requisite
582
Adjusting the Printer
583
Adjusting the Starting Print Position at the Leading Edge Position
583
Adjusting the Starting Print Position at the Left Edge
585
Adjusting the Starting Print Position for the Second Side
587
Adjusting Printing According to the Media
589
Adjusting the Finisher (FS-514)
591
Adjusting the Center Folding Position
591
Adjusting the Center Stapling Position
593
Adjusting the Horizontal Punch Position
595
Adjusting the Angle of Punched Holes
597
Adjusting the Finisher (FS-603)
599
Adjusting the Center Stapling Position
599
Adjusting the Center Folding Position
602
Adjusting the Color Registration
605
Adjusting the Color Registration for Yellow, Magenta and Cyan
605
12.10 Adjusting the Gradation Levels
608
Requisite
608
12.11 Authentication Method
611
User Authentication and Account Track
611
When User Authentication and Account Track Are Synchronized
612
When User Authentication and Account Track Are Used Separately
613
To Select an Authentication Method
614
12.12 User Authentication Setting
619
Administrative Setting-User Name List
619
Default Function Permission
620
To Specify the Default Function Permissions
620
Authenticating Public Users
621
User Registration
623
User Counter
628
To Check the Counter
629
12.13 Account Track Setting
631
Account Track Registration
631
Account Track Counter
635
To Check the Counter
636
12.14 Password Rules
638
Conditions of the Password Rules
638
12.15 Enhanced Security Settings
640
12.16 Viewing the Status of the Consumables
643
Displaying the Unit Life Indicator Screen
643
13 Appendix
646
Entering Text
647
To Type Text
649
List of Available Characters
649
Glossary
650
Index
655
Advertisement
Advertisement
Related Products
Konica Minolta bizhub C550 Series
Konica Minolta bizhub C552 Series
Konica Minolta bizhub C552DS Series
Konica Minolta bizhub C554
Konica Minolta bizhub C554e
Konica Minolta bizhub C558
Konica Minolta bizhub C550i
Konica Minolta bizhub C280 Series
Konica Minolta bizhub C224
Konica Minolta bizhub PRESS C70hc
Konica Minolta Categories
All in One Printer
Printer
Digital Camera
Measuring Instruments
Copier
More Konica Minolta Manuals
Login
Sign In
OR
Sign in with Facebook
Sign in with Google
Upload manual
Upload from disk
Upload from URL