Sign In
Upload
Manuals
Brands
Konica Minolta Manuals
All in One Printer
bizhub 5020i
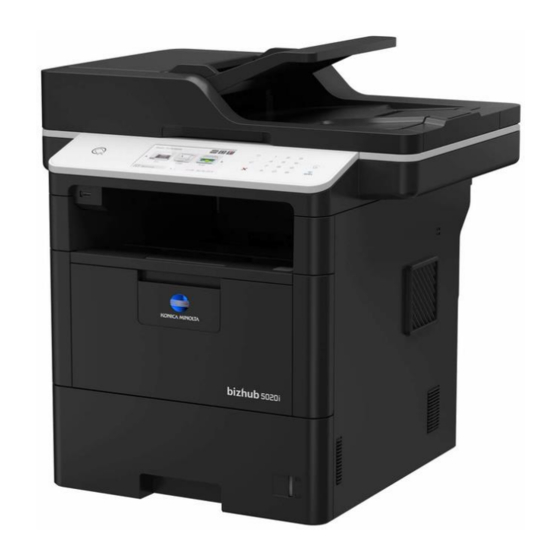
Konica Minolta bizhub 5020i Manuals
Manuals and User Guides for Konica Minolta bizhub 5020i. We have
3
Konica Minolta bizhub 5020i manuals available for free PDF download: User Manual, Shortcut Manual
Konica Minolta bizhub 5020i User Manual (606 pages)
Brand:
Konica Minolta
| Category:
All in One Printer
| Size: 7 MB
Table of Contents
Table of Contents
3
Before You Use Your Machine
8
Applicable Models
9
Related Information
9
Definitions of Notes
10
Trademarks
11
Important Note
12
Introduction to Your Machine
13
Before Using Your Machine
14
Simultaneous Printing, Scanning and Faxing
14
Control Panel Overview
15
Touchscreen LCD Overview
16
How to Navigate the Touchscreen LCD
19
Settings Screen Overview
21
Setting the Home Screen
22
Access KONICA MINOLTA Utilities (Windows)
23
Uninstall the Software (Windows)
25
Paper Handling
26
Load Paper
27
Load and Print Using the Paper Tray
28
Load Thick Paper in the Paper Tray
32
Load and Print Using the Multi-Purpose Tray (MP Tray)
35
Load Paper in the Multi-Purpose Tray (MP Tray)
36
Load and Print Thick Paper and Labels Using the MP Tray
38
Load and Print on Envelopes Using the MP Tray
40
Paper Settings
43
Change the Paper Size and Paper Type
44
Select the Tray to be Used for Printing
45
Change the Check Paper Size Setting
46
Load Documents
47
Load Documents in the Automatic Document Feeder (ADF)
48
Document Sizes Supported
48
Load Documents on the Scanner Glass
50
Unscannable and Unprintable Areas
51
Using Special Paper
52
Print
53
Print from Your Computer (Windows)
54
Print a Document (Windows)
55
Secure Print (Windows)
56
Change the Default Print Settings (Windows)
57
Configure the Optional Tray Settings (Windows)
58
Print from Your Computer (Mac)
59
Print a Document (Mac)
60
Secure Print (Mac)
61
Configure the Optional Tray Settings (Mac)
62
Cancel a Print Job
63
Test Print
64
Scan
65
Scan Using the Scan Button on Your Machine
66
Scan Photos and Graphics
67
Save Scanned Data to a Folder as a PDF File
69
Save Scanned Data to a USB Flash Drive
71
Press [Start]
72
Scan to an Editable Text File (OCR)
73
Scan to Email Attachment
75
Send Scanned Data to an Email Server
77
Scan to FTP
79
Scan to SSH FTP (SFTP)
84
Set up a Scan to SFTP Profile
85
Create a Client Key Pair Using Web Based Management
88
Export a Client Key Pair Using Web Based Management
89
Import a Server Public Key Using Web Based Management
90
Upload Scanned Data to an SFTP Server
91
Scan to Network (Windows)
92
Set up a Scan to Network Profile
93
Set the Date and Time Using Web Based Management
96
Upload Scanned Data to a CIFS Server
97
Scan to Sharepoint
98
Set up a Scan to Sharepoint Profile
99
Upload Scanned Data to a Sharepoint Server
102
Web Services for Scanning on Your Network (Windows 7, Windows 8.1 and Windows 10)
103
Configure Scan Settings for Web Services
106
Change Scan Button Settings from Controlcenter4 (Windows)
107
Configure Certificate for Signed PDF
110
Disable Scanning from Your Computer
111
Scan from Your Computer (Windows)
112
Scan Using Controlcenter4 Home Mode (Windows)
113
Select Document Type Using Controlcenter4 Home Mode (Windows)
116
Custom Scan Settings (Windows)
117
Change Scan Size Using Controlcenter4 Home Mode (Windows)
119
Crop a Scanned Image Using Controlcenter4 Home Mode (Windows)
120
Scan to an Application Using Controlcenter4 Home Mode (Windows)
122
Save Scanned Data to a Folder as a PDF File Using Controlcenter4 Home Mode (Windows)
123
Scan both Sides of a Document Automatically Using Controlcenter4 Home Mode (Windows)
125
Scan Settings for Controlcenter4 Home Mode (Windows)
127
Scan Using Controlcenter4 Advanced Mode (Windows)
129
Scan Photos and Graphics Using Controlcenter4 Advanced Mode (Windows)
130
Save Scanned Data to a Folder as a PDF File Using Controlcenter4 Advanced Mode (Windows)
132
Scan both Sides of a Document Automatically Using Controlcenter4 Advanced Mode (Windows)
134
Scan both Sides of an ID Card Using Controlcenter4 Advanced Mode (Windows)
136
Scan to Email Attachment Using Controlcenter4 Advanced Mode (Windows)
138
Scan to an Editable Text File (OCR) Using Controlcenter4 Advanced Mode (Windows)
140
Scan Settings for Controlcenter4 Advanced Mode (Windows)
142
Scan Using Windows Photo Gallery or Windows Fax and Scan
146
WIA Driver Settings (Windows)
147
Scan from Your Computer (Mac)
149
Scan Using Iprint&Scan (Mac)
150
Configure Scan Settings Using Web Based Management
151
Set the Scan Job Email Report Using Web Based Management
152
Copy
153
Copy a Document
154
Enlarge or Reduce Copied Images
156
Make N in 1 Copies Using the Page Layout Feature
157
Sort Copies
159
Copy an ID Card
160
Copy on both Sides of the Paper (2-Sided Copy)
161
Copy Options
163
Fax
165
Send a Fax
166
Send a Fax
167
Send a 2-Sided Fax from the ADF
169
Send a Fax Manually
170
Send a Fax at the End of a Conversation
171
Send the same Fax to more than One Recipient (Broadcasting)
172
Cancel a Broadcast in Progress
173
Send a Fax in Real Time
174
Send a Fax at a Specified Time (Delayed Fax)
175
Add a Cover Page to Your Fax
176
Compose Your Own Comments
177
Use a Printed Cover Page
178
Cancel a Fax in Progress
179
Check and Cancel a Pending Fax
180
Fax Options
181
Receive a Fax
182
Receive Mode Settings
183
Receive Modes Overview
184
Choose the Correct Receive Mode
185
Set the Number of Rings before the Machine Answers (Ring Delay)
186
Set the F/T Ring Time (Fast Double-Ring)
187
Set Fax Detect
188
Shrink Page Size of an Oversized Incoming Fax
189
Set the 2-Sided Printing for Received Faxes
190
Set the Fax Receive Stamp
191
Receive a Fax at the End of a Telephone Conversation
192
Memory Receive (Remote Fax) Options
193
Forward Incoming Faxes to Another Machine
194
Store Incoming Faxes in the Machine's Memory
195
Change Memory Receive Options
196
Turn off Memory Receive
197
Print a Fax Stored in the Machine's Memory
198
Use PC-Fax Receive to Transfer Received Faxes to Your Computer (Windows Only)
199
Remote Fax Retrieval
200
Set a Remote Access Code
201
Use Your Remote Access Code
202
Remote Retrieval Commands
203
Forward Faxes Remotely
204
Change the Fax Forwarding Number
205
Voice Operations and Fax Numbers
206
Voice Operations
207
Pick up a Voice Call in Fax/Tel Receive Mode
208
Store Fax Numbers
209
Store Address Book Numbers
210
Store Address Book Numbers from Outgoing Calls
211
Change or Delete Address Book Names or Numbers
212
Set up Groups for Broadcasting
213
Change a Group Name
214
Delete a Group
215
Add or Delete Group Members
216
Combine Address Book Numbers
217
Telephone Services and External Devices
218
Use BT Call Sign
219
Set the Telephone Line Type
221
PBX and TRANSFER
222
External TAD (Telephone Answering Device)
223
Connect an External TAD
224
Record an Outgoing Message (OGM) on the External TAD
225
External and Extension Telephones
226
Connect an External or Extension Telephone
227
Operation from External and Extension Telephones
228
Use Extension Telephones
229
Use the Remote Codes
230
Remote Activation Code
230
Remote Deactivation Code
230
Change the Remote Codes
231
Multi-Line Connections (PBX)
232
Fax Reports
233
Print a Transmission Verification Report
234
Print a Fax Journal
235
Pc-Fax
236
PC-FAX for Windows
237
PC-FAX Overview (Windows)
238
Configure PC-FAX (Windows)
239
Configure Your PC-Fax Address Book (Windows)
241
Add a Member to the Address Book (Windows)
242
Create a Group in the Address Book (Windows)
244
Edit Member or Group Information (Windows)
246
Delete a Member or Group (Windows)
247
Export the Address Book (Windows)
248
Import Information to the Address Book (Windows)
250
Send a Fax Using PC-FAX (Windows)
252
Receive Faxes on Your Computer (Windows)
253
Receive Faxes Using PC-FAX Receive (Windows)
254
Set up Your Computer for PC-FAX Receiving (Windows)
256
Print Data Directly from a USB Flash Drive
261
Compatible USB Flash Drives
262
Print Data Directly from a USB Flash Drive or Digital Camera Supporting Mass Storage
263
Create a PRN File for Direct Printing (Windows)
265
Network
266
Get Started
267
Supported Basic Network Features
268
Network Management Software and Utilities
269
Learn about Network Management Software and Utilities
270
Additional Methods of Configuring Your Machine for a Wireless Network
271
Before Configuring Your Machine for a Wireless Network
272
Configure Your Machine for a Wireless Network
273
Configure Your Machine for a Wireless Network Using the One Push Method of Wi-Fi Protected Setup ™ (WPS)
274
Configure Your Machine for a Wireless Network Using the PIN Method of Wi-Fi Protected Setup (WPS)
275
Configure Your Machine for a Wireless Network in Ad-Hoc Mode (for IEEE 802.11B/G/N)
278
Configure Your Machine for a Wireless Network in Ad-Hoc Mode Using an Existing SSID
280
Configure Your Machine for a Wireless Network Using the Machine's Control Panel Setup Wizard
282
Configure Your Machine for a Wireless Network When the SSID Is Not Broadcast
284
Configure Your Machine for an Enterprise Wireless Network
286
Use Wi-Fi Direct
288
Print or Scan from Your Mobile Device Using Wi-Fi Direct
289
Configure Your Wi-Fi Direct Network
290
Wi-Fi Direct Network Configuration Overview
291
Configure Your Wi-Fi Direct Network Using the One-Push Method
292
Configure Your Wi-Fi Direct Network Using the One-Push Method of Wi-Fi Protected Setup ™ (WPS)
293
Configure Your Wi-Fi Direct Network Using the PIN Method
294
Configure Your Wi-Fi Direct Network Using the PIN Method of Wi-Fi Protected Setup ™ (WPS)
295
Configure Your Wi-Fi Direct Network Manually
296
Advanced Network Features
297
Print the Network Configuration Report
298
Configure Your Mail Server Settings Using Web Based Management
299
Configure the Machine for Email or Internet Fax (I-Fax)
301
Fax Using the Internet (I-Fax)
302
Initial Setup for Email or Internet Fax (I-Fax)
304
Send an Internet Fax (I-Fax)
305
Poll the Server Manually
306
How Your Computer Receives an I-Fax
307
Forward Received Email and Fax Messages
308
Relay Broadcast
309
Relay Broadcast from Your Computer
313
I-Fax Options
314
Internet Fax (I-Fax) Verification Mail
315
Enable Send Notifications for TX Verification Mail
316
Enable Receive Notification for TX Verification Mail
317
Error Mail
318
Use the Send Fax to Server Feature
319
Before Sending a Fax to the Fax Server
320
Enable Fax to Server
321
Operate Fax to Server
322
Print the WLAN Report
323
Wireless LAN Report Error Codes
324
Configure and Operate LDAP Search
326
Change LDAP Configuration Using Web Based Management
327
Synchronize Time with the SNTP Server Using Web Based Management
329
Configure Date and Time Using Web Based Management
330
Configure the SNTP Protocol Using Web Based Management
331
Technical Information for Advanced Users
333
Gigabit Ethernet (Wired Network Only)
334
Configure the Gigabit Ethernet Settings Using Web Based Management
335
Reset the Network Settings to the Factory Settings
336
Security
337
Lock the Machine Settings
338
About Using Setting Lock
339
Set the Setting Lock Password
340
Change the Setting Lock Password
341
Network Security Features
343
Before Using Network Security Features
344
Secure Function Lock 3.0
345
Before Using Secure Function Lock
346
Configure Secure Function Lock 3.0 Using Web Based Management
347
Configure Public Mode for Secure Function Lock
349
Additional Secure Function Lock 3.0 Features
350
Register a New ID Card Using Machine's Control Panel
351
Use Active Directory Authentication
352
Introduction to Active Directory Authentication
353
Configure Active Directory Authentication Using Web Based Management
354
Use LDAP Authentication
357
Introduction to LDAP Authentication
358
Configure LDAP Authentication Using Web Based Management
359
Manage Your Network Machine Securely Using SSL/TLS
361
Introduction to SSL/TLS
362
Brief History of SSL/TLS
363
Benefits of Using SSL/TLS
364
Certificates and Web Based Management
365
Supported Security Certificate Features
366
Create and Install a Certificate
367
Self-Signed Certificate
368
Create and Install a Self-Signed Certificate
369
Create a Self-Signed Certificate
370
Install the Self-Signed Certificate for Windows Users with Administrator Rights
372
Import the Self-Signed Certificate
377
Export the Self-Signed Certificate
378
Create and Install a Certificate from a Certificate Authority (CA)
379
Create a Certificate Signing Request (CSR)
380
Import and Export the Certificate and Private Key
383
Import a Certificate and Private Key
384
Export the Certificate and Private Key
385
Import and Export a CA Certificate
386
Import a CA Certificate
387
Export a CA Certificate
388
Manage Multiple Certificates
389
Manage Your Network Machine Securely Using Web Based Management
390
Print Documents Securely Using SSL/TLS
392
Manage Your Network Machine Securely Using Ipsec
393
Introduction to Ipsec
394
Configure Ipsec Using Web Based Management
395
Configure an Ipsec Address Template Using Web Based Management
397
Configure an Ipsec Template Using Web Based Management
399
Ikev1 Settings for an Ipsec Template
401
Ikev2 Settings for an Ipsec Template
404
Manual Settings for an Ipsec Template
408
Send or Receive an Email Securely
411
Configure Email Sending or Receiving Using Web Based Management
412
Send an Email with User Authentication
413
Email Server Settings
413
Send or Receive an Email Securely Using SSL TLS
414
Verify Server Certificate
414
Use IEEE 802.1X Authentication for a Wired or a Wireless Network
416
What Is IEEE 802.1X Authentication
417
Configure IEEE 802.1X Authentication for a Wired or a Wireless Network Using Web Based Management (Web Browser)
418
IEEE 802.1X Authentication Methods
420
Store Print Log to Network
421
Store Log to Network Overview
422
Configure the Store Print Log to Network Settings Using Web Based Management
423
Mobile/Web Connect
427
Print with Google Cloud Print
428
Print with Mopria
429
Print from a Mobile Device
430
Controlcenter
431
Controlcenter4 (Windows)
432
Change the Operation Mode in Controlcenter4 (Windows)
433
Scan Using Controlcenter4 Home Mode (Windows)
435
Scan Using Controlcenter4 Advanced Mode (Windows)
436
Set up this Machine Using Controlcenter4 (Windows)
437
Create a Custom Tab Using Controlcenter4 Advanced Mode (Windows)
439
Troubleshooting
441
Error and Maintenance Messages
442
Transfer Your Faxes or Fax Journal Report
448
Transfer Faxes to Another Fax Machine
449
Transfer Faxes to Your Computer
450
Transfer the Fax Journal Report to Another Fax Machine
451
Document Jams
452
Document Is Jammed in the Top of the ADF Unit
453
Document Is Jammed under the Document Cover
454
Remove Small Scraps of Paper Jammed in the ADF
455
Paper Jams
456
Paper Is Jammed in the MP Tray
457
Paper Is Jammed in the Paper Tray
458
Paper Is Jammed in the Back of the Machine
460
Paper Is Jammed Inside the Machine
462
Paper Is Jammed in the 2-Sided Tray
464
Printing Problems
467
Improve the Print Quality
469
Telephone and Fax Problems
474
Set Dial Tone Detection
477
Set Telephone Line Compatibility for Interference and Voip Systems
478
Network Problems
479
Error Messages
480
Where Can I Find My Machine's Network Settings
482
I Cannot Complete the Wireless Network Setup Configuration
483
My Machine Cannot Print, Scan, or PC-FAX Receive over the Network
485
I Want to Check that My Network Devices Are Working Correctly
487
Other Problems
488
Copying Difficulties
488
Check the Machine Information
490
Reset Your Machine
491
Reset Functions Overview
492
Routine Maintenance
493
Replace Supplies
494
Replace the Toner Cartridge
496
Replace the Imaging Unit
499
Reset the Drum Counter
502
Clean the Machine
503
Clean the Scanner
505
Clean the Touchscreen LCD
506
Clean the Corona Wire
507
Clean the Imaging Unit
509
Clean the Paper Pick-Up Rollers
513
Check the Remaining Life of Parts
515
Replace Periodic Maintenance Parts
516
Machine Settings
517
Change Machine Settings from the Control Panel
518
In the Event of Power Failure (Memory Storage)
519
General Settings
520
Adjust the Machine's Volume
521
Change for Daylight Saving Time Automatically
522
Set Sleep Mode Countdown
523
About Deep Sleep Mode
524
Set Auto Power off Mode
525
Set the Date and Time
526
Set the Time Zone
527
Adjust the LCD Backlight Brightness
528
Change How Long the LCD Backlight Stays on
529
Set Your Station ID
530
Set Tone or Pulse Dialling Mode
531
Reduce Toner Consumption
532
Prevent Dialling a Wrong Number (Dial Restriction)
533
Reduce Printing Noise
534
Change the Language on the LCD
535
Save Your Favourite Settings as a Shortcut
536
Add Shortcuts
537
Change or Delete Shortcuts
538
Print Reports
539
Print a Report
541
Settings and Features Tables
542
Settings Tables
543
Features Tables
552
Change Machine Settings from Your Computer
559
Change Machine Settings Using Web Based Management
560
What Is Web Based Management
561
Access Web Based Management
563
Set a Login Password for Web Based Management
564
Change the Machine Settings Using Remote Setup
565
Remote Setup (Windows)
566
Appendix
572
Specifications
573
General Specifications
573
Document Size Specification
574
Print Media Specifications
575
Fax Specifications
576
Copy Specification
576
Scanner Specifications
577
Printer Specifications
577
Interfaces Specifications
577
How to Enter Text on Your Machine
579
Glossary
581
Active Directory Authentication
588
Address Book List
588
Auto Reduction
589
Automatic Fax Transmission
589
Automatic Redial
589
Backup Print
589
Coding Method
591
Communication Error (or Comm. Error)
591
Compatibility Group
591
Digital Signature
592
Distinctive Ring
592
Dual Access
592
Extension Telephone
593
Fax Forwarding
593
Fax Journal
593
Fine Resolution
594
Group Number
594
Infrastructure Mode
595
Internet Fax
595
Journal Period
596
MAC Address
596
Manual Fax
596
Memory Receive
597
Network Configuration Report
597
Shared Key Cryptosystem
601
SMTP Client
601
SMTP over SSL
601
Standard Resolution
602
Subnet Mask
602
WINS Server
604
WLAN Report
604
WPA-PSK/WPA2-PSK Authentication Method
604
Xmit Report (Transmission Verification Report)
605
Advertisement
Konica Minolta bizhub 5020i User Manual (227 pages)
Brand:
Konica Minolta
| Category:
All in One Printer
| Size: 13 MB
Table of Contents
Table of Contents
2
Safety Information
6
Conventions
6
Product Statements
6
Learning about the Printer
9
Selecting a Location for the Printer
9
Printer Configurations
10
Attaching Cables
11
Using the Control Panel
13
Understanding the Status of the Sleep Button and Indicator Light
13
Using the Embedded Web Server
14
Printing a Menu Settings Page
14
Printing the Network Setup Page
14
Using the Keyboard on the Display
14
Setting up and Using the Home Screen Applications
15
Using the Home Screen
15
Customizing the Home Screen
16
Using Display Customization
16
Managing Contacts
17
Loading Paper and Specialty Media
19
Setting the Size and Type of the Specialty Media
19
Configuring Universal Paper Settings
19
Loading Trays
19
Loading the Multipurpose Feeder
21
Linking Trays
22
Supported Paper
23
Supported Paper Sizes
23
Supported Paper Types
25
Supported Paper Weights
25
Printing
26
Printing from a Computer
26
Printing from a Mobile Device
26
Printing from a Flash Drive
27
Supported Flash Drives and File Types
28
Configuring Confidential Jobs
29
Printing a Font Sample List
29
Printing a Directory List
29
Canceling a Print Job
29
Copying
31
Making Copies
31
Copying Photos
31
Copying on Letterhead
31
Copying on both Sides of the Paper (Two-Sided)
31
Reducing or Enlarging Copies
32
Collating Copies
32
Placing Separator Sheets between Copies
32
Copying Multiple Pages Onto a Single Sheet
32
Creating a Copy Shortcut
32
E-Mailing
33
Setting up the E-Mail Function
33
Configuring E-Mail Settings
33
Sending an E-Mail
33
Creating an E-Mail Shortcut
34
Faxing
35
Setting up the Printer to Fax
35
Sending a Fax
48
Scheduling a Fax
49
Creating a Fax Destination Shortcut
49
Changing the Fax Resolution
49
Adjusting the Fax Darkness
49
Viewing a Fax Log
49
Blocking Junk Faxes
50
Holding Faxes
50
Forwarding a Fax
50
Scanning
51
Scanning to an FTP Server
51
Creating an FTP Shortcut
51
Scanning to a Flash Drive
51
Sending Scanned Documents to a Computer
52
Understanding the Printer Menus
53
Menu Map
53
Device
54
Print
63
Paper
72
Copy
74
Fax
78
E-Mail
90
Ftp
97
USB Drive
102
Network/Ports
107
Security
119
Reports
127
Help
128
Troubleshooting
129
Securing the Printer
130
Locating the Security Slot
130
Erasing Printer Memory
130
Erasing Printer Hard Disk Memory
130
Configuring Printer Hard Disk Encryption
131
Restoring Factory Default Settings
131
Statement of Volatility
131
Maintaining the Printer
133
Networking
133
Cleaning Printer Parts
135
Ordering Parts and Supplies
138
Replacing Parts and Supplies
139
Moving the Printer
150
Saving Energy and Paper
151
Clearing Jams
153
Avoiding Jams
153
Identifying Jam Locations
154
Paper Jam in the Front Door
155
Paper Jam in the Rear Door
158
Paper Jam in the Standard bin
159
Paper Jam in the Duplex Unit
160
Paper Jam in Trays
161
Paper Jam in the Multipurpose Feeder
161
Paper Jam in the Automatic Document Feeder
162
Troubleshooting
164
Network Connection Problems
164
Internal Option Problems
166
Paper Feed Problems
167
Printing Problems
169
Faxing Problems
198
Scanning Problems
201
Contacting Customer Support
205
Upgrading and Migrating
206
Hardware
206
Software
211
Firmware
214
Notices
215
Index
222
Konica Minolta bizhub 5020i Shortcut Manual (32 pages)
Brand:
Konica Minolta
| Category:
Printer
| Size: 7 MB
Table of Contents
Control Panel
3
Home Screen
4
Copy Function
6
Scan Function
10
Fax Function
16
Print Function
26
Replacing Toner
29
Check Meter
30
Advertisement
Advertisement
Related Products
Konica Minolta bizhub 501
Konica Minolta bizhub 552
Konica Minolta BIZHUB 550
Konica Minolta BIZHUB 500
Konica Minolta bizhub 554E
Konica Minolta magicolor 5670
Konica Minolta magicolor 5650
Konica Minolta bizhub 502
Konica Minolta BIZHUB 558
Konica Minolta bizhub 550i
Konica Minolta Categories
All in One Printer
Printer
Digital Camera
Measuring Instruments
Copier
More Konica Minolta Manuals
Login
Sign In
OR
Sign in with Facebook
Sign in with Google
Upload manual
Upload from disk
Upload from URL