Sign In
Upload
Manuals
Brands
Jandy Manuals
Lighting Equipment
AquaPure Ei Series
Jandy AquaPure Ei Series Manuals
Manuals and User Guides for Jandy AquaPure Ei Series. We have
3
Jandy AquaPure Ei Series manuals available for free PDF download: Installation And Operation Manual, Manual, Instructions
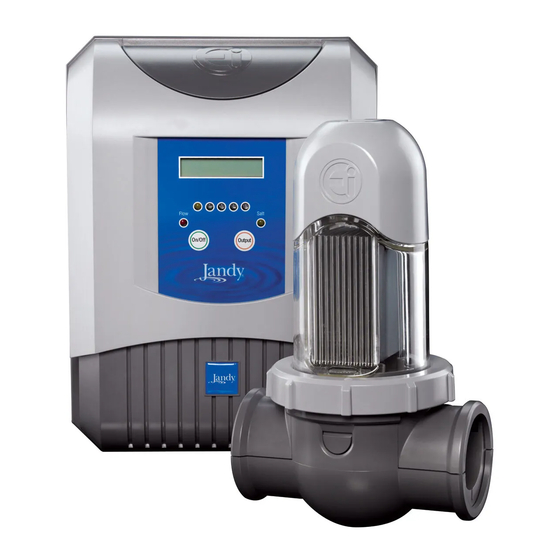
Jandy AquaPure Ei Series Installation And Operation Manual (96 pages)
Chlorine Generating Device 120V Plug-In
Brand:
Jandy
| Category:
Water Filtration Systems
| Size: 7.96 MB
Table of Contents
English
3
Table of Contents
3
Section 1. Important Safety Instructions
5
Section 2. System Description
8
Product Specifi Cations
8
Figure 1. Example of Installation
8
Figure 2. Carton Contents
9
Product Contents
9
Section 3. Installation Instructions
10
Materials and Tools
10
Installation Requirements
10
Figure 3. Installation Requirements
10
Figure 7. Marking Pipe for Drilling Feeder Holes
11
Figure 9. Pipe Spacer
11
Figure 8. Drilling Feeder Holes
11
Figure 5. Attaching the Power Pack
11
Figure 6. Disassemble the Cell and Pod
11
Install the Power Pack, Cell, and Pod
11
Figure 4. Installation Requirements
11
Figure 15. Locking Ring Tool
12
Figure 18. Pod Connector
12
Figure 17. Connecting Cell Leads
12
Figure 16. Locking Ring Level
12
Figure 13. Installing Pod and Cell
12
Figure 14. Locking Ring Alignment
12
Figure 11. Water Flow Arrows
12
Figure 10. Cell Clamps
12
Figure 12. Cell Attached
12
Figure 21. Bonding Lug Locations
13
Figure 22. Example of Bypass Installation
13
Figure 20. Bonding Wire Attached to Power Pack
13
Figure 19. Bonding Wire
13
Bypass Plumbing Instructions: if Flow Rate Exceeds 92 GPM (348 LPM)
13
Alternative Installation (When Pipe Is Obstructed)
14
Connection to an Aqualink RS Control System or PDA (Optional)
14
Verify the Controller Type on the Power Pack Is Set Correctly
14
Figure 23. Example of Alternative Installation
14
System or PDA
15
Figure 24. Accessing and Wiring to the Power
15
Figure 25. Communication Wiring between Power Pack and Aqualink ® RS Control System or PDA Network
15
Testing the Connection
16
Chemistry You Need to Know
17
Determining Pool Size (Gallons of Water in Your Pool)
17
Determining Pool Size (Litres of Water in Your Pool)
17
Section 4. Pool Water Preparation
17
Optimum Pool Water Conditions
18
Chlorine Testing
18
Salt (Nacl Sodium Chloride)
18
When to Add Salt
18
What Type of Salt to Use
19
How Much Salt to Use
19
How to Add Salt to the Pool
20
Approximate Pounds and Kilograms of Salt Needed to Obtain 4000 Ppm (4.0 Gpl)
20
Approximate Pounds and Kilograms of Stabilizer Needed to Obtain 50 Ppm
21
Section 5. Operating Instructions
22
Control Panel
22
Turning Power Pack On/Off (Manually)
22
Setting the Chlorine Output Level
22
Figure 26. Control Panel on the Power Pack
22
Connection to an Aqualink RS / PDA Control System
23
Polarity Reversal
23
Backup Battery
23
Monthly
24
Daily
24
Section 6. Maintenance Instructions
24
Cleaning the Cell
25
Figure 27. Undo Locking Ring
25
Figure 28. Remove the Cell
25
Figure 29. Invert the Cell
25
Winterizing
26
Winterizing Procedure
26
Figure 30. Installing the Winterizing Caps
26
Figure 31. Locking Ring Level
26
Problems and Corrective Action
27
Section 7. Troubleshooting
27
Section 8. Replacement Parts and Exploded Views
30
Parts List
30
Exploded Views
31
Figure 32. Cell Exploded View
31
Figure 33. Pod Exploded View
31
Figure 34. Power Pack, Locking Ring Tool, and Winterizing Cap
31
Français
35
Consignes de Sécurité Importantes
37
Description du Système
40
Spécifi Cations du Produit
40
Exigences D'installation
42
Guide D'installation
42
Matériaux et Outils
42
Installer le Bloc D'alimentation, la Cellule et le Capteur
43
Instructions de Tuyauterie de Dérivation : si le Débit Dépasse 348 LPM (92 GPM)
45
Autre Installation (lorsque le Tuyau Est Bloqué)
46
Connexion à un Système de Commande
46
Vérifi er si le Type de Régulateur Sur le Bloc D'alimentation Est Réglé Correctement
46
Câblage à un Système de Commande Aqualink ® RS ou ADP
47
Tester la Connexion
48
Connaissances de Chimie Essentielles
49
Déterminer la Grandeur de la Piscine (Capacité en Gallons D'eau)
49
Déterminer la Grandeur de la Piscine (Capacité en Litres D'eau)
49
Préparation de L'eau de la Piscine
49
Analyse du Chlore
50
Conditions Optimales pour L'eau de la Piscine
50
Quand Ajouter du Sel
50
Sel (Chlorure de Sodium Nacl)
50
Quel Type de Sel Utiliser
51
Quelle Quantité de Sel Utiliser
51
Comment Verser le Sel Dans la Piscine
52
Allumer et Éteindre le Bloc D'alimentation (Manuellement)
54
Confi Guration du Niveau de Production du Chlore
54
Consignes D'utilisation
54
Panneau de Commande
54
Connexion au Système de Commande Aqualink RS / ADP
55
Inversion de la Polarité
55
Pile de Secours
55
Entretien Mensuel
56
Entretien Quotidien
56
Instructions D'entretien
56
Nettoyage de la Cellule
57
Préparation pour L'hiver
58
Dépannage
59
Problèmes et Mesures Correctives
59
Liste des Pièces
62
Pièces de Rechange et Vues Éclatées
62
Vues Éclatées
63
Español
67
Seguridad
69
Especifi Caciones del Producto
72
Sección 2. Descripción del Sistema
72
Contenido del Producto
73
Materiales y Herramientas
74
Requisitos de Instalación
74
Sección 3. Instrucciones de Instalaciones
74
Instalación de la Fuente de Enérgía y la Celda
75
Instrucciones para Fontanería de Paso [Si el Caudal Excede 348 Lpm (92 Gpm)]
77
Conexión del Sistema de Control Aqualink® RS O PDA (Opcional)
78
Instalación Alternativa (cuando la Tuberia Esta Obstruida)
78
Verifi que el Tipo de Controlador en la Fuente de Energía Este Confi Gurado Correctamente
78
Conexión con el Sistema de Control Aqualink RS O PDA
79
Probar la Conexión
80
Determinación del Tamaño de la Piscina (Galones de Agua en la Piscina)
81
Determinación del Tamaño de la Piscina (Litros de Agua en la Piscina)
81
Nociones de Química que Debe Conocer
81
Piscina
81
Seccion 4. Preparación del Agua de la
81
Condiciones Óptimas del Agua de la Piscina
82
Cuándo Se Debe Añadir la Sal
82
Prueba de Cloro
82
Sal (Cloruro de Sodio Nacl )
82
Qué Cantidad de Sal Se Debe Usar
83
Qué Tipo de Sal Se Debe Usar
83
Cómo Se le Debe Añadir la Sal a la Piscina
84
Ajuste de la Salida de Nivel de Cloro
86
Encendiendo y Apagando (Manualmente)
86
Encendiendo/Apagando de la Fuente de Energía (Usando el Temporizador de la Bomba)
86
Panel de Control
86
Sección 5. Instrucciones de Operacion
86
Batería de Reserva
87
Conexión al Sistema de Control Aqualink
87
Inversión de Polaridad
87
Rs / Pda
87
Diariamente
88
Mensualmente
88
Sección 6. Instrucciones de Mantenimiento
88
Limpieza de la Celda Electrolítica - Según Se Requiera
89
Hibernación
90
Procedimiento de Hibernación
90
Averías
91
Problemas y Acciones Correctivas
91
Lista de Repuestos
94
Sección 8. Repuestos y Vista Ampliada
94
Vista Ampliada
95
Advertisement
Jandy AquaPure Ei Series Manual (8 pages)
Replacement Kits
Brand:
Jandy
| Category:
Lighting Equipment
| Size: 2.27 MB
Table of Contents
Connection to an Aqualink ® RS Control System or PDA (Optional)
4
Wiring to the Aqualink RS Control System or PDA
5
Testing the Connection
7
Parts List
7
Jandy AquaPure Ei Series Instructions (4 pages)
Replacement Kits for Models APURE35PLG / 35PLGC
Brand:
Jandy
| Category:
Lighting Equipment
| Size: 1.8 MB
Advertisement
Advertisement
Related Products
Jandy APURE35
Jandy AquaLink TCX
Jandy AquaPure
Jandy AquaPure Ei
Jandy AquaPalm
Jandy AquaLink RS
Jandy AquaLink Touch
Jandy AquaLink RS PDA
Jandy AquaLink
Jandy Aqualink RS OneTouch
Jandy Categories
Water Filtration Systems
Lighting Equipment
Swimming Pool Heater
Water Pump
Swimming Pool Filter
More Jandy Manuals
Login
Sign In
OR
Sign in with Facebook
Sign in with Google
Upload manual
Upload from disk
Upload from URL