Sign In
Upload
Manuals
Brands
INSYS Manuals
Locks
EloStar Master 3X0
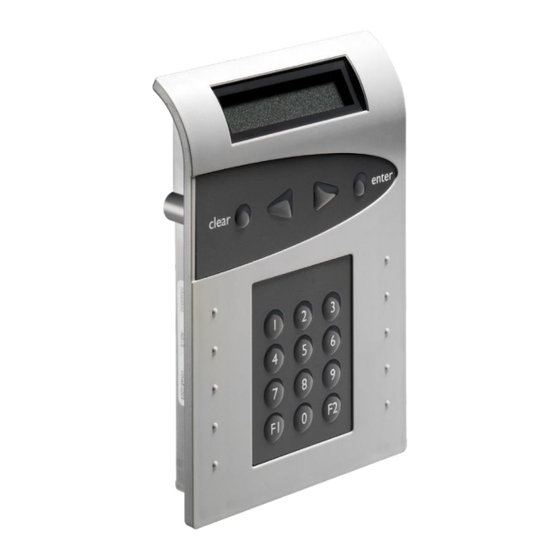
INSYS EloStar Master 3X0 Manuals
Manuals and User Guides for INSYS EloStar Master 3X0. We have
1
INSYS EloStar Master 3X0 manual available for free PDF download: Assembly Instructions Manual
INSYS EloStar Master 3X0 Assembly Instructions Manual (112 pages)
Brand:
INSYS
| Category:
Locks
| Size: 2 MB
Table of Contents
Imprint
2
Accreditations
2
Table of Contents
2
Table of Contents
3
General Information on this Manual
6
User Qualification
6
Content and Usage
6
Text Marks and Formatting
6
Safety Warnings
6
Icons and Their Meaning
7
Operating Instructions
8
Scope of Delivery
8
Components
9
UL Compliance
9
System Description
10
Elostar Master 3X0 / 4X0 X.X (Smart)
10
System Diagrams (Samples)
11
Overview of Functions
13
Standard Functions
13
Setting Functions with Optional Software
14
Optional Functions with Version EM11 and Higher
15
Optional Functions with Version EM12 and Higher
19
Optional Functions with Version EM13
20
System Components
21
Operating Unit Qpad Elostar Master
21
Operating Unit Flatcontrol Elostar Master
21
Lock INSYS Lock 300 / 400 Master
22
Optional Accessory: Blocking Unit Eloxt II
23
Optional Accessories: Cards Twincard
25
Intended Use
26
Technical Data
26
Components
26
Default Settings
28
Assembly
29
Survey Assembly and Installation
29
Mounting the Operating Unit Qpad
30
Attaching the Operating Unit Qpad
30
Connecting Extensions to Qpad
33
Mounting the Operating Unit Flatcontrol
34
Attaching the Operating Unit Flatcontrol
34
Connecting Extensions to Flatcontrol
36
Displaying the Hidden Menu
37
Assembling the Lock
38
Mounting the INSYS Lock 300 / 500 Master
38
Connecting the Lock
39
Assembling Blocking Device Eloxt II
40
Fastening Blocking Device Eloxt II
40
Connecting Blocking Device Eloxt II
41
Connecting the Release Contacts of Eloxt II
41
Connecting the Bolt Mechanism Contacts of Eloxt II
42
Connecting the Alarm Contact of Eloxt II
42
Connecting the Lock Status Contact of Eloxt II
43
Connecting the Door-Open-Alarm-Contact of Eloxt II
43
Extending the Tamper Line of Eloxt II
44
Start-Up
45
Special Key Functions
45
Initialising the System
45
Registering the Lock(S)
45
Finishing the Start-Up Process
47
Flatcontrol: Attaching the Menu Keypad
47
Operation
48
Operating Unit Qpad
48
Operating Unit Flatcontrol
48
Display and Key Functions
49
Hotkeys
49
System State and Configuration
50
System State
50
Configuration Via PC Software (Optional)
50
Configuration with Qpadcomm
50
Configuration Via Twincomm
50
User- / Personnel Numbers
51
Entering User- / Personnel Numbers
51
Operation with OTC Dependent (up to EM22)
52
Conditions for OTC Dependent
52
User Groups
52
User Authorisation
53
Fields and Boxes of the User Matrix
54
Authorisations Ex Works
55
Authorisation Master / User / Manager
55
PIN Codes
56
Types and Numbers of PIN Codes in Every Lock
56
Entering PIN Code
57
Entering PIN Code Via Menu Keys
57
Entering Code Via Numeric Keys
57
Cards
58
RFID Cards
58
Code Card Twincard Code Access (Not with Qpad)
58
Twincard Configuration II / - Language
58
Inserting Chip Card into Flatcontrol / Reader
58
Reading an RFID Card at the Operating Unit / Reader
59
Menu Navigation in Operating Unit
60
Operation with CIT Function Selected
61
Selecting the Master / CIT Master
61
Opening and Closing
62
Opening a Lock with PIN Code
62
Opening also with Code Card (RFID Cards Also)
63
Triggering Silent Alarm When Opening
64
Opening the Lock with Dual Code
65
Opening with Unlocking Delay
66
Opening with Unlocking Delay and Release Time
66
Opening with Parallel Code
67
Opening with OTC Dependent
68
Closing a Lock
69
Closing a Lock with Code Input
69
Closing Automatically with the Door Switch
69
Adjusting the System Settings
70
Settings: Lock System
70
Lock System: Dual Code
70
Lock System: Parallel Code
70
Lock System: Forced Sequence
71
Lock System: Time Delay
71
Lock System: Time Locked / Week Programs
71
Setting the Date and the Time of Day
72
Switching Alarm Devices on / off
73
Activating the CIT Function (2 User Groups) / Counter Reset
73
Exporting, Displaying and Printing Configuration and Protocol (with Qpad)
74
Exporting the Protocol (Flatcontrol)
75
Displaying / Printing the Protocol (Flatcontrol)
76
Importing Configuration and Language (Qpad)
77
Importing the Configuration (Flatcontrol)
78
Configuration Import: Error Messages
79
Exporting the Configuration (Flatcontrol)
81
Selecting a Language
81
Importing a Language (Flatcontrol)
82
Administrating Users
83
Changing the System Manager Code
83
Changing the Master Code / CIT Master Code
84
Registering PIN Code for Users
85
Changing a PIN Code
86
Deregistering PIN Code
87
PIN Code User Display
88
Registering a Code Card (RFID Cards Also)
89
Deregistering a Code Card (also RFID Cards)
90
Code Card User Display
91
Service
92
Supplying Power in Case of Power Breakdown
92
Displaying Status / Info about the System
92
Performing a Reset
93
Registering a New Lock
95
Additional New Lock
95
Changing Locks
96
Locking the System Despite Defect Bolt Work Contact
97
Motor Service
98
Licensing
99
Enabling Instant / Immediate Blocking
99
Maintenance, Cleaning and Repair
100
Changing the Battery of the Qpad Battery Case
100
Trouble Shooting
101
Supplying Power in Case of Power Breakdown
101
Changing the Operating Unit Qpad
102
Changing the Operating Unit Flatcontrol
104
Error Messages
107
Technical Support
111
Disposal
111
Notes
112
Advertisement
Advertisement
Related Products
INSYS EloStar Master
INSYS EloStar Master 4X0
INSYS EloStar Master 3X0 smart
INSYS EloStar Master 4X0 smart
INSYS EloStar Master smart
INSYS 336 4.1
INSYS i-modul 336 LL
INSYS 336
INSYS CombiLock 200 pro
INSYS CombiLock 200 RFID
INSYS Categories
Modem
Network Router
Network Hardware
Locks
Door locks
More INSYS Manuals
Login
Sign In
OR
Sign in with Facebook
Sign in with Google
Upload manual
Upload from disk
Upload from URL