Sign In
Upload
Manuals
Brands
Hydac Manuals
Test Equipment
CTU 2200
Hydac CTU 2200 Manuals
Manuals and User Guides for Hydac CTU 2200. We have
1
Hydac CTU 2200 manual available for free PDF download: Operating And Maintenance Instructions Manual
Hydac CTU 2200 Operating And Maintenance Instructions Manual (108 pages)
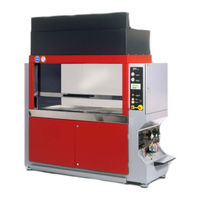
Contamination Test Unit
Brand:
Hydac
| Category:
Test Equipment
| Size: 4 MB
Table of Contents
Imprint
2
Documentation Representative
2
Table of Contents
3
Content
3
Preface
7
Technical Support
7
Product Modification
7
Warranty
7
Using the Documentation
8
Safety Information
9
Signal Words and Their Meaning in the Safety Information and Instructions
9
Structure of the Safety Information and Instructions
10
Warning Signs Used
10
Signs Used for Giving Orders
11
Used Prohibitory Signs
11
Others Used Symbols
12
Signs Used for the Required Specialist Personnel
12
Specialist Personnel - Mechanical
12
Specialist Personnel - Electricity
12
Observe Regulatory Information
13
Proper/Designated Use
13
Improper Use or Use Deviating from Intended Use
15
Qualifications of Personnel / Target Group
16
Wear Suitable Clothing
17
Observe Regulatory Information
17
What to Do in Case of Emergency (EMERGENCY STOP)
17
Transporting the CTU
18
Storing the CTU
18
Decoding the Model Code Label
19
Checking the Scope of Delivery
20
Functional Principle of the CTU
21
Clean-Room Conditions in the Analysis Chamber
23
Filling/Refilling Test Fluid
23
Automatic Inner Chamber Cleaning/Clean Room Cleaning
23
Performing the Contamination Test
23
Achievable Negative Control Values
24
Parts of the CTU
25
Control Elements on the Operating Panel
26
Control Elements on the Operating Console
27
Preparing the CTU for Operation
28
Setting up the CTU
28
Setting up the Electrical Connection of the CTU
29
Connecting the Compressed Air
30
Connecting an Air Extractor
31
Opening/Closing the Door
32
Door with Several Access Holes
33
Door with Gloves
34
Installing Gloves
35
Use Electro-Statically Conductive Gloves
35
Door with Several Access Holes and Small Pane
36
Operating the Filter Membrane Holder
37
Filter Membrane Holder CTMH (Contaminationtest Membrane Holder)
37
Cascading Filter Membrane Holder CTMH
38
Filter Membrane Holder with Union Nut
39
Filter Membrane Holder with Clamp
40
Cascading Filter Membranes
41
Changing the Filter Membrane
42
Labeling the Filter Membrane
44
Operating the Text Display TD 200
45
CTU Switching on
47
Selecting the Operating Mode
48
Stand-By
48
Operation
48
Setting the Vacuum for Suctioning off the Rinsing Fluid
49
Setting the Pressure of the Rinsing Fluid
49
Filling/Refilling Rinsing Fluid
50
Selecting the Rinsing Volume
53
Performing the Contamination Test
54
Cleansing the Clean Room Automatically
56
Automatic Reservoir Change-Over
57
CTU Switching off (Power Down)
58
Preparing the CTU for Operation
59
Clean-Room Conditions in the Analysis Chamber - Rinsing of the Inner Chamber
60
Performing the Spray Extraction Method
60
Performing Maintenance
61
Maintenance Work
62
Maintenance Intervals
62
Inspecting/Cleaning the Machine Compartment
63
Replacing Hoses
63
Selecting the Rinsing Fluid Filter / Return Filter
63
Changing the Filter Element - Type LF
64
Changing the Filter Element - Type MRF1
67
Removing/Fitting Halogen Lights (CTU up to Manufacture Year 2006)
70
Light Spare Parts
72
Removing/Fitting LED Lights (CTU 2200 / 2400 from Manufacture Year 2013)
73
Checking/Maintaining the Spray Gun
74
Changing the Spray Nozzle
74
Replacing the Hose for the Spray Gun
75
Calibrating the Flow Rate Meter
76
Cleaning the Analysis Chamber
76
Clean the Diffuser on the Filter Membrane Holder
76
Cleaning the Door
77
Statically Charged Door
77
Changing the Clean-Room Filters
78
Replacing the Prefilter Mat
78
Replacing the Main Filter
79
Replacing the Main Filter of a CTU 2000
79
Replacing the Main Filter of a CTU 2200 / 2400
80
Emptying the Intermediate Pan
81
Changing the Test Fluid
81
Draining the Reservoirs
82
Reservoir Filling/Refilling
83
Checking the Gloves
83
Permeation of Protective Gloves According to en 374-3:1994
84
Checking the Filter Regulator
86
Setting the Filter Regulator
86
Draining the Filter Regulator
86
Cleaning the Filter Elements of the Filter Regulator
86
Disassembling the Filter Regulator
87
Disassembling the Top Part
87
Disassembling the Bottom Part
87
Assembling the Filter Regulator
87
Assembling the Bottom Part
88
Assembling the Top Part
88
Remedying Error Messages/Malfunctions
89
Hydraulic Circuit
91
Locating Spare Parts
94
Disposing of the CTU
96
Technical Data
97
Attachment
99
EC Declaration of Conformity
99
Customer Support/Service
99
Model Code
100
Explanation of Terms and Abbreviations
101
Index
103
Advertisement
Advertisement
Related Products
Hydac CTU 2 Series
Hydac CTU 2000
Hydac CTU 2400
Hydac CTU12 Series
Hydac CTU 1000
Hydac CTU 1 5 Series
Hydac CTU 105 Series
Hydac CTU 125 Series
Hydac CTU-1051-K-U-Z
Hydac CTU-1250-M-Z-R
Hydac Categories
Water Filtration Systems
Industrial Equipment
Accessories
Control Unit
Switch
More Hydac Manuals
Login
Sign In
OR
Sign in with Facebook
Sign in with Google
Upload manual
Upload from disk
Upload from URL