Sign In
Upload
Manuals
Brands
Hologic Manuals
Medical Equipment
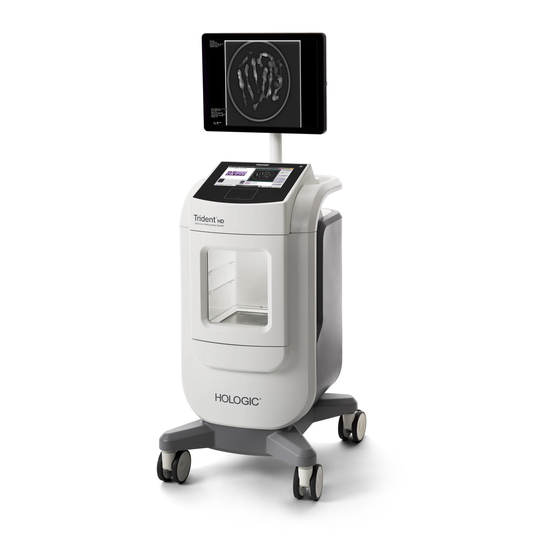
Trident HD
Hologic Trident HD Manuals
Manuals and User Guides for Hologic Trident HD. We have
1
Hologic Trident HD manual available for free PDF download: User Manual
Hologic Trident HD User Manual (96 pages)
Brand:
Hologic
| Category:
Medical Equipment
| Size: 10 MB
Table of Contents
Table of Contents
5
List of Figures
9
List of Tables
11
1 : Introduction
13
Intended Use
13
System Capabilities
13
User Profiles
13
Quality Control Requirements
14
Where to Find the Installation Instructions
14
Where to Find Technical Description Information
14
Warranty Statement
14
Technical Support
14
Product Complaints
14
Hologic Cybersecurity Statement
15
Symbols
15
Descriptions of Warnings, Cautions, and Notes
16
2 : General Information
17
System Overview
17
Figure 1: Trident HD System
17
Safety Information
18
Warnings and Precautions
18
Interlocks
22
Compliance
23
Compliance Requirements
23
Compliance Statements
24
Label Locations
25
Figure 2: Label Locations
25
Table 1: System Labels
26
3 : Components, Controls, and Indicators
27
System Components
27
Figure 3: System Components
27
Figure 4: Specimen Tray Positions
28
Imaging Cabinet Components
28
Figure 5: Specimen Tray Markings for the Full-Field Detector
29
System Connections
30
How to Lock and Unlock a Caster
30
Figure 6: Power and Network Connections
30
How to Move the Console
31
How to Turn on the System and Log in
31
Figure 7: System Power Switch
31
Figure 8: Computer Power Switch
32
Figure 9: Login Screen
32
Figure 10: Startup Screen
33
Windows 10 Information
33
How to Log out
34
How to Turn off the System
34
How to Remove All Power from the System
34
4 : User Interface
35
About the Taskbar
35
Figure 11: the Taskbar
35
Table 2: the Taskbar Sections
35
Select Patient Screen
37
Figure 12: Select Patient Screen
37
Add a New Patient
38
Figure 13: Add Patient Screens
38
Open a Patient
38
Edit the Patient Information
39
Figure 14: Edit Patient Information Screens
39
Figure 15: Split Patient Records Screen
40
Split the Patient Records
40
Figure 16: Select the Correct Procedure to Split Patient Records
41
Figure 17: Select the Correct Patient to Split Patient Records
42
Delete a Patient
43
Figure 18: Filter Tab in the Patient Filter Screen
43
Filters for Patients
43
Table 3: Filter Tab Options (Require Access Privileges)
44
4.2.10 Close the Patient List
45
Admin
45
How to Query the Worklist
45
How to Refresh the Worklist
45
Procedure Screen
46
Figure 19: Procedure Screen
46
Table 4: the Procedure Screen
46
Add a Procedure
47
Figure 20: Add Procedure Dialog Box
47
Figure 21: Tools Tab, Simple
48
Figure 22: Tools Tab, Advanced
48
Retrieve
48
Simple and Advanced Button
48
Close a Patient
49
How to Select an Output Group
49
How to Access Image Review Features
49
How to Use the Output Groups
49
Add or Edit an Output Group
49
How to Use the On-Demand Outputs
50
How to Archive
50
How to Export
50
Print
51
Figure 23: Print Screen
52
5 : the Images
53
Image Display Screen
53
Figure 24: Image Display Screen
53
How to Set the Exposure Techniques
54
How to Acquire an Image
54
Figure 25: Imaging Enabled
54
Figure 26: X-RAY Button
55
Figure 27: X-RAY Button While the Exposure Is in Progress
55
How to Review the Images
57
Figure 28: Tools Tab in the Procedure Screen
57
Figure 29: the Image Review Tools
58
Image Review Tools
58
Figure 30: the Comments Tab
59
Figure 31: Priors Tab
60
Figure 32: Display Modes
60
Send the Images to the Output Devices
61
6 : Sample Clinical Sequences
63
Example Imaging Workflow
63
Example Sequence of Operation
64
7 : Quality Control
71
Required Quality Control Procedures
71
How to Access the Quality Control Tasks
71
Table 5: Required Procedures
71
Gain Calibration
72
8 : Maintenance, Cleaning, and Disinfecting
73
General Information
73
For General Cleaning
73
For Disinfecting
73
To Prevent Possible Injury or Equipment Damage
74
Component Specific Care
74
How to Clean the Image Display Monitor
74
Power Cord
75
Maintenance
75
Preventive Maintenance Schedules
75
Table 6: User Preventive Maintenance
75
About Reclamation
76
Table 7: Service Preventive Maintenance
76
9 : System Administration Interface
77
Admin Screen
77
Figure 33: Admin Screen
77
Table 8: Admin Screen Functions
77
About Screen
79
Figure 34: System Tab of the about Screen
79
Change the User Language Preference
80
Set Multi Line Procedure Tabs
80
System Tools
81
System Tools for the Radiologic Technologist Manager
81
Figure 35: System Tools Button
81
Figure 36: System Tools Screen
81
Archive Tool
82
Figure 37: Archive Button
82
Table 9: Radiologic Technologist Manager-System Tools Functions
82
Figure 38: Multi Patient on Demand Archive Screen
83
How to Change the Default Lock out Time
84
Figure 39: Export Screen
84
Appendix A: System Specifications
85
Product Measurements
85
Figure 40: Console Measurements
85
Operation and Storage Environment
86
General Conditions for Operation
86
General Conditions for Transport and Storage
86
Console Technical Information
87
General Information
87
Network Environment
87
Electrical Input
87
X-Ray Tube Technical Information
88
X-Ray Generator
88
Imaging System Technical Information
88
Image Receptor
88
Appendix B System Messages and Alerts
89
Error Recovery and Troubleshooting
89
Types of Messages and Alert Messages
89
Fault Levels
89
System Messages
90
Troubleshooting
90
Advertisement
Advertisement
Related Products
Hologic Trident
Hologic Tumark Professional Q
Hologic TUMARK-E13-P-Q
Hologic Tumark Professional X
Hologic TUMARK-BREV-P-X
Hologic TUMARK-E13-P-X
Hologic TUMARK-BREV-P-VISION
Hologic TUMARK-BREV-S-VISION
Hologic TUMARK-E13-S-Q
Hologic TUMARK-E13-P-VISION
Hologic Categories
Medical Equipment
Laboratory Equipment
Server
Control Systems
Test Equipment
More Hologic Manuals
Login
Sign In
OR
Sign in with Facebook
Sign in with Google
Upload manual
Upload from disk
Upload from URL