Sign In
Upload
Manuals
Brands
Hologic Manuals
Medical Equipment
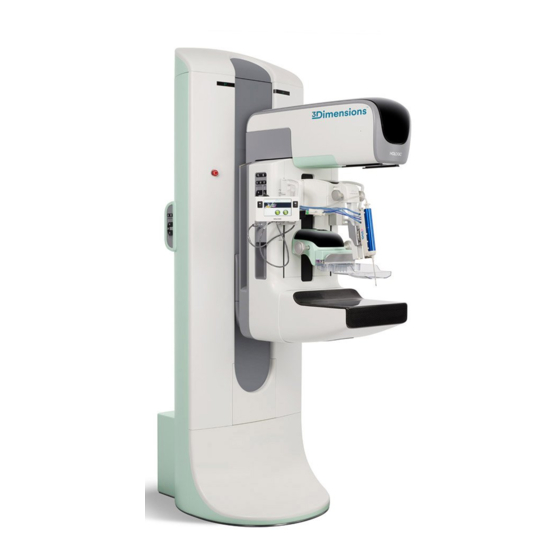
3Dimensions
Hologic 3Dimensions Manuals
Manuals and User Guides for Hologic 3Dimensions. We have
1
Hologic 3Dimensions manual available for free PDF download: User Manual
Hologic 3Dimensions User Manual (100 pages)
Digital Mammography System Digital Tomosynthesis System
Brand:
Hologic
| Category:
Medical Equipment
| Size: 4 MB
Table of Contents
Table of Contents
5
List of Figures
11
List of Tables
15
1 : Introduction
17
Intended Use
17
Contraindications
17
Potential Adverse Effects of Mammography Systems on Health
18
System Capabilities
18
About the Genius 3D Mammography Exam
18
More Information about Tomosynthesis
19
About C-View and Intelligent 2D
21
C-View and Intelligent 2D Software
21
C-View and Intelligent 2D Warnings
21
C-View and Intelligent 2D Theory of Operation
22
User Profiles
22
Mammography Technologist
22
Radiologist
22
Medical Physicist
23
Training Requirements
23
Quality Control Requirements
23
Where to Find the Installation Instructions
23
Where to Find Technical Description Information
23
Warranty Statement
24
Technical Support
24
Product Complaints
24
Hologic Cybersecurity Statement
24
Symbols
25
Descriptions of Warnings, Cautions, and Notes
26
Document Conventions
26
2 : General Information
27
System Overview
27
Figure 1: 3Dimensions™ System
27
C-Arm Overview
28
Figure 2: C-Arm Overview
28
Safety Information
29
Warnings and Precautions
29
Emergency off Switches
33
Figure 3: Emergency off Switch Functionality
33
Interlocks
34
Compliance
34
Compliance Requirements
34
Compliance Statements
36
Label Locations
37
Figure 4: Label Locations
37
Table 1: System Labels
38
3 : System Controls and Indicators
39
System Power Controls
39
Figure 5: System Power Controls
39
Tubestand Controls and Indicators
40
Figure 6: Tubestand Controls and Indicators
40
Tubehead Display
41
Compression Device Controls and Display
41
Figure 7: Tubehead Display
41
Figure 8: Compression Device
41
Figure 9: Compression Device Display
41
C-Arm Control Panels
42
Gantry Control Panels
42
Figure 10: C-Arm Control Panel
42
Figure 11: Gantry Control Panel
42
Dual Function Footswitch
43
Figure 12: Dual Function Footswitch
43
Universal Acquisition Workstation Controls and Displays
44
Figure 13: Universal Acquisition Workstation Controls and Displays
44
4 : Startup, Functional Tests, and Shutdown
45
How to Start the System
45
Figure 14: Turn to Reset the Emergency off Switches
45
Figure 15: Universal Acquisition Workstation Power Buttons
45
Figure 16: Startup Screen
46
Log in
47
Figure 17: Select an Operator (Log In) Screen
47
Perform the Functional Tests
48
Figure 18: C-Arm Control Panel (Left Side Shown)
48
Compression Functional Tests
49
Table 2: Compression Tests
49
C-Arm Movement Functional Tests
50
Table 3: C-Arm up and down Movement
50
Table 4: C-Arm Counterclockwise Rotation
52
Table 5: C-Arm Clockwise Rotation
53
Table 6: C-Arm Rotation Switch
54
Table 7: Automatic C-Arm Counterclockwise Rotation
55
Table 8: Automatic C-Arm Clockwise Rotation
56
Table 9: Automatic MLO Rotation
57
Collimation
58
Table 10: C-Arm Collimation
58
Shifting Paddles
59
Table 11: Shifting Paddle
59
Emergency off Switches Functionality
60
How to Turn off the System
60
How to Remove All Power from the System
60
Figure 19: Emergency off Switch Functionality
60
Figure 20: Universal Acquisition Workstation Power Buttons
60
5 : User Interface
61
Select Function to Perform Screen
61
Figure 21: an Example Select Function to Perform Screen
61
About the Taskbar
62
Figure 22: Taskbar
62
Table 12: Taskbar Menus
62
Select Patient Screen
64
Figure 23: Select Patient Screen
64
Table 13: the Select Patient Screen
64
Figure 24: Enterprise Tab
65
About the Notices Tab
66
Open a Patient
66
Add a New Patient
66
Figure 25: Add Patient Screen
66
Edit the Patient Information
67
Split the Patient Records
67
Figure 26: Split Patient Records Screen
67
Figure 27: Select the Correct Procedure to Split Patient Records
68
Delete a Patient
69
Filters for Patients
69
Figure 28: Filter Tab in the Patient Filter Screen
69
Table 14: Filter Tab Options (Require Access Privileges)
70
Refresh the Worklist
71
Query the Worklist
71
5.3.10 Admin
71
5.3.11 Log out
71
5.3.12 Advanced Workflow Manager
72
Procedure Screen
72
Figure 29: Procedure Screen
72
How to Use the Implant Present Button
73
Table 15: the Procedure Screen
73
How to Use the Paddle Shift Feature
74
Procedure Information Dialog Box
74
Figure 30: Paddle Shift Buttons
74
Figure 31: Procedure Info Dialog Box
74
Add a Procedure
75
Figure 32: Add Procedure Dialog Box
75
Table 16: Procedure Groups
75
Add (or Remove) a View
76
Figure 33: Add View Screen
76
Edit a View
77
Retrieve
77
Figure 34: Edit View Screen
77
Close a Patient
78
How to Access the Image Review Features
78
Output Groups
79
Select an Output Group
79
Add or Edit an Output Group
79
Figure 35: Output Groups Field
79
Custom Output
80
On-Demand Outputs
80
Archive
80
Figure 36: an Example Custom Output Group
80
Export
81
Figure 37: Select the Images for Export
81
Print
82
Figure 38: Export Dialog Box
82
Figure 39: Print Screen
83
6 : Images
85
Image Display Screen
85
Figure 40: Image Display Screen
85
How to Set the Exposure Parameters
86
Select the Image Acquisition Mode (Tomosynthesis Option)
86
Select the Exposure Mode
86
How to Use the AEC Sensor
86
How to Acquire an Image
87
Figure 41: Exposure in Progress
87
Figure 42: Exposure Complete
87
Conventional Imaging Sequence of Events
88
Tomosynthesis Imaging Sequence of Events
88
How to Accept a Rejected Image
89
How to Accept or Reject a Pended Image
89
How to Correct and Reprocess Implant Images
89
If the Image Is Not Accepted
89
If the Image Is Accepted
89
How to Review the Images
90
Image Review Tools Tab
91
Notices Tab
92
Other Image Review Tools
93
Slice Indicator
94
How to Send the Images to the Output Devices
94
How to Use I-View 2D Contrast
95
How to Configure Contrast Settings
98
7 : Accessories
99
How to Install Accessories on the C-Arm
99
Patient Face Shields
100
How to Install and Remove the Retractable Face Shield
100
Advertisement
Advertisement
Related Products
Hologic ThinPrep 3000
Hologic Cenova Image Analytics Server 3.0
Hologic Acessa ProVu
Hologic Affirm
Hologic Affirm ASY-03949
Hologic Affirm ATEC 0909-12
Hologic Affirm ATEC 0909-20
Hologic Affirm ATEC 0912-12
Hologic Affirm ATEC 0912-20
Hologic Affirm ATEC 0914-20
Hologic Categories
Medical Equipment
Laboratory Equipment
Server
Control Systems
Rfid Systems
More Hologic Manuals
Login
Sign In
OR
Sign in with Facebook
Sign in with Google
Upload manual
Upload from disk
Upload from URL