Sign In
Upload
Manuals
Brands
Hioki Manuals
Test Equipment
MR8827
Hioki MR8827 Manuals
Manuals and User Guides for Hioki MR8827. We have
1
Hioki MR8827 manual available for free PDF download: Instruction Manual
Hioki MR8827 Instruction Manual (436 pages)
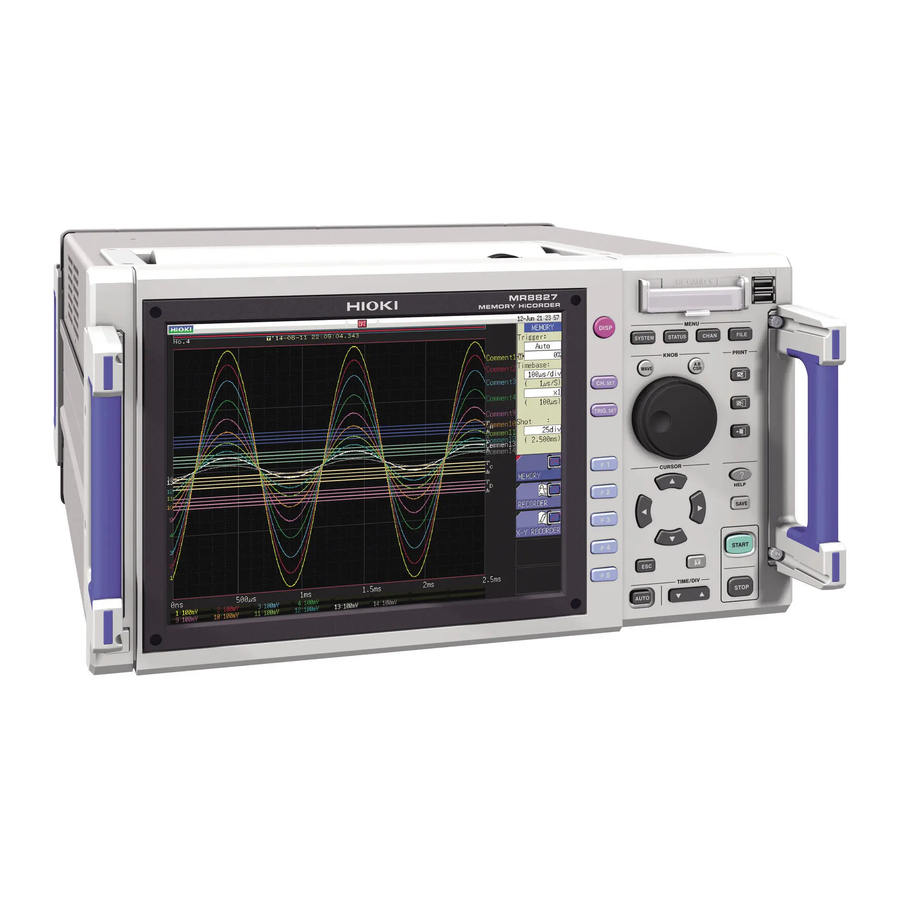
MEMORY HiCORDER
Brand:
Hioki
| Category:
Test Equipment
| Size: 18 MB
Table of Contents
Table of Contents
2
Usage Index
6
Introduction
7
Package Contents
7
Safety Information
8
Operation Precautions
11
1 Overview
20
Product Overview
20
Part Names and Functions
21
Screen Organization
24
Basic Key Operations
26
Use a Mouse to Perform Key Operations
28
2 Measurement Preparation
30
Install or Remove Modules
31
X84; Channel Allocation
32
Connection Cables
33
Prepare Storage Media
45
Storage Media (Inserting a CF Card and USB Memory Stick)
45
To Format Storage Media
47
Load Instrument with Recording Paper (When Model U8350 Printer Unit Is Installed)
48
Power Supply
49
Connect the Power Cord
49
Ground the Functional Earth of this Instrument
49
Turn the Power on and off
50
Set the Clock
51
Adjust the Zero Position (Zero-Adjust)
52
Perform Calibration (When Model MR8990 Is Installed)
53
3 Measurement
54
Measurement Workflow
54
Pre-Measurement Inspection
56
Measurement Configuration
57
Measurement Function
57
Timebase and Sampling Rate
59
Recording Length (Number of Divisions)
62
Screen Layout
64
Select Input Channels
65
Channel Setting Workflow
66
Choose Analog Channel Settings
68
Logic Channel Settings
71
Displayed Sheet
72
Start and Stop Measurement
73
Measurement with Automatic Range Setting (Auto-Ranging Function)
75
4 Y Recorder Function
76
Measurement Workflow
77
Measurement Configuration
78
Start and Stop Measurement
79
Waveform Observation
80
To Save and Print Waveforms
80
5 Save/Load Data and Manage Files
82
Data that Can be Saved and Loaded
84
Save Data
86
Save Types And Workflow
86
Automatically Save Waveforms
87
Save Data Selectively (SAVE Key)
93
Save Waveform Output Data to the Media
97
Load Data
98
Automatically Load Settings (Auto-Setup Function)
101
Manage Files
102
Save Data
103
Check the Contents of a Folder (Open a Folder)
105
Create New Folders
105
Delete Files and Folders
106
Sort Files
107
Rename Files and Folders
108
Copy A File Into A Specified Folder
109
Print the File List
110
6 Printing (When Model U8350 Printer Unit Is Installed)
112
Print Type And Workflow
113
Auto-Print Settings
114
Manual Printing with the PRINT Key (Selective Printing)
117
Setting the Print Density of the Waveform
119
Printer Settings
120
Miscellaneous Printing Functions
123
Report Print (A4 Size Print)
123
Screen Hard Copy
123
List Print
124
Text Comment Printing
124
7 Waveform Screen Monitoring and Analysis
126
Read Measurement Values (Using the AB Cursors)
127
Specify a Waveform Range (AB Cursor)
130
Move the Waveform Display Position
131
About the Display Position
131
Scroll with Jog and Shuttle Knobs (Scroll)
131
Change Position (Jump Function)
132
Perform Waveform X-Y Synthesis
133
Magnify and Compress Waveforms
135
Magnify and Compress Horizontal Axis (Time Axis)
135
Zoom Function (Magnifying a Section of the Horizontal Axis [Time Axis])
136
Vertical Axis (Voltage Axis) Magnification
137
Monitor Input Levels (Level Monitor)
138
Level Monitor
138
Numerical Value Monitor
139
Switch the Waveform Screen Display (Display Menu)
140
Show Upper/Lower Limit on Waveform Screen
141
Show Comments on Waveform Screen
141
Switch the Waveform Display Width
141
Switch the Channel Range Information Display
141
Switch the Displayed Sheet
141
View Block Waveforms
142
8 Utility Functions
144
Add Comments
145
Add a Title Comment
145
Add a Channel Comment
146
Alphanumeric Input
148
Display Waveforms During Recording (Roll Mode)
152
Display New Waveforms over Past Waveforms (Overlay)
153
Setting Channels to Use (Extending the Recording Length)
155
Convert Input Values (Scaling Function)
156
Scaling Examples
158
Set the Waveform Position (Variable Function)
163
Fine Adjustment of Input Values (Vernier Function)
166
Invert the Waveform (Invert Function)
167
Copy Settings to Other Channels (Copy Function)
168
Detailed Settings for Modules
169
Settings for the Anti-Aliasing Filter (A.A.F.) (Model 8968 High Resolution Unit)
171
Probe Attenuation Selection
171
Setting Model 8967 Temp Unit
172
Setting Model 8969 and U8969 Strain Unit
173
Setting Model 8970 Freq Unit
174
Setting Model 8971 Current Unit
177
Setting Model 8972 DC/RMS Unit
177
Setting Model MR8990 Digital Voltmeter Unit
178
Setting Model U8974 High Voltage Unit
179
Setting Model MR8790 Waveform Generator Unit
180
Setting Model MR8791 Pulse Generator Unit
182
Setting Model U8793 Arbitrary Waveform Generator Unit
184
Register the Waveform in the U8793 Arbitrarywaveform Generator Unit
187
Save the Waveforms Registered in the Model U8793 in the Media
190
Setting Output Waveform Parameters
190
9 Trigger Settings
192
Setting Workflow
193
Set the Trigger Mode
194
Analog Signal Triggers
195
Logic Signal Triggers (Logic Trigger)
200
Trigger by Timer or Time Interval (Timer Trigger)
202
Apply an External Trigger (External Trigger)
205
Trigger Manually (Manual Trigger)
205
Pre-Trigger Settings
206
Set the Trigger Start Point (Pre-Trigger)
206
Set Trigger Acceptance (Trigger Priority)
208
Set Trigger Timing
209
Combined Trigger Logic (AND/OR) for Multiple Trigger Sources
211
Use Trigger Settings to Search Measurement Data
212
10 Numerical Calculation Functions
214
Numerical Calculation Workflow
215
Numerical Value Calculation Settings
217
Display Numerical Calculation Results
220
Calculation Result Judgment
221
Display Judgment Results and Signal Output
223
Save Numerical Calculation Results
224
Print Numerical Calculation Results
226
Numerical Calculation Type and Description
227
11 Waveform Calculation Functions
230
Waveform Calculation Workflow
231
Waveform Calculation Settings
233
Display the Trigger Settings to Search Measurement Data
234
Setting Constants
236
Change the Display Method for Calculated Waveforms
237
Waveform Calculation Operators and Results
239
12 Memory Division Function
242
Recording Settings
244
Display Settings
245
13 FFT Function
248
Overview and Features
248
Operation Workflow (Reference Data)
249
FFT Analysis Condition Settings
250
Select the FFT Function
250
Select the Data Source for Analysis (Reference Data)
251
Set the Frequency Range and Number of Analysis Points
252
Thin out and Calculating Data
254
Window Function Settings
255
Analysis Result Peak Value Settings
256
Average Analysis Results (Waveform Averaging)
257
Emphasize Analysis Results (Phase Spectra Only)
260
Analysis Mode Settings
261
Set the Display Range of the Vertical Axis (Scaling)
265
Set and Change Analysis Conditions on the Waveform Screen
266
Select Channels
267
Screen Display Settings
268
Display Running Spectrums
270
Save Analysis Results
273
Print Analysis Results
274
Analysis with the Waveform Screen
275
Analyze after Specifying an Analysis Starting Point
275
FFT Analysis Modes
277
Analysis Modes and Display Examples
277
Analysis Mode Functions
294
14 Waveform Evaluation Function
296
Function
296
Waveform GO/NG Evaluation (MEM, FFT Function)
296
Set the Waveform Area
299
Set the Waveform Evaluation Mode
301
Set Waveform Evaluation Stop Mode
302
Create the Evaluation Area
304
Editor Command Details
305
15 System Environment Settings
310
16 Connect to a PC
314
LAN Connection and Settings (before Using Ftp/Internet Browser/Command Communications)
315
LAN Settings on the Instrument
315
Connect the Instrument to a PC with a LAN Cable
318
Perform Remote Operations on the Instrument (Use an Internet Browser)
320
HTTP Settings on the Instrument
320
Connect to the Instrument with an Internet Browser
321
Operate the Instrument with an Internet Browser
322
Access Files on the Instrument from a PC (Using FTP)
327
FTP Settings at the Instrument
328
Use FTP to Connect to the Instrument
329
Use FTP for File Operations
330
Transferring Data to the PC
331
Wave Viewer (Wv)
332
USB Connection and Settings (before Command Communication)
333
USB Settings on the Instrument
333
Install the USB Driver
333
Controlling the Instrument with Command Communications (LAN/USB)
338
Settings on the Instrument
338
Operate the Instrument Remotely and Acquire Data Using the Model 9333 LAN Communicator
339
17 External Control
340
Connect to External Control Terminals
342
External I/O
343
External Input (START/IN1) (STOP/IN2) (SAVE/IN3)
343
External Output (GO/OUT1) (NG/OUT2)
345
External Sampling (EXT.SMPL)
347
Trigger Output (TRIG OUT)
348
External Trigger Terminal (EXT.TRIG)
349
18 Specifications
350
General Specifications of the Unit
350
Common Functions
353
Measurement Functions
355
Memory Function
355
Recorder Function
356
X-Y Recorder Function
357
FFT Function
357
Other Functions
358
File
363
Module Specifications
365
Model 8966 Analog Unit
365
Model 8967 Temp Unit
366
Model 8968 High Resolution Unit
368
Model 8969 Strain Unit, U8969 Strain Unit
369
Model 8970 Freq Unit
370
Model 8971 Current Unit
372
Model 8972 DC/RMS Unit
373
Model 8973 Logic Unit
375
Model MR8990 Digital Voltmeter Unit
376
Model U8974 High Voltage Unit
378
U8793 Arbitrary Waveform Generator Unit
380
MR8790 Waveform Generator Unit
383
MR8791 Pulse Generator Unit
385
19 Maintenance and Service
388
Trouble Shooting
390
Reset the Instrument
393
Reset System Settings
393
Reset Waveform Data
393
Error Messages
394
Self-Test (Self Diagnostics)
398
ROM/RAM Check
398
Printer Check (When Model U8350 Printer Unit Is Installed)
399
Display Check
399
Key Check
400
System Configuration Check
400
Cleaning
401
Dispose of the Instrument (Lithium Battery Removal)
403
Appendix A1
406
Appx. 1 Default Values for Major
406
Settings
406
Appx. 2 for Reference
407
Appx. 3 about Options
414
Appx. 4 Fft Definitions
418
Advertisement
Advertisement
Related Products
Hioki MR8880-20
Hioki MR8847-51
Hioki MR8847A
Hioki MR8847-52
Hioki MR8847-53
Hioki MEMORY HiCORDER MR8870-20
Hioki MR8875
Hioki MEMORY HiCORDER MR8847-01
Hioki MEMORY HiCORDER MR8847-02
Hioki MEMORY HiCORDER MR8847
Hioki Categories
Measuring Instruments
Test Equipment
Data Loggers
Multimeter
Accessories
More Hioki Manuals
Login
Sign In
OR
Sign in with Facebook
Sign in with Google
Upload manual
Upload from disk
Upload from URL