Sign In
Upload
Manuals
Brands
High End Manuals
Light Fixture
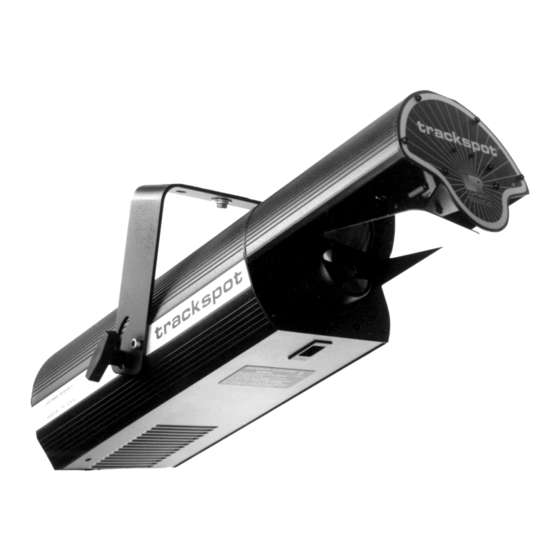
trackspot
High End trackspot Manuals
Manuals and User Guides for High End trackspot. We have
1
High End trackspot manual available for free PDF download: User Manual
High End trackspot User Manual (82 pages)
Brand:
High End
| Category:
Light Fixture
| Size: 2 MB
Table of Contents
Warranty Information
6
Table of Contents
9
Trackspot ® Features
13
Caution and Warning Symbols
14
Cautions
14
Warnings
14
Getting Help
15
Specifications
16
Model Information
16
Physical Specifications
16
Electrical Specifications
16
Environmental Specifications
17
Cable and Connector Specifications
17
DMX Data Cables
17
DMX Data Connectors
17
DMX Data Terminators
17
Safety Specifications
17
Optional Accessories
18
Chapter 1 Setup and Assembly
19
Installing the Yoke
19
Unpacking Trackspot
19
Saving the Shipping Materials
19
Inspecting the Contents
19
Figure 1-1. Side View of Trackspot
20
Figure 1-2. Inserting the Yoke Screws and T-Handles
20
Figure 1-3. Trackspot Rear Panel
21
Powering up the Fixture
21
Selecting the Voltage
21
Understanding LED Indicators
22
Fan LED
22
Enable LED
22
Audio LED
22
Figure 1-4. LED Location on the Rear Panel
22
Chapter 2 Configuring Your Trackspot
23
Choosing a Control Mode
23
DMX 512 Protocol
23
Table 2-1. Channel Assignments
23
LWR Protocol
24
Standard Analog
24
Stand Alone Operation (Master/Slave)
24
Enabling the Control Mode
25
Figure 2-1. Address and Personality DIP Switches
25
Personality Switches
25
Table 2-2. Personality Switch Settings - Operating Modes
25
Table 2-3. Personality Switch Settings - Control Modes
27
Address Switches
28
Installing Remote Enable/Disable
28
Table 2-4. Address Switch Settings
28
External Voltage Source
29
Figure 2-2. Connecting a Remote Enable/Disable Switch to the
29
SPST Switch
29
Additional Hardware
30
Truss or Other Support System
30
Safety Cable
31
Clamp
31
Mounting the Fixture
30
Figure 2-3. Attaching Two C-Clamps to the Trackspot Yoke
32
Figure 2-4. Attaching a Safety Cable to the Mounted Fixture
32
Constructing Cabling
33
Constructing Terminators
33
Figure 2-5. XLR 3-Pin Connectors
33
Figure 2-6. Data Cable Terminator
33
Obtaining Cabling and Terminators
32
Linking the Fixtures
34
DMX 512 Protocol
34
Figure 2-7. Linking Fixtures to a DMX 512 Protocol Controller
35
LWR Protocol
36
Figure 2-8. Linking Fixtures to a LWR Protocol Controller
36
Standard Analog
37
Figure 2-10. Linking Fixtures to a Standard Analog Controller
37
Stand Alone Operation (Master/Slave)
38
Figure 2-11. Linking Master and Slave Fixtures Together
38
Figure 2-12. Lens Tube Adjustment
39
Focusing the Fixture
39
Chapter 3 General Maintenance
41
Replacing Parts
41
Replacing the Lamp
41
Figure 3-1. Underside of Trackspot
42
Figure 3-2. Underside of Trackspot with Access Door Removed
42
Figure 3-3. Proper Way to Handle a QT 8500 Lamp
43
Figure 3-4. Installing a New Lamp
43
Replacing Power Supply Fuses
44
Table 3-1. Description and Function of Trackspot Fuses
44
Figure 3-5. Fuse Locations on the Circuit Board
45
Figure 3-6. Fuse Housing Location on the Rear Panel
45
Replacing the Mirror Assembly
46
Figure 3-7. Mirror Assembly
46
Figure 3-8. Installing a New Mirror
46
Replacing or Installing Custom Gobos
47
Figure 3-9. Custom Gobo
47
Figure 3-10. Gobo Wheel and Gobo Wheel Sensor Location
48
Figure 3-11. Custom Gobo Aperture in Gobo Wheel
48
Cleaning Your Trackspot
49
Cleaning the Outer Surfaces
49
Cleaning the Internal Components
50
Removing the Color Wheel or Gobo Wheel
50
Figure 3-12. Trackspot Internal Components
50
Figure 3-13. Components of the Color and Gobo Wheels
51
Figure 3-14. Pull Wheel up and out to Remove
51
Figure 3-15. Sensor below each Wheel
51
Figure 3-16. Homing Slot on Wheel
51
Reinstalling the Color Wheel or Gobo Wheel
52
Adjusting Wheel Clearance
52
Figure 3-17. allen Screws on the Color Wheel and Gobo Wheel Hubs
53
Chapter 4 Troubleshooting
55
Fixture Does Not Work: no Leds, Fans, Lamp, or Other
55
Functionality (Fixture Appears Dead)
55
Lamp will Not Strike
55
Light Output Is Low, Beam Edge Is very Soft, Images Fuzzy
55
Table 4-1. Symptoms and Solutions
55
Lamp Shuts off
56
Error Tone (Two Level Beeping) after the Fixture Homes
56
Yellow Enable LED or Green Audio LED Does Not Illuminate
57
Fixture Does Not Respond to Data
57
None of the Motors Work and the Yellow Enable LED Does Not Illuminate
58
Appendix Admx Control of Trackspot
59
Start Channels and Construct Parameters
59
Low Resolution Mode
59
High Resolution Mode
59
Table A-1. Starting Channels in 7-Channel DMX 512 Protocol
60
Table A-2. Construct Parameters in DMX 512 Low Resolution Mode
62
Table A-3. Construct Parameters in DMX 512 High Resolution Mode
63
Appendix B Trackspot ® Mspeed Times
65
DMX 512 Protocol Mspeed Times
65
Table B-1. DMX 512 Protocol Mspeed Times
65
LWR Protocol Mspeed Times
69
Table B-2. LWR Protocol Mspeed Times
69
Appendix C Personality and Address Switch Settings
71
Personality Switch Settings
71
Table C-1. Personality Switch Settings for All Control Modes and Operating Modes
71
Address Switch Settings
72
Table C-2. Address Switch Settings for LWR Protocol and Master/Slave Mode
72
Appendix D Important Safety Information
73
English Version
73
Appendice D IMPORTANTES INFORMATIONS SUR la SÉCURITÉ
74
Appendice D
74
Importantes Informations Sur la Sécurité
74
Anhang D WICHTIGE HINWEISE für IHRE SICHERHEIT
75
Anhang D
75
Wichtige Hinweise für Ihre Sicherheit
75
Apéndice D INFORMACIÓN IMPORTANTE de SEGURIDAD
76
Apéndice D
76
Información Importante de Seguridad
76
Appendice D IMPORTANTI INFORMAZIONI PER la SICUREZZA
77
Vigtig Fikker Heds Information - Danmark
78
Glossary
79
Appendice D
77
Importanti Informazioni Per la Sicurezza
77
Advertisement
Advertisement
Related Products
High End studio spot 575
High End Categories
Light Fixture
Music Mixer
Fog Machine
More High End Manuals
Login
Sign In
OR
Sign in with Facebook
Sign in with Google
Upload manual
Upload from disk
Upload from URL