Sign In
Upload
Manuals
Brands
Hercules Manuals
Scooter
Rob Family F360
Hercules Rob Family F360 Cargo Bike Manuals
Manuals and User Guides for Hercules Rob Family F360 Cargo Bike. We have
1
Hercules Rob Family F360 Cargo Bike manual available for free PDF download: Translation Of The Original Operating Instructions
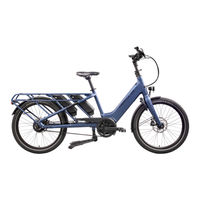
Hercules Rob Family F360 Translation Of The Original Operating Instructions (101 pages)
Pedelecs with Intuvia display
Brand:
Hercules
| Category:
Scooter
| Size: 14.16 MB
Table of Contents
Table of Contents
2
About These Operating Instructions
6
Manufacturer
6
Language
6
Laws, Standards and Directives
6
For Your Information
6
Warnings
6
Markups
7
Nameplate
8
Type Number and Model
9
Identifying the Operating Instructions
9
Safety
10
Residual Risks
10
Risk of Battery Fire and Explosion
10
Risk of Fire and Explosion Due to Short
10
Fire Hazard Caused by Overheated
10
Electric Shock Caused by Electric Drive
10
Risk of a Fall Due to Incorrectly Set Quick Releases
11
Risk of Fire and Burns Due to Hot Motor
11
Key Breaking off
11
Toxic Substances
11
Brake Fluid
11
Suspension Oil
11
Defective Battery
11
Requirements for the Rider
11
Vulnerable Groups
11
Personal Protective Equipment
11
Safety Markings and Safety Instructions
12
What to Do in an Emergency
12
Dangerous Situation in Road Traffic
12
12 2.7.2 Leaked Brake Fluid
12
Battery Vapours Emitted
13
Battery Fire
13
Leaked Brake Fluid
13
Oil and Lubricant Leaks from the Fork
13
Oil and Lubricant Leaks from the Rear Frame Damper
13
Overview
14
Description
15
Range
15
Valve
15
Rigid Fork
15
Brake System
15
Disc Brake
15
Drive System
16
Rechargeable Battery
16
Frame Battery
17
Pannier Rack Battery
18
Integrated Battery
18
Display
19
Control Panel
19
USB Port
19
Riding Light
19
Charger
19
Proper Use
20
Improper Use
21
Data Privacy Information
21
Maximum Permitted Total Weight
21
Environmental Requirements
22
Technical Data
24
Pedelec
24
Emissions
24
Tightening Torque
24
Bicycle Lighting
24
Intuvia Display
24
USB Port
24
Performance Line Motor
24
Powerpack 500 Battery
24
Description of Controls and Screens
25
Handlebars
25
Rechargeable Battery
25
Display
25
Control Panel
25
On-Screen Indicators
26
Riding Light Indicator
26
Level of Assistance Indicator
26
Battery Level Indicator (Display Screen)
26
Indicator for Motor Power Used
27
Gear Recommendation Indicator
27
Tachometer Indicator
27
Function Display
27
Journey Information
27
Additional Journey Information
27
System Settings and Data
28
Additional System Settings
28
System Message
29
ABS Indicator Lamp
29
Transporting and Storing
30
Physical Transport Characteristics
30
Designated Handles/Lifting Points
30
Transporting
30
Storing
30
Break in Operation
30
Preparing a Break in Operation
30
Taking out of Operation
31
Assembly
32
Unpacking
32
Scope of Delivery
32
Preparing the Battery
32
Checking the Battery
32
Required Tools
32
Commissioning
33
Checking the Stem and Handlebars
33
Checking the Connections
33
Firm Hold
33
Checking the Headset Backlash
33
Pedelec Sale
33
Operation
34
Risks and Hazards
34
Personal Protective Equipment
35
Tips for a Greater Range
35
Error Message
36
Display
36
Rechargeable Battery
38
Instruction and Customer Service
39
Adjusting the Pedelec
39
Adjusting the Saddle
39
Adjusting the Saddle Tilt
39
Determining the Seat Height
39
Adjusting the Seat Height with
40
Quick Release
40
Height-Adjustable Seat Post
40
Adjusting the Seat Position
41
Adjusting the Handlebars
41
Adjusting the Stem
41
Adjusting the Height of the Handlebars
41
Adjusting the Quick Release
42
Clamping Force
42
Retracting the Brake Linings
42
Accessories
43
Child Seat
43
Trailer
44
Pannier Rack
44
Check List before each Ride
45
Using the Kickstand
46
Raising the Kickstand
46
Using the Pannier Rack
46
Using the Saddle
46
Rechargeable Battery
47
Frame Battery
47
Removing the Frame Battery
47
Inserting the Frame Battery
47
Pannier Rack Battery
47
Removing the Pannier Rack Battery
47
Inserting the Pannier Rack Battery
47
Integrated Battery
48
Removing the Integrated Battery
48
Inserting the Integrated Battery
48
Charging the Battery
49
Charging the Dual Battery
49
Charging Process When Two Batteries Are Used
49
Charging Process When One Battery Is Used
50
Using Double Battery Model with a Single Battery Only
50
Waking the Battery
50
Electric Drive System
51
Switching on the Electric Drive System
51
Switching off the Drive System
51
Control Panel with Display
52
Removing and Attaching the Display
52
Removing the Display
52
Attaching the Display
52
Securing the Display against Removal
52
Charging the Display Battery
52
Charging on the Pedelec
53
Charging Using the USB Port
53
Using the USB Port
53
Switching on the Display
53
Switching off the Display
53
Using the Push Assist System
53
Using the Riding Light
53
Selecting the Level of Assistance
54
Journey Information
54
1Switching the Displayed Journey Information
54
2Resetting the Journey Information
54
Changing the System Settings
54
Brake
55
Using the Brake Lever
56
Gear Shift
57
Using the Derailleur Gears
57
Parking the Pedelec
58
Cleaning and Servicing
59
Cleaning after each Ride
59
Cleaning the Suspension Fork
59
Cleaning the Pedals
59
Basic Cleaning
60
Cleaning the Frame
60
Cleaning the Stem
60
Cleaning the Wheel
60
Cleaning the Drive Elements
60
Cleaning the Chain
61
Cleaning the Battery
61
Cleaning the Display
61
Cleaning the Motor
61
Cleaning the Brake
62
Servicing the Fork
62
Servicing the Drive Elements
62
Servicing the Pedals
62
Servicing the Chain
62
Cleaning the Saddle
62
Servicing
62
Servicing the Frame
62
Servicing the Stem
62
Maintenance
63
Wheel
63
Checking the Tyres
63
Checking the Rims
63
Checking and Adjusting the Tyre
63
Pressure - Dunlop Valve
63
Checking and Adjusting the Tyre
64
Pressure - Presta Valve
64
Pressure - Schrader Valve
64
Brake System
64
Checking the Brake Linings for Wear
64
Checking the Pressure Point
65
Checking the Brake Discs for Wear
65
Checking the Electrical Cables and Brake Cables
65
Checking the Gear Shift
65
Checking the Stem
65
Checking the USB Port
65
Checking the Chain Tension
65
Maintenance
66
Suspension System
67
Rear Frame Damper
67
Suspension Fork
68
Suspension Seat Post
69
Axle with Quick Release
69
Checking the Quick Release
70
Maintaining the Stem
70
Adjusting the Gear Shift
70
Cable-Operated Gear Shift, Single-Cable
71
Cable-Operated Gear Shift, Dual-Cable
71
Cable-Operated Twist Grip, Dual-Cable
71
Troubleshooting, Fault Clearance and Repair
72
Troubleshooting and Fault Clearance
72
The Drive System or Display Do Not Start up
72
Error Message
72
Assistance Function Errors
73
Battery Error
74
Display Errors
75
Lighting Does Not Work
75
Other Errors
76
Repair
76
Original Parts and Lubricants
76
Replacing the Lighting
76
Adjusting the Headlight
76
Tyre Clearance Check
76
Recycling and Disposal
77
Documents
78
Parts List
78
Rob Family F360
78
Assembly Report
79
Maintenance Instructions
81
Charger Operating Instructions
85
Glossary
93
Abbreviations
95
Simplified Terms
95
Appendix
96
Translation of the Original EC/EU Declaration of Conformity
96
Declaration of Conformity for Incomplete Machine
97
Keyword Index
100
Advertisement
Advertisement
Related Products
Hercules Viverty F7
Hercules Futura Sport 8.2
Hercules Futura
Hercules FAZUA Futuro 10 FA 20" 252Wh 10G S
Hercules NIZZA F7 NL
Hercules FUTURA COMPACT F8
Hercules FUTURA COMPACT 10
Hercules Fazua Futura
Hercules FMR 800
Hercules Categories
DJ Equipment
Speakers
Saw
Grinder
Power Tool
More Hercules Manuals
Login
Sign In
OR
Sign in with Facebook
Sign in with Google
Upload manual
Upload from disk
Upload from URL