Sign In
Upload
Manuals
Brands
Grafik Eye Manuals
Control Unit
3100
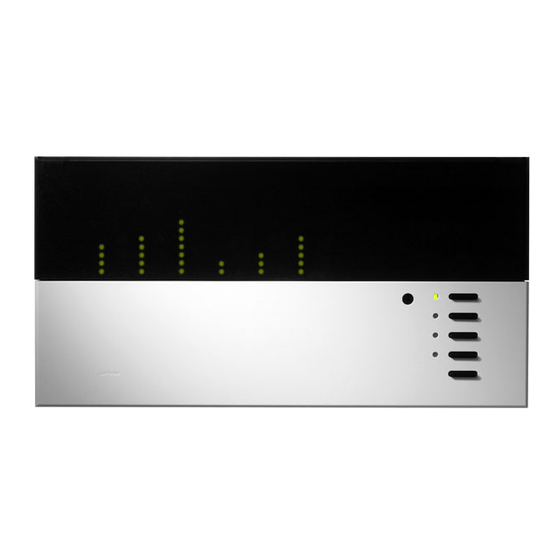
Grafik Eye 3100 Manuals
Manuals and User Guides for Grafik Eye 3100. We have
2
Grafik Eye 3100 manuals available for free PDF download: Installer's Manual
Grafik Eye 3100 Installer's Manual (192 pages)
Brand:
Grafik Eye
| Category:
Control Unit
| Size: 8 MB
Table of Contents
English
1
Table of Contents
1
Section 1: Introduction
2
GRAFIK Eye ® 3000 Series Control Unit
2
System Communications and Capacities
3
Control Unit
4
Step 1: Test the Loads for Short Circuits
4
Step 2: Turn the Power off
4
Step 3: Mount the Wallbox
5
Step 4: Connect the Line Voltage/Mains Cables to the Control Unit
5
Step 6: Mount the Control Unit
7
Step 7: Test the Control Unit
7
Step 8: Connect the Wallstations - Optional
8
Step 9: Connect Other Accessories - Optional
8
Step 10: Connect Multiple Control Units - Optional
9
Special Mounting Considerations
9
Installing an External Power Supply
10
Control Unit
11
Control Unit Buttons and Indicators
11
Entering and Exiting Setup Mode
11
Identifying the Load Type for each Zone
12
Programming Scenes
14
Adjusting High or Low End Trim
17
Selecting the Save Mode You Want to Use
17
Control Unit
18
Selecting Scenes
18
Temporarily Adjusting Light Levels and Shade Positions
18
Setting up System Communications
20
Appendix A: Troubleshooting
23
Warranty
23
Español
25
Unidad de Control GRAFIK Eye
26
Sección 1: Introducción
27
Comunicaciones del Sistema y Capacidades
27
Paso 2: DESCONECTE la Alimentación
28
Paso 3: Monte la Caja de Pared
29
Paso 5: Conecte Cable PELV (Clase 2: EE .UU .) a la Unidad de Control - Opcional
30
Paso 6: Monte la Unidad de Control
31
Paso 7: Pruebe la Unidad de Control
31
Paso 9: Conecte Otros Accesorios - Opcional
32
Consideraciones de Montajes Especiales
33
Paso 10: Conecte Múltiples Unidades de Control - Opcional
33
Instalación de una Fuente de Alimentación Externa
34
Botones E Indicadores de la Unidad de Control
35
Entrar y Salir del Modo Configuración
36
Identificación del Tipo de Carga de cada Zona
36
Programación de las Escenas
38
Selección del Modo Guardar que Quiere Usar
41
Ajuste Temporal de Los Niveles de Luz y las Posiciones de las Cortinas
42
Selección de Escenas
42
Configuración de las Comunicaciones
45
Apéndice A Solución de Problemas
46
Garantía
47
Información de Contacto
48
Deutsch
49
Abschnitt 1: Einleitung
50
GRAFIK Eye
50
Systemkommunikation und Leistungsfähigkeit
51
Schritt 1: Überprüfung der Lasten auf Kurzschlüsse
52
Schritt 2: Stromabschaltung
52
Schritt 3: Montage der Unterputzdose
53
Schritt 4: Anschluss der Netzkabel an der Steuerstelle
53
Schritt 5: Anschluss der PELV-Kabel (Klasse 2: USA) an der Steuerstelle - Optional
54
Schritt 6: Montage der Steuerstelle
55
Schritt 7: Test der Steuerstelle
55
Schritt 8: Anschluss der Bedienstellen - Optional
56
Schritt 9: Anschluss von anderem Zubehör - Optional
56
Besondere Montageerwägungen
57
Schritt 10: Anschluss Mehrerer Steuerstellen - Optional
57
Aufruf und Verlassen des Setup-Modus
59
Tasten und Anzeigen an der Steuerstelle
59
Bestimmung des Lasttyps für jede Zone
60
Auswahl des Gewünschten Speichermodus
65
Einstellung der Maximum- oder Minimumbegrenzung
65
Abschnitt 4: Verwendung der GRAFIK Eye
66
Szenenauswahl
66
Vorübergehende Einstellung von Helligkeitsstufen und Jalousiepositionen
66
Einrichtung der Systemkommunikation
68
Anhang A Fehlersuche
70
Gewährleistung
71
Kontaktinformationen
72
Français
73
Section 1 : Introduction
74
Unité de Commande GRAFIK Eye ® Série 3000
74
Communications Et Capacités du Système
75
Étape 2 : COUPER L'alimentation
76
Étape 3 : Monter Le Boîtier D'encastrement
77
Étape 6 : Monter L'unité de Commande
79
Étape 7 : Tester L'unité de Commande
79
Étape 8 : Connecter Les Claviers - en Option
80
Étape 10 : Connecter Plusieurs Unités de Commande - en Option
81
Installation D'une Alimentation Externe
82
Entrée Et Sortie du Mode de Configuration
83
Section 3 : Programmation D'une Unité de Commande GRAFIK Eye
83
Sélection du Mode de Sauvegarde que L'on Souhaite Utiliser
89
Réglage Provisoire des Niveaux D'éclairage Et des Positions de Stores
90
Section 4 : Utilisation de L'unité de Commande GRAFIK Eye
90
Sélection de Scènes
90
Configuration des Communications du Système
92
Annexe A : Dépannage . . . . . . . . . . . . . . . . . . . . . . . . . . . . . . . . . . . . . . . . . . . . . . . . . . . . . . 22
95
Garantie
95
Português
121
Secção 1: Introdução
123
Comunicações E Capacidades Do Sistema
123
1º Passo: Teste a Carga no que Se Refere a Curtos-Circuitos
124
2º Passo: Desligue a Energia
124
3º Passo: Monte a Caixa de Embutir
125
4º Passo: Ligue a Cablagem da Rede de Alimentação/Tensão de Linha À Unidade de Controlo
125
6º Passo: Monte a Unidade de Controlo
127
7º Passo: Teste a Unidade de Controlo
127
8º Passo: Ligue os Teclados de Parede - Opcional
128
9º Passo: Ligue Outros Acessórios - Opcional
128
10º Passo: Ligue Várias Unidades de Controlo - Opcional
129
Considerações Específicas sobre Montagens
129
Instalar um Fornecimento de Tensão Externa
130
Identificação Do Tipo de Carga para cada Zona
132
Regular a Capacidade Máxima E Mínima
137
Seleccionar O Modo de Guardar que Deseja Utilizar
137
Seleccionar Ambientes
138
Configuração das Comunicações Do Sistema
140
Apêndice A Resolução de Problemas
142
Garantia
143
Dutch
145
Regeleenheid GRAFIK Eye
146
Sectie 1: Inleiding
147
Systeemcommunicatie en -Capaciteit
147
Stap 1: Meet de Belastingen Door Op Kortsluiting
148
Stap 2: Schakel de Elektrische Voeding Uit
148
Stap 4: Sluit de Lijnspannings-/Netkabels Aan Op de Regeleenheid
149
Stap 7: Test de Regeleenheid
151
Stap 8: Sluit de Wandstations Aan - Optioneel
152
Stap 9: Sluit andere Accessoires Aan - Optioneel
152
Bijzondere Overwegingen M.b.t. Montage
153
Stap 10: Sluit Meer Regeleenheden Aan - Optioneel
153
Installeren Van Een Externe Voeding
154
Activeren en Verlaten Van de Instelmodus
155
Knoppen en Indicators Van de Regeleenheid
155
Instellen Van Het Belastingstype Voor Elke Zone
156
De Gewenste Opslagwijze Kiezen
161
Selecteren Van Scenario's
162
Tijdelijk Wijzigen Van Lichtniveaus en Rolgordijnstanden
162
Instellen Van de Systeemcommunicatie
164
Bijlage A: Storingzoeken . . . . . . . . . . . . . . . . . . . . . . . . . . . . . . . . . . . . . . . . . . . . . . . . . . . . . 22
167
Garantie
167
Italiano
169
Centralina GRAFIK Eye
170
Sezione 1: Introduzione
171
Comunicazioni DI Sistema E Potenze
171
Fase 2: Togliere Tensione
172
Fase 3: Montare la Scatola a Muro
173
Fase 6: Installare la Centralina
175
Fase 7: Testare la Centralina
175
Fase 8: Collegare I Tastierini - Opzionale
176
Fase 9: Collegare Gli Altri Accessori - Opzionale
176
Installazione DI un Alimentatore Esterno
178
Entrare (Uscire) in Modalità Programmazione
179
Pulsanti E Indicatori Della Centralina
179
Identificare I Tipi DI Carico Per Ogni Zona Collegata Alla Centralina
180
Programmare Le Scene
182
Regolare Temporaneamente I Livelli DI Luce E Le Posizioni Delle Tende
186
Appendice A: Individuazione Ed Eliminazione Dei Guasti . . . . . . . . . . . . . . . . . . . . . . . . . . . . . 22
191
Selezione Delle Scene
186
Garanzia
191
Advertisement
Grafik Eye 3100 Installer's Manual (19 pages)
3000 Series Control Unit
Brand:
Grafik Eye
| Category:
Control Unit
| Size: 0 MB
Table of Contents
Contents
2
Installing Control Units
3
Preparation
3
Line Voltage/Mains Wiring
3
Wire the Control Unit
3
Class 2/PELV Wiring
4
Mounting
4
Testing: Do the Lights Work?
4
Installing Wallstations
4
Set DIP Switches 1—4 with Unique System Address
5
Set DIP Switches 5, 6 And/Or 7 to Specify Function
5
Turn off Power and Wire
5
Scene Selection Control
5
Setting up GRAFIK Eye Control Units
6
How to Enter and Exit Setup Mode
6
Identifying the Load Type for each Zone
6
What Is a Scene?
7
How to Set up Lighting Scenes
7
Light Levels for Zones
7
How to Adjust Light Levels Temporarily
8
How to Set Low-End Trim
8
Advanced Scene Programming Options
8
To Adjust an Entire Scene
8
How to Set an “Unaffected Zone”
9
How to Set Save Options
9
Assign Addresses to GRAFIK Eye Control Units
10
Why Do You Set up Communications?
10
STEP 4: Setting up System Communications
10
Set up a Wallstation to “Talk” to a “Listening” Control Unit
11
Set up 2-Way Communication between 2 Control Units
11
For Example: 16-Zone Control
11
More about Class 2/PELV Wiring
12
What Is PELV?
12
Small Project: a Control Unit with up to Three Wallstations
12
Large Project: up to 8 Control Units and 16 Wallstations
13
Installing an External Power Supply
13
Wallbox Mounting
14
Panel Mounting
14
Power Boosters and Interfaces
14
Appendix B: Special Mounting Considerations
14
Wiring Detail
15
Specifications
15
Installation
15
0-10 Volt Ballast/Switching Interface
15
GRAFIK Eye Control Unit
16
Wiring Details
16
HP Dimming Modules
17
Wiring Overview
17
Choose a Mounting Location
17
Infrared Transmitters
18
Infrared Interference
18
Appendix G: Troubleshooting
18
Advertisement
Related Products
Grafik Eye 3500
Grafik Eye 3000 Series
Grafik Eye Categories
Control Unit
Recording Equipment
Receiver
Control Panel
Controller
More Grafik Eye Manuals
Login
Sign In
OR
Sign in with Facebook
Sign in with Google
Upload manual
Upload from disk
Upload from URL