Table of Contents
Advertisement
Quick Links
LUTRON
PLEASE LEAVE FOR OCCUPANT
○ ○ ○ ○ ○ ○ ○ ○ ○ ○ ○ ○ ○ ○ ○ ○ ○ ○ ○ ○ ○ ○ ○ ○ ○ ○ ○ ○ ○ ○ ○ ○ ○ ○ ○ ○ ○ ○
○ ○ ○ ○ ○ ○ ○ ○ ○ ○ ○ ○ ○ ○ ○ ○ ○ ○ ○ ○ ○ ○ ○ ○ ○ ○ ○ ○ ○ ○ ○ ○ ○ ○ ○ ○ ○ ○
○ ○ ○ ○ ○ ○ ○ ○ ○ ○ ○ ○ ○ ○ ○ ○ ○ ○ ○ ○ ○ ○ ○ ○ ○ ○ ○ ○ ○ ○ ○ ○ ○ ○ ○ ○ ○ ○
○ ○ ○ ○ ○ ○ ○ ○ ○ ○ ○ ○ ○ ○ ○ ○ ○ ○ ○ ○ ○ ○ ○ ○ ○ ○ ○ ○ ○ ○ ○ ○ ○ ○ ○ ○ ○ ○
IMPORTANT! GRAFIK Eye lighting controls must be installed by a qualified electrician in accordance with all applicable
regulations. Improper wiring can result in personal injury or damage to GRAFIK Eye lighting controls or other equipment.
Always turn off circuit breaker/MCB or remove main fuse from power line before doing any work. To avoid overheating and
possible damage to equipment, do not install dimming devices to dim receptacles, motor-operated appliances, or
fluorescent lighting not equipped with Lutron Hi-lume
magnetic low-voltage circuits, you can prevent transformer overheating and failure by avoiding excessively high current
flow: Do not operate GRAFIK Eye lighting controls with any lamps removed or burned out; Replace any burned out lamps
immediately; Use only transformers that incorporate thermal protection or fused primary windings. This lighting control is
designed for residential and commercial use. GRAFIK Eye Controls are designed for indoor use only.
3000 Series
Installer's Guide
Models 3100 and 3500
GRAFIK
Series Control Units
supply power to, and control
the brightness of two, three,
four, or six zones of lighting.
control the intensity of all the
light sources in a room. You
can adjust the lights for a
special event or activity with
the press of a button!
®
™
, Eco-10
, or Tu-Wire
Eye
3000
™
Electronic Dimming Ballasts. In dimmed
LIGHTING CONTROL
○ ○ ○
LUTRON
Advertisement
Table of Contents

Related Manuals for Grafik Eye 3100

Summary of Contents for Grafik Eye 3100
- Page 1 Do not operate GRAFIK Eye lighting controls with any lamps removed or burned out; Replace any burned out lamps immediately; Use only transformers that incorporate thermal protection or fused primary windings. This lighting control is designed for residential and commercial use.
- Page 2 Hi-Power, Eco-10, LIAISON, Designer, Tu-Wire, and Architrave are trademarks of Lutron Electronics Co., Inc. © 1999 Lutron Electronics Co., Inc. ® Safety standards listed above apply to one or more products in the GRAFIK Eye product line. Consult factory for specific information. LUTRON-Quality Systems Registered to ISO 9001...
- Page 3 STEP 1: Installing Control Units This section shows how to install Control Units and make sure they are properly operating all connected loads. CAUTION! First test loads for short circuits. 1. Turn power OFF at the breaker/MCB panel or fuse box. SWITCH HOT/LIVE 2.
- Page 4 TERMINAL Testing: Do the lights work? Mounting 1. Restore Power. 2. Press Scene 1 button on front of the GRAFIK Eye Control Unit. The Scene 1 LED will light. 3. Press zone to raise or lower the light levels. Make sure that the Control Unit is dimming all connected loads.
- Page 5 Control Scenes 5—16* only only When using a Wallstation to access scenes 5—16, the scene LEDs will illuminate only on the Wallstation—not on the GRAFIK Eye Control Unit. Turn off power and wire Mounting Review Appendix A: More About Class 2/PELV Wiring Place twisted pairs in wallbox and mount as shown.
- Page 6 STEP 3: Setting Up GRAFIK Eye Control Units This section shows how to set up a GRAFIK Eye Control Unit, including: Identifying the load type for each zone of lighting connected to the Control Unit. SCROLL THROUGH SETUP CODES Setting up the scenes to create the desired lighting effects, and make sure the Control Unit is working correctly.
- Page 7 In this example, ZONE 6 is set to 60%.) To program scenes 5 through 16, or for more precise zone intensity adjustment with a SET SCENE’S FADE-IN TIME GRAFIK Eye 3500 Control Unit, refer to page 8. 3. Set scene’s FADE-in time. Press FADE to make FADE-in time anything from 0—59 seconds or 1—60 minutes*.
- Page 8 Note: These adjustments are temporary and remain only until a new scene selection occurs—the GRAFIK Eye Control Unit does not store them as permanent scene settings. How to set low-end trim—OPTIONAL If necessary, adjust the low-end trim to achieve uniform low- ADJUST ZONE’S LIGHT FOR LOW-END TRIM...
- Page 9 5. Exit setup mode. Press and hold Scene 1 and OFF buttons until LEDs stop cycling. How to set Save Options— OPTIONAL The GRAFIK Eye 3000 Series Control Units allow selection of several SELECT different Save Options. Follow these steps to access the Save Options.
- Page 10 Control Units..all other Scene 1 LEDs light! LUTRON Assign addresses to GRAFIK Eye Control Units Assign each GRAFIK Eye Control Unit in your project a unique SELECT A- system address (AI through A8). To assign an address: 1.
- Page 11 The communication link is now established. The Control Unit will “listen” when the user presses a button on the Wallstation. You can proceed to the next Wallstation and set up its communications. For more specific, step-by-step instructions about setting up communications for each type of GRAFIK Eye Wallstation, please refer to the instructions included with each Wallstation.
- Page 12 DATA LINK: 1 2 3 4 5 6 One pair is for the low-voltage power wiring that enables each GRAFIK Eye Control Unit to 4: MUX supply power to up to three Wallstations. Connect this twisted pair to terminals 1 3: MUX (COMMON) and 2 (12VDC).
- Page 13 Large project: Up to 8 Control Units and 16 Wallstations TOTAL CLASS 2/PELV WIRING LENGTH IS 2000 FT. (600 m). 1 2 3 4 1 2 3 4 MAXIMUM LENGTH OF T-TAP IS 8 FT. (2.5 ). A3 POWERS b, c, AND d.
- Page 14 OPEN FRONT COVER. wallbox. 2. All GRAFIK Eye 3000 Series Control Units, Power Boosters, Fluorescent Interfaces, and Electronic Low-Voltage Interfaces MUST have 4 1/2 in. (11 cm) of space above and below the faceplate to dissipate the heat caused by normal operation.
-
Page 15: Specifications
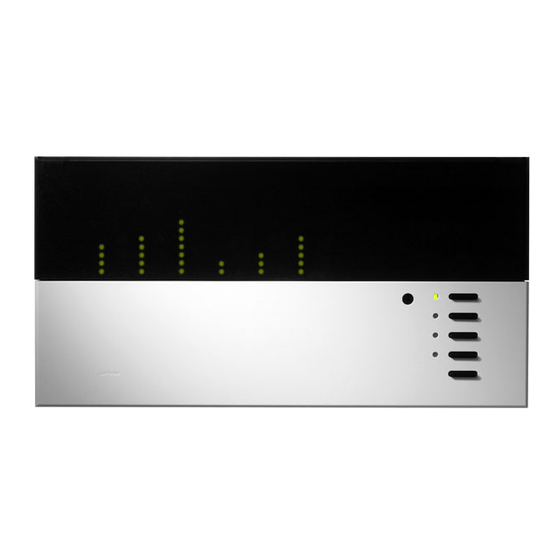
EN60929 and IEC60929. Complies with UL Standard 508. switching capabilities in one Accepts a constant-gate drive fluorescent signal. enclosure. The interface (100-127V, 220-240V, 50/60Hz). gives GRAFIK Eye 3000 CONTROL INPUT POWER RATING 100-127/220-240V, 50/60Hz Series Control Units the L2/H2 TERMINAL INPUT RATING... - Page 16 GRAFIK Eye Control Unit To Set Up GRAFIK Eye: To Operate GRAFIK Eye: 1. Select a Scene. Press a Scene button to recall its corresponding light levels. Press the Off button to turn all lights off. INSTRUCTION LABEL 2. Adjust light level of each Zone.
- Page 17 Appendix D: Wiring overview 0-10V CONTROL FLUORESCENT ZONE/LOAD 1 A GRX Interface is required for each 0-10V BALLAST fluorescent dimming zone. (A 3-zone 0-10V CONTROL FLUORESCENT ZONE/LOAD 1 Control Unit with two fluorescent 0-10V BALLAST zones and one incandescent zone is SWITCHED FLUORESCENT ZONE/LOAD 2 shown as an example.) Please note that the power feed...
- Page 18 Infrared Interference All GRAFIK Eye 3000 Series Control Units are equipped with an IR Receiver for use with Lutron GRX-IT and GRX-8IT handheld remote controls. The IR frequency for all Control Units is 40.000 KHz. Any other device continuously operating in the frequency range from 30 KHz to 50 KHz may cause either no response or unwanted scene changes on the Control Unit.
Need help?
Do you have a question about the 3100 and is the answer not in the manual?
Questions and answers