Sign In
Upload
Manuals
Brands
Fulgor Milano Manuals
Ranges
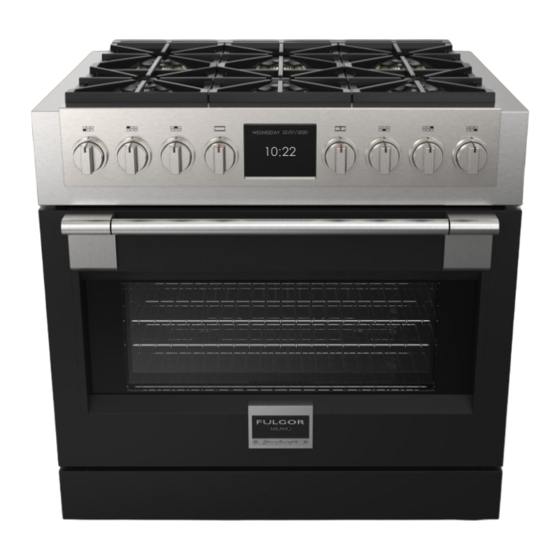
Sofia FSRC 3606 P MG ED 2F Series
Fulgor Milano Sofia FSRC 3606 P MG ED 2F Series Manuals
Manuals and User Guides for Fulgor Milano Sofia FSRC 3606 P MG ED 2F Series. We have
1
Fulgor Milano Sofia FSRC 3606 P MG ED 2F Series manual available for free PDF download: Instruction Manual
Fulgor Milano Sofia FSRC 3606 P MG ED 2F Series Instruction Manual (234 pages)
Brand:
Fulgor Milano
| Category:
Ranges
| Size: 28 MB
Table of Contents
Italiano
5
Table of Contents
5
Caratteristiche del Forno
6
Avvertenze Speciali
8
Prima DI Iniziare L'installazione
8
Istruzioni DI Sicurezza
9
Sicurezza Per Forni Autopulenti
11
Dimensioni del Prodotto E Requisiti DI Ingombro
12
Installazione Della Staffa Anti-Ribaltamento
14
Informazioni Sull'installazione
15
Istruzioni DI Installazione
16
Requisiti Dell'impianto a Gas
18
Norme Per L'installazione Dell'apparecchio (Ubicazione E Ventilazione Locale)
18
Ubicazione
18
Ventilazione del Locale
18
Allacciamento Gas
18
Allacciamento del Tubo Metallico
18
Conversione Ad Altro Tipo DI Gas
19
Tabella Degli Ugelli
19
Sostituzione Degli Ugelli (Bruciatore a Doppio Cerchio DI Fiamma)
21
Regolazione Fiamma Bassa
22
Regolazione Dei Bruciatori a Cerchio DI Fiamma Singolo O Doppio
22
Conversione in GPL O GN
23
Accensione Elettrica del Gas
23
Le Fiamme Dei Bruciatori
23
Alimentazione Elettrica
24
Caratteristiche Elettriche
24
Collegamento del Forno Alla Rete Elettrica
24
Checklist Finale
25
Manopole
26
Modalità DI Cottura
26
I Pannelli DI Controllo
26
Display
26
Tasti DI Comando
26
Informazioni Generali Forno
28
Suggerimenti Generali Forno
29
Griglie del Forno
29
Griglie Telescopiche del Forno
30
Per Impostare Il Timer
31
Come Impostare L'ora del Giorno
31
Impostazione Orologio E Timer
31
Selezione Della Modalità DI Cottura
32
Impostazione Della Modalità DI Cottura E Della Temperatura
32
Come Usare Il Tasto Per Selezionare le Funzioni a Bassa Temperatura
32
Impostazione Della Modalità DI Cottura ECO
32
Utilizzo Delle Luci del Forno
32
Come Controllare Il Tempo
33
Durante una Modalità a Tempo
33
Come Ritardare L'inizio DI una Modalità a Tempo
33
Come Impostare una Modalità a Tempo
33
Funzionamento del Forno in Modalità a Tempo
33
Impostazione Delle Opzioni Della Sonda Carne
34
Suggerimenti E Tecniche DI Cottura Statica
35
Linee Guida Generali
35
Suggerimenti E Tecniche DI Cottura a Convezione
36
Tabella Cottura a Convezione
37
Suggerimenti E Tecniche DI Cottura Ventilata
38
Tabella Cottura Ventilata - CAVITÀ CONVEZIONE
38
Tabella Grill a Convezione - CAVITÀ CONVEZIONE
40
Suggerimenti E Tecniche DI Cottura con Grill a Convezione
40
Tabella Essiccazione
41
Suggerimenti E Tecniche DI Essiccazione
41
Tabella Grill
42
Risoluzione Problemi DI Cottura
43
Funzioni Speciali
44
Istruzioni Modalità Sabbath
45
Cura E Pulizia del Forno
46
Autopulizia del Forno
46
Preparazione del Forno Per L'autopulizia
46
Come Ritardare L'avvio Della Pulizia
47
Impostazione Modalità Autopulizia
47
Come Modificare Il Tempo DI Pulizia
47
Come Impostare la Modalità Autopulizia
47
Manutenzione Fai-Da-Te: Smontaggio Della Porta del Forno
48
Come Smontare la Porta
48
Come Rimontare la Porta
48
Sostituzione Della Luce del Forno
49
Come Sostituire una Lampadina
49
Caratteristiche del Piano Cottura
50
Bruciatori a Cerchio DI Fiamma Doppio
51
Impostazione Manopola Controllo Gas
51
Bruciatori a Gas
51
Utilizzo del Piano Cottura a Gas
51
Utilizzo del Piano Cottura a Gas
52
Superficie Dei Bruciatori Super Sigillata
52
Strumenti DI Cottura
53
Caratteristiche Degli Strumenti DI Cottura
53
Adattamento del Diametro Della Padella alle Dimensioni Della Fiamma
53
Tabella Pulizia
54
Come Usare la Tabella DI Pulizia del Forno
54
Informazioni Generali Sulla Manutenzione del Forno
54
Finitura Forno / Metodo DI Pulizia
55
Pulizia del Piano Cottura
57
Risoluzione Problemi Funzionali
58
English
61
Features of Your Oven
62
Before Starting Installation
64
Special Warnings
64
Safety Instructions
65
Safety for the Self-Cleaning Oven
67
Product Dimensions and Cutout Requirements
68
Anti-Tip Bracket Installation
70
Installation Information
71
Installation Instructions
73
Gas Connection
74
Gas Requirement
74
Instructions for Installation of the Appliance (Positioning and Ventilation Requirements)
74
Positioning
74
Rigid Pipe Connection
74
Ventilation
74
Conversion to a Different Type of Gas
75
Nozzle Table
75
Replace Injectors (Two Ring Flame Burner)
77
Adjustment for Burners with One or Two Flame Rings
78
Low Flame Adjustment
78
Conversion for LP or NG Gas
79
Electric Gas Ignition
79
The Burner Flames
79
Connection to the Electrical Power Mains
80
Electrical Supply
80
Electricals
80
Final Checklist
81
Command Keys
82
Display
82
Knobs
82
The Control Panels
82
Oven Modes
83
General Oven Information
84
General Oven Tips
85
Oven Racks
85
Oven Telescopic Racks
86
Setting the Clock and Timer
87
To Set the Time of Day
87
To Set the Timer
87
Selecting the Oven Mode
88
Setting Cooking Mode and Temperature
88
Setting the ECO Cooking Mode
88
Using Key to Select Low Temperature Functions
88
Using Oven Lights
88
How to Check a Time Value
89
Timed Oven Mode Operation
89
To Delay the Start of a Timed Mode
89
To Set a Timed Mode
89
When a Timed Mode Is Running
89
Setting the Meat Probe Options
90
Bake Tips and Techniques
91
General Guidelines
91
Convection Bake Tips and Techniques
92
Convection Bake Chart
93
Convection Roast Chart - CONVECTION CAVITY
94
Convection Roast Tips and Techniques
94
Convection Broil Chart - CONVECTION CAVITY
96
Convection Broil Tips and Techniques
96
Dehydrate Chart
97
Dehydrate Tips and Techniques
97
Broil Chart
98
Broil Tips and Techniques
98
Solving Baking Problems
99
Special Features
100
Sabbath Mode Instruction
101
Oven Care and Cleaning
102
Preparing the Oven for Self-Clean
102
Self-Cleaning the Oven
102
Setting the Self-Clean Mode
103
To Change the Cleaning Time
103
To Delay the Start of Cleaning
103
To Set the Self-Clean Mode
103
Do-It-Yourself Maintenance Oven Door Removal
104
To Remove Door
104
To Replace Door
104
Replacing an Oven Light
105
To Replace a Light Bulb
105
Features of Your Cooktop
106
Burners with Two Flame Rings
107
Gas Burners
107
Gas Control Knob Setting
107
Gas Cooktop Operation
107
Gas Cooktop Operation
108
Super Sealed Surface Burners
108
Cookware
109
Cookware Characteristics
109
Match Pan Diameter to Flame Size
109
Cleaning Chart
110
General Oven Care
110
How to Use the Oven Cleaning Chart
110
Oven Finishes / Cleaning Methods
111
Cleaning the Cooktop
113
Solving Operational Problems
115
Assistance or Service
116
Français
117
Caractéristiques de Votre Four
118
Avant de Commencer L'installation
120
Avertissements Spécifiques
120
Consignes de Sécurité
121
Consignes de Sécurité pour le Four Autonettoyant
123
Dimensions du Produit et Exigences en Matière de Découpe
124
Installation du Support Anti-Basculement
126
Informations Sur L'installation
127
Consignes D'installation
129
Exigences de L'installation au Gaz
130
Instructions pour L'installation de L'appareil (Positionnement et Exigences de Ventilation)
130
Positionnement
130
Raccordement au Gaz
130
Raccordement des Tuyaux Rigides
130
Ventilation
130
Conversion à un Autre Type de Gaz
131
Tableau des Buses
131
Remplacer les Injecteurs (Brûleur à Flamme à Deux Anneaux)
133
Réglage de la Flamme Basse
134
Réglage pour les Brûleurs à Flamme à un ou Deux Anneaux
134
Allumage Électrique à Gaz
135
Conversion pour le Gaz GPL ou GN
135
Flammes du Brûleur
135
Alimentation Électrique
136
Raccordement au Réseau Électrique
136
Systèmes Électriques
136
1 - Liste de Contrôle Finale
137
Boutons
138
Les Panneaux de Contrôle
138
Touches de Commande
138
Écran
138
Modes du Four
139
Informations Générales Sur le Four
140
Conseils Généraux pour le Four
141
Grilles du Four
141
Grilles Télescopiques du Four
142
Pour Paramétrer L'heure de la Journée
143
Pour Paramétrer la Minuterie
143
Réglage de L'horloge et de la Minuterie
143
Réglage du Mode de Cuisson et de la Température
144
Réglage du Mode de Cuisson ÉCO
144
Sélection du Mode de Cuisson
144
Utilisation des Lumières du Four
144
Utiliser la Touche pour Sélectionner les Fonctions de Basse Température
144
Comment Vérifier une Valeur de Temps
145
Lorsqu'un Mode à Durée Déterminée Est en Cours
145
Mode de Fonctionnement du Four en Minuterie
145
Pour Définir un Mode Programmé
145
Options de Réglage de la Sonde Thermique
146
Conseils et Techniques de Cuisson
147
Consignes Générales
147
Conseils et Techniques de Cuisson Par Convection
149
Tableau de Cuisson Par Convection
149
Conseils et Techniques de Rôtissage Par Convection
150
Conseils et Techniques pour le Grill à Convection
152
Tableau de Grill de Convection - CAVITÉ de CONVECTION
152
Conseils et Techniques de Séchage
153
Tableau de Séchage
153
Conseils et Techniques de Grill
154
Consignes de Température des Services Alimentaires du FSIS (USDA Food Safety & Inspection Service)
154
Tableau de Grill
154
Résolution des Problèmes de Cuisson
155
Caractéristiques Spécifiques
156
Instruction Mode Sabbat
157
Autonettoyage du Four
158
Entretien et Nettoyage du Four
158
Préparation du Four pour L'autonettoyage
158
Pour Modifier L'heure de Nettoyage
159
Pour Retarder le Début du Nettoyage
159
Pour Régler le Mode D'autonettoyage
159
Réglage du Mode D'autonettoyage
159
Maintenance Autonome Retrait de la Porte du Four
160
Pour Remplacer la Porte
160
Pour Retirer la Porte
160
Pour Remplacer une Ampoule
161
Remplacement D'une Lampe du Four
161
Caractéristiques de Votre Plaque de Cuisson
162
Brûleurs à Flamme Avec Deux Anneaux
163
Brûleurs à Gaz
163
Fonctionnement de la Plaque de Cuisson à Gaz
163
Réglage du Bouton de Commande du Gaz
163
Brûleurs de Surface Super Étanches
164
Fonctionnement de la Plaque de Cuisson à Gaz
164
Adaptez le Diamètre de la Casserole à la Taille de la Flamme
165
Batterie de Cuisine
165
Caractéristiques de la Batterie de Cuisine
165
Comment Utiliser le Tableau de Nettoyage du Four
166
Entretien Général du Four
166
Tableau de Nettoyage
166
Finitions des Fours / Méthodes de Nettoyage
167
Nettoyage de la Plaque de Cuisson
169
Résolution des Problèmes de Fonctionnement
170
Dutch
173
Kenmerken Van Uw Oven
174
Speciale Waarschuwingen
176
Voorafgaand Aan de Installatie
176
Veiligheidsinstructies
177
Veiligheid Voor de Zelfreinigende Oven
179
Installatie-Informatie
183
Installatie-Instructies
185
Gasaansluiting
186
Gasbehoefte
186
Instructies Voor de Installatie Van Het Toestel (Plaatsing en Ventilatievereisten)
186
Positionering
186
Stijve Pijpaansluiting
186
Ventilatie
186
Injectoren Vervangen (Tweekringsvlambrander)
189
Aanpassing Voor Branders Met Één of Twee Vlamringen
190
Lage Vlam Aanpassing
190
Elektrische Gasontsteking
191
Omschakeling Voor LP of NG Gas
191
Vlammen Van de Brander
191
Aansluiting Op Het Elektriciteitsnet
192
Elektriciteitsvoorziening
192
Elektrische Onderdelen
192
Bedieningstoetsen
194
Knoppen
194
Weergave
194
Algemene Oventips
197
Ovenrekken
197
Oven Telescopische Rekken
198
De Klok en Timer Instellen
199
De Timer Instellen
199
De ECO-Kookstand Instellen
200
De Toets Gebruiken Om de Lage Temperatuurfuncties te Selecteren
200
Gebruik Van Ovenverlichting
200
Kookstand en Temperatuur Instellen
200
De Start Van Een Tijdgestuurde Stand Uitstellen
201
Hoe Een Tijdswaarde te Controleren
201
Instellen Van Een Tijdgestuutde Stand
201
Tijdgestuurde Ovenstand
201
Wanneer Een Tijdgestuurde Stand Actief Is
201
Advertisement
Advertisement
Related Products
Fulgor Milano SOFIA FSRC 4807 2P MK 2F X
Fulgor Milano F6PGR304AS1
Fulgor Milano F4PGR304S1
Fulgor Milano SOFIA F6PGR366S2
Fulgor Milano F6PDF366S1
Fulgor Milano SOFIA F6IRT485GS1
Fulgor Milano SOFIA F6PDF364GS1
Fulgor Milano F4PDF366S1
Fulgor Milano F4PDF304S1
Fulgor Milano SOFIA F6PGR364GS2
Fulgor Milano Categories
Oven
Hob
Cooktop
Refrigerator
Ranges
More Fulgor Milano Manuals
Login
Sign In
OR
Sign in with Facebook
Sign in with Google
Upload manual
Upload from disk
Upload from URL