Sign In
Upload
Manuals
Brands
Fidelity Electronics Manuals
Scales
C-10 Series
Fidelity Electronics C-10 Series Manuals
Manuals and User Guides for Fidelity Electronics C-10 Series. We have
1
Fidelity Electronics C-10 Series manual available for free PDF download: Operation Manual
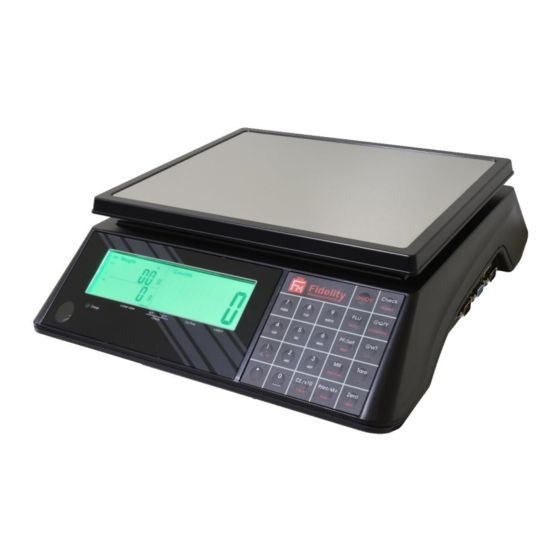
Fidelity Electronics C-10 Series Operation Manual (95 pages)
Configurable Counting Scales
Brand:
Fidelity Electronics
| Category:
Scales
| Size: 2 MB
Table of Contents
Table of Contents
3
1 Reminders
9
Cautions
9
Metrological Legislation
9
Placing the Instrument
9
Seal & Serial Number
9
Warm up Time
9
2 Specifications
10
3 Panel and Keys
11
Key Board Description
11
Display Panel Description
13
Meaning of Platform No. in this Manual
14
4 Connection Points
14
Connection Pins & Plugs
14
P2 Load Cell Connector Pin Assignment Table
15
RS485 and External Input Port Pin Assignment Table
15
RS232 Comports Pin Assignment for UART0 and UART2
15
5 Power Adaptor, Built-In Batteries and Recharging
16
Power Adaptor
16
Before Plugging in Power Adaptor to Electricity Grid
16
Before First Time Use
16
CR1220 Real Time Clock Backup Battery
16
Battery Voltage and Battery-Operation Application
16
Battery lo
16
Battery Charging Status
16
6 Internal Function Settings
17
About Internal Function Table
17
How to Enter & Select Internal Function
17
Key Function During Internal Function Setting & Operation Mode
17
Shift between Built-In Platform (P1) and External Platform (P2)
17
Internal Function Table
18
7 Recommended Setting Procedures for User
26
8 UART & Comport Settings
26
UART Transmission Type & Assigned Comport No. Table
26
Parameters Table for PC & Command & Scanner
27
Parameters Table for Auto 1 ~ 3 & Manual
27
Android and Ios APP
29
Settings When Using App Via WIFI Connection
29
Settings When Using App Via Bluetooth Connection
29
9 Basic Operation
29
Power Instrument on and off
29
Power on Countdown Process
29
Operator Number
30
Warm up Time
30
Dual Platform Operation
30
Select Preferred Weighing Platform by [Pf/Set]
30
Summing up Transaction Results of both Platforms
30
Keyboard Lock
30
Loads and Weighing Platform
30
Manual Zero
31
Tare Functions
31
Manual and Automatic Tare
31
Repetitive / Multiple Tare
31
Preset Tare
31
Auto Power Saving & Auto Power off Time
31
Expiry Date
32
Print a Customer & Product Code Entered
32
Inputting Numbers, Letters, Symbols by Keyboard
32
10 Piece Count
32
Obtain Unit Weight
32
Direct Unit Weight Entry Method
32
Sampling Method
33
Employ the Last Unit Weight When Power on
33
Recall Unit Weigh Unit from Quick PLU
33
Start Counting Process
33
Auto Unit Weight Enhancement Function
33
Check Function
33
Check Types and Target
34
Hints for Entering lo and Hi Limits
34
Cancel Check Function
34
Check Function Priority Rules for Dual Platform (PA) Operation
35
Memory Accumulation
35
Memory Accumulation Settings
35
Manual Accumulation
35
Automatic Accumulation
35
When Data Is Accumulated to Memory
35
Memory Recall and Clearance
36
Dual Platform Accumulation Rules
36
11 Quick Plus
37
Unit Weight Quick PLU
37
Create & Save Unit Weight to Quick PLU
37
Recall Unit Weight from Quick PLU
37
Clear Unit Weight from Quick PLU
37
Quantity Check Limit Quick PLU
37
Create & Save Quantity Check Limit to Quick PLU
37
Recall Quantity Check Limit from Quick PLU
38
Clear Quantity Check Limit from Quick PLU
38
Weight Check Limit Quick PLU
38
Create & Save Weight Check Limit to Quick PLU
38
Recall Weight Check Limit from Quick PLU
38
Clear Weight Check Limit from Quick PLU
38
Preset Tare Value Quick PLU
38
Create & Save Preset Tare Value to Quick PLU
38
Recall Preset Tare Value from Quick PLU
39
Clear Preset Tare Value from Quick PLU
39
Product Code and Product Description
39
Create & Save Product Code and Product Description to Quick PLU
39
Recall Product Code and Product Description from Quick PLU
39
Clear Product Code and Product Description from Quick PLU
39
Applying Blank Product Code and Product Description
40
Customer Code and Customer Description
40
Create & Save Customer Code and Customer Description to Quick PLU
40
Recall Customer Code and Customer Description from Quick PLU
40
Clear Customer Code and Customer Description from Quick PLU
40
Applying Blank Customer Code and Customer Description
41
12 Customized Setting Plus for Operation Settings & Parameters
41
Save Current Operation Settings/Parameters to Customized Setting PLU
41
Recall Operation Settings/Parameters from Customized Setting PLU
41
By Instrument Keyboard
41
By Execution Command
42
Clear Customized Setting PLU
42
By Instrument Keyboard
42
Quit Current Customized Setting PLU Effect
42
13 Data Output Protocols & Formats
42
PC Output Protocols
42
Data & Print Formats
42
Predefined Output Formats
42
Lab 2 Customized Output Format
43
Label Printing
43
14 Alibi Transaction Memory & Management Report
43
Alibi Memory Description
43
Define When a Transaction Data Is Saved to Alibi Memory
44
Output and Settings for Alibi Memory & Management Report
45
Totalization
45
15 Barcode Scanner
45
Using Barcode Scanner to Simulate Operation Key Input
45
Inputting Customer & Product Code and Operator Number
45
Change to Different Input Target
46
More about Customer / Product Code & Description
46
16 Commands
46
17 System Message & Error Code
47
System Message Table
47
Error Code Table
47
18 Daily Care & Maintenance
48
Appendix A: - Pre-Defined PC Output Protocols
49
Data Abbreviation Table
49
Output Formats Tables
50
Appendix B: - Customized PC Output Protocol
52
Customized PC Output Protocol Setting Procedures
52
Customized PC Output Content Table
53
Appendix C: - Lab 1 Output Formats
55
Appendix D: - Standard Lab 2 Output Format
56
Appendix E: - Customized Lab 2 Output Format
57
Customized Lab 2 Output Format Variants Table
57
Edit Customized Lab 2 Print Output Format
58
Appendix F: - Lab 3 Output Formats
59
Appendix G: - Lab 4 Output Format
60
Lab 4 Output Format Illustration
60
Appendix H: - Lab 5 Output Format
61
Lab 5 Output Format Illustration
61
Appendix I: - TSC Printer Installation, Setup & Label Upload Procedures
62
Get the below Ready before Printer Installation
62
Printer Installation
62
Uploading TCF File to Printer
62
Create & Upload Label to TSC Printer
63
Selecting the Correct Edition for Bartender Software
63
Adding Information from Instrument to Label & Uploading to a TSC Printer
63
Appendix J: - Sbarco Printer Installation, Setup & Label Upload Procedures
65
Get the below Ready before Printer Installation
65
Bardrawer Software & Printer Driver Installation
65
Create & Upload Label to Sbarco Printer
66
Appendix K: - Label Programming, Illustration & Samples
68
Label Prompt Command Table
68
K2. Label Programming Illustration
70
Label Illustration for LP50 & TSC
70
Label Illustration for Sbarco
70
Sample Labels
70
Quick Access to Label Settings
71
Repetitive Printout
71
Appendix L: - Keyboard Command
72
Appendix M: - Execution Commands
73
Command Description Table (System Related)
73
Command Description Table (Report Related)
74
Command Description Table (Customized Setting PLU Related)
74
Appendix N: - System Parameter & Operation Entry Setting Commands
75
Appendix O: - System Parameter Reading Commands
78
Appendix P: - Operation Entry Reading Commands
81
Appendix Q: - Operation Result Reading Commands
83
Appendix R: - Quick PLU Saving Commands
86
Appendix S - Quick PLU Reading Commands
88
Appendix T: - Customized Operation Settings PLU Saving Commands
90
Command Description Table
90
Parameter Description Table
91
Appendix U: Customized Operation Settings PLU Reading Commands
93
Command Description Table
93
Parameter Output Description Table
94
Advertisement
Advertisement
Related Products
Fidelity Electronics A10
Fidelity DM-10K
Fidelity DM-10KD
Fidelity DM-20K
Fidelity DM-20KD
Fidelity Electronics DM-3000
Fidelity Electronics DM-3000D
Fidelity Electronics DM-6000
Fidelity DM-6000D
Fidelity Electronics G1-15K
Fidelity Electronics Categories
Digital Photo Frame
Scales
Measuring Instruments
Accessories
Video Gaming Accessories
More Fidelity Electronics Manuals
Login
Sign In
OR
Sign in with Facebook
Sign in with Google
Upload manual
Upload from disk
Upload from URL