Sign In
Upload
Manuals
Brands
Fastec Manuals
Digital Camera
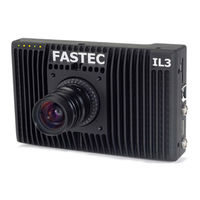
IL3
Fastec IL3 High Speed Camera Manuals
Manuals and User Guides for Fastec IL3 High Speed Camera. We have
2
Fastec IL3 High Speed Camera manuals available for free PDF download: Operator's Manual, Quick Start Manual
Fastec IL3 Operator's Manual (107 pages)
High-Speed Camera
Brand:
Fastec
| Category:
Digital Camera
| Size: 4 MB
Table of Contents
Contact
2
Reader Response
2
Trademarks
2
Chapter 2 , Getting Started
3
Chapter 1, IL3 Product Overview
3
Chapter 3, Camera Setup
3
Chapter 4, Recording with the IL
3
Chapter 5, Synchronizing Cameras
3
Chapter 6, IL3 Web-Application
3
Appendices
3
Table of Contents
4
Chapter Summary
3
IL3 Product Overview
10
IL3 Product Description
10
IL3 Product Differentiation
10
Table 1-1: IL3100-L and IL3100-S Models
11
Table 1-2: Part Number Legend
11
IL3 Controls, Indicators, and Connectors
12
Figure 1-1: IL3 Back View
12
Figure 1-2: IL3 Front View
12
Figure 1-3: IL3 Top View
12
Figure 1-4: IL3 Side Views
12
Table 1-3: Camera Part Locations
12
Figure 1-5: IL3 Bottom View
14
IL3 Getting Started
15
Unpacking the Camera
15
Installing the Lens
15
Table 2-1: Package Contents
15
Table 2-2: Lens Selection
15
Power
16
IL3 Memory and Mass Storage Options
16
Figure 2-1: IL3 Connections
17
Table 2-3: IL3 Mass Storage Functionality
18
IL3 Camera Setup
19
Install Fasmotion Camera Control Software
19
Figure 3-1: Fasmotion Installation
19
Figure 3-2: Fasmotion Install Location
19
Figure 3-3: Fasmotion Start Folder
20
Figure 3-4: Fasmotion Install Progress
20
Figure 3-5: Fasmotion Installation Complete
20
Connect the IL3 to a Wired Network
21
Figure 3-6: Fasmotion "Find Camera" Icon
21
Figure 3-7: Fasmotion "Find Cameras" Dialog
21
Table 3-1: IL3 Network Leds
21
Wifi Setup
22
Figure 3-8: Configuration Menu with Wifi
22
Figure 3-9: Wifi Configuration Dialog
22
Figure 3-10: Wifi Access Point Scan Dialog
22
Fasmotion Application Window
23
Figure 3-11: Fasmotion Application Window
23
Controlling the Image Displays
24
Figure 3-12: Video Control Pane
24
Figure 3-14: User Preferences
24
Figure 3-13: View Menu
24
Figure 3-15: Gamma Comparison
25
Name the Camera
26
Camera Time and Date
26
Figure 3-17: Time and Date Configuration
26
Figure 3-16: HDMI Settings
26
Connect to the IL3 Outside Fasmotion
27
Figure 3-18: Web-Application
27
Figure 3-19: Open IL3 Media in Windows Explorer
28
Storage Setup
29
Figure 3-20: Fasmotion Storage Settings Tab
29
Figure 3-21: Fasmotion Camera Explorer
29
Configurations
30
Reboot and Power down
30
Figure 3-22: Fasmotion Camera Menu
30
Camera Information
31
Figure 3-23: Camera Information
31
Recording with the IL3
32
Setting Frame Rate and Resolution
32
Table 4-1: Sample Frame Rates and Resolutions
32
Figure 4-1: Record Settings Tab
33
Setting Shutter Speed
34
Figure 4-2: Shutter Settings
34
Setting Bit Depth
35
Configuring the Trigger
35
Figure 4-3: Trigger Configuration
35
Configuring Sync and Arm I/O
36
Figure 4-4: I/O Dialog in Record Controls
36
Black Level Calibration
37
Record: Arm and Trigger
37
Figure 4-5: Configuration Menu: Black Level Calibration
37
Table 4-2: Camera Control Buttons
37
Figure 4-6: Record Progress Bar: Armed
38
Figure 4-7: Record Progress Bar: Triggered
38
Autosave
39
Figure 4-8: Video Review Tab and Video Controls
39
Fasfire
40
Figure 4-9: Autosave Setup Dialog
40
Figure 4-10: Fasfire Gas Gauges
41
Figure 4-11: Fasfire with One Partition Left
41
Figure 4-12: Video Review with Multiple Partitions
41
Reviewing Captured Imagery: Playback
42
Figure 4-13: Fasmotion Playback Window
42
Figure 4-14: Playback Bug Selected
42
Figure 4-15: Video Controls (Playback)
43
Table 4-3: Playback Control
43
Figure 4-16: Select Per Frame Metadata in View Menu
44
Figure 4-17: Per Frame Metadata in Fasmotion
44
Image Processing
45
Figure 4-18: Image Pipeline
45
Custom Color Correction
46
Figure 4-19: Display Settings
46
Figure 4-20: Custom White Balance
47
Saving Images to Mass Storage
48
Table 4-4: Image File Save Options
48
Figure 4-21: Save Dialog
49
4-14: Transfers, Batch Transfers and Conversions
50
Figure 4-22: Fasmotion Explore Menu
50
Figure 4-23: Copy: Choose Destination
50
Figure 4-24: Batch Copy Convert: JPEG or BMP to AVI
50
Figure 4-25: Batch Copy Convert: CAP Files
51
Synchronizing Cameras
52
Sync in
52
Figure 5-1: Sync in Settings Dialog
52
Figure 5-2: Sync: Per Frame Timing
53
Figure 5-3: Sync in Per Second
53
Sync out
54
Figure 5-4: Sync: Per Second Timing
54
Figure 5-5: Sync out Per Frame
54
Master/Slave Setup
55
Figure 5-6: Sync Pass Thru
55
Figure 5-7: Master and Slave Cameras
55
Figure 5-8: External Sync: Local Grouping
56
Figure 5-9: External Sync: Distributed Grouping
57
IL3 Timestamps and Markers
58
Figure 5-10: Image with Timestamp
58
Figure 5-11: Per Frame Metadata from XML File
59
Table 5-1: I/O Pins to Markers
59
Using the Web App
60
Web App Overview
60
Figure 6-1: Address Bar (Chrome)
60
Figure 6-2: Application Window Camera Tab
60
Camera Tab
61
Figure 6-3: Camera Tab
61
Figure 6-4: Network Configuration Dialog
61
Storage Settings Tab
62
Figure 6-5: Storage Settings Tab
62
Figure 6-6: Explore Window
62
Record Settings
63
Figure 6-7: Record Settings Tab
63
Record Controls
64
Figure 6-8: Record Settings Tab--Advanced Settings
64
Figure 6-9: Record Controls Tab
64
Display Settings Tab
65
Arm, Trigger, Live, and Review Buttons
65
Figure 6-10: Display Settings Tab
65
Figure 6-11: Arm, Trigger, Live and Review Buttons
65
Review Tab
66
Figure 6-12: Web-App Review and Save
66
Figure 6-13: Video Review Tab
67
Figure 6-14: Download Information Box
67
Application Notes
68
Application Note 1: Histograms
68
Figure 7-1: Histogram: Linear Gradient
68
Figure 7-2: Histogram: Mono-Tonal
68
Figure 7-3: Histogram: Linear Gradient
69
Application Note 2: Understanding Bit Depth
70
Figure 7-4: High
71
Application Note 3: Trigger Position and the Circular Buffer
72
Figure 7-5: Circular Buffer Fills and Images Shift Position
72
Figure 7-6: Circular Buffer Fills and Images Shift Position
73
Figure 7-7: Circular Buffer Overflowing
73
Figure 7-8: Circular Buffer End Trigger
74
Application Note 4: Frame Rate, Resolution, and Exposure
76
Application Note 5: Optimizing System for Image Transfers
77
Figure 7-9: Packet Delay Spinner
78
Figure 7-10: Fasmotion Shortcut
79
Figure 7-11: Fasmotion Shortcut Properties
79
Table 7-1: Table Stats.txt High-Performance System
80
Table 7-2: Table Stats.txt Moderate-Performance System
80
Figure 7-12: Memory Usage in Task Manager
82
Table 7-3: Missing Frames on a Busy System
82
Table 7-4: Benefit from Jumbo Packets
82
Table 7-5: Finding the Correct Packet Delay Value
83
Application Note 6: Choosing an Image File Format
84
Table 7-6: File Format Features
85
Table 7-7: Save to SSD Benchmarks
85
Appendices
86
Appendix A: Definition of Terms
86
Table 8-1: Definitions
86
Appendix B: IL3 Specifications
89
Table 8-2: Specifications
89
Appendix C: IL3 Record / Resolution Tables
90
Table 8-3: Resolutions, Rates, and Times
90
Appendix D: Power and I/O Connections
93
Table 8-4: Power Pin out
93
Table 8-5: I/O Connector Pin out
93
Figure 8-1: Sync I/O Cable Drawing
94
Figure 8-2: Sync I/O Camera Interface Schematic
94
Appendix E: Adjusting Back Focus
95
Figure 8-3: Focus Chart
95
Figure 8-4: C-Mount
95
Figure 8-5: Navitar 50Mm F/95 Lens
96
Appendix F: Camera Status Leds
97
Table 8-6: Camera Status Leds
97
Appendix G: Contents of Frame.txt File
98
Appendix H: Contents of <Capture>.Xml File
99
Appendix I: IL3 Updates
100
Figure 8-6: Camera Information
100
Figure 8-7: Camera Update Screens
100
Figure 8-8: Contents of Update SD Card
101
Figure 8-9: SD Card Restorer Messages
101
Appendix J: Physical Measurements
102
Figure 8-10: Physical Measurements
102
Appendix K: Crop Factor
103
Figure 8-11: Crop Factor 1280 X 1024
103
Figure 8-12: Crop Factor 1280 X 720
103
Figure 8-13: Crop Factor 800 X 600
103
Table 8-7: Crop Factor
103
Appendix L: Partition Capture (CAP) File Format
104
Figure 8-14: CAP File Diagram
104
Table 8-8: CAP File Format
105
Appendix M: Day Number Calendar Conversion
106
Table 8-9: Dates and Day Numbers (Non Leap-Years)
106
Table 8-10: Dates and Day Numbers (Leap-Years)
107
Advertisement
Fastec IL3 Quick Start Manual (4 pages)
PC controlled digital high speed camera for slow motion
Brand:
Fastec
| Category:
Digital Camera
| Size: 0 MB
Table of Contents
Equipment
1
Fasmotion Camera Control Application
2
Power up the Ilx
2
Set the Language in Fasmotion
2
Connect the Ilx to a Computer
2
Record Setup: Resolution, Frame Rate, and Exposure
3
Set Preferences: Long Recording Mode for IL4
3
Record Controls: Triggering
3
Review and Save
4
Advertisement
Related Products
Fastec IL4
Fastec Categories
Digital Camera
Camcorder
More Fastec Manuals
Login
Sign In
OR
Sign in with Facebook
Sign in with Google
Upload manual
Upload from disk
Upload from URL