Sign In
Upload
Manuals
Brands
FARGO electronics Manuals
Printer
HDPii Dual-Sided
FARGO electronics HDPii Dual-Sided Manuals
Manuals and User Guides for FARGO electronics HDPii Dual-Sided. We have
1
FARGO electronics HDPii Dual-Sided manual available for free PDF download: User Manual
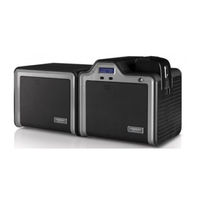
FARGO electronics HDPii Dual-Sided User Manual (373 pages)
High Definition Card Printer/Encoder
Brand:
FARGO electronics
| Category:
Printer
| Size: 6 MB
Table of Contents
Table of Contents
3
Section 1: Printer Overview
9
How to Use the Guide
9
Safety Messages (Review Carefully)
10
Process Flow (in Table Format)
11
Reviewing the Boot-Up Sequence
11
Reviewing the Sequence of Operations
12
Section 2: Specifications
14
Safety Messages (Review Carefully)
14
Introduction
15
Reviewing the Printer Overview Table
15
Reviewing the Package
16
Regulatory Compliances
18
Agency Listings
18
FCC Rules
19
Environmental Protection (China-Rohs)
19
Technical Specifications
20
Functional Specifications
29
Printer Components: Resin Thermal Transfer to USB Interface Port
30
Printer Components: LCD and Softkey Control Pad
31
Printer Components: Print Ribbons
33
Printer Components: Blank Cards
34
Printer Components: Card Input and Output Hoppers
35
Printer Components: Card Output Hopper and Reject Hopper
36
Printer Components: Transfer Roller
37
Printer Components: Flipper Table
38
Section 3: Installation Procedures
39
Safety Messages (Review Carefully)
39
Introduction
40
Time Requirement
40
System Requirements
40
Inspecting the Printer
40
Unpacking the Printer
40
Choosing a Good Location
42
About Moisture Condensation
42
Module Installation Procedures
43
Installing the Output Module Accessory
43
Removing the Output Side Upgrade Cover (if Applicable)
45
Printer Loading Procedures
46
Loading the Print Ribbon
46
Loading the Clear Transfer Film
49
Inserting the Card Cleaning Roller
52
Loading the Blank Cards
55
Connecting Power to Printer
57
Printer Driver Installation Procedures
60
Installation Procedures
60
Installing the Printer Driver
60
Printing a Test Print Image
69
Section 4: Accessory Procedures
71
Safety Messages (Review Carefully)
71
Using the Security Lock Slot
72
Section 5: General Troubleshooting
74
LCD Messages
74
Safety Messages (Review Carefully)
75
Troubleshooting - LCD and Printer Error Message Tables
76
How to Use the LCD Error Message Table (Example Provided)
77
Troubleshooting with the LCD Error Message Table
78
Troubleshooting with the Printer Error Message Table
92
Communications Errors
103
Resolving the Communication Errors
103
Printing a Test Image
105
Reviewing the Alignment Self Test Card
107
Reviewing the Color Bars Self Test
108
Reviewing the Device Settings Self Test
109
Reviewing the Ymck Self Test
110
Reviewing the Magnetic Self Test
111
Reviewing the Resin Self Test
112
Section 6: Ethernet Option Section
113
Introduction
113
Technical Specification - Ethernet Option
114
Functional Specification - Ethernet Option
115
Reviewing the Web Page Server
116
Network Services - Overview
116
Reviewing the Print Server
116
Reviewing the Network Management Interface
116
Reviewing the Telnet Server
116
Network Management Interface
117
Telnet Command Line Interface
117
Initiating a Telnet Session
117
Reviewing the Telnet Command Table
118
Reviewing Web Page Security
124
Ethernet Web Pages - Standard Procedures
124
Logging in
125
Accessing the Home Page
126
Reviewing the Home Page
127
Reviewing the Home Page Categories and Fields (Table)
128
Configuring the Network Settings
128
Accessing the Network Settings Page
129
Reviewing the Interface
130
Reviewing the Current Settings
131
Switching to the Automatic IP Address Mode
132
Changing to the Static IP Address Mode
133
Using the Clear Changes Button
135
Using the Media Information Page
136
Using the TCP/IP Page
137
Using the Printer Page
139
Using the System Log Page
141
Changing the Log Name
142
Selecting the Log Type
144
Selecting the Log Destination
146
Setting up Email Event Logging
148
Specifying UDP Event Logging
150
Specifying TCP Event Logging
152
Using the Administration Pages
155
Using the System Information Page
155
Changing the Root Password
157
Using the Reboot Pages
158
Rebooting the Printer
158
Upgrading the Main Firmware
160
Using the Print Path Page
166
Using the Help Page
168
Additional Procedures
168
Accessing the Ethernet Status Leds
168
Reviewing the LED Table
168
Upgrading the Main Firmware with the Fargo Workbench Printer Utility
169
Restoring the Factory Settings for Ethernet
171
Resetting the Settings
171
Changing the LCD Network Settings
171
Accessing the Network Setup Menu
171
Changing the DHCP Setting
172
Changing the ANEG Setting
172
Saving Addresses
173
Resetting Passwords
173
Accessing the IP Address
174
Ethernet Printer Troubleshooting Procedures
175
Troubleshooting Procedures
175
Verifying the Printer Connection
176
Verifying the Printer IP Address
176
Verifying that Your PC Can Access the Printer Using the Ping Command
177
Printing a Test Page
178
Reviewing Frequently-Asked Questions
179
Glossary of Terms
186
Section 7: Printer Adjustments
188
Safety Messages (Review Carefully)
188
Printing on Alternate Card Stocks
189
Selecting the Right Cards and Optimizing the Print Process
189
Selecting the Appropriate Printer Driver Settings
190
Conducting the Tape Adhesion Test
192
Printer Driver Options
195
Installing Printer Driver Updates
195
Setting up the Printer Driver
197
Setting up Windows 2000/XP/2003
197
Using the OK, Cancel and Help Buttons
197
Using the Card Tab
198
Selecting the Card Size
199
Selecting the Card Type
200
Setting the Orientation
204
Specifying the Number of Copies
205
Selecting the Diagnostics Button
206
Selecting the Test Print Button
207
Selecting the about Button
208
Selecting the Toolbox Button
209
Using the Device Options Tab
210
Detecting Supplies at Print Time Function
211
Adjusting the Ribbon Type
214
Adjusting the Film Type
216
Using the Dual Sided Group Functions
217
Using the Dual Sided - Print both Sides Option
218
Using the Print both Sides - Split 1 Set of Ribbon Panels Option
219
Using the Print both Sides - Print Back Image on Front of Card Option
220
Using the Dual Sided - Print Back Side Only Option
221
Using the Device Options Group
222
Using the Rotate Front 180 Degrees or Rotate Back 180 Degrees Options
223
Using the Disable Printing Option
224
Using the Image Color Tab
225
Using the Quality - Color Matching Dropdown
227
Adjusting for the Resin Dither
231
Using the Advanced Image Color Window
232
Using the Default Button on the Image Color Tab
238
Using the Image Transfer Tab
239
Adjusting the Image Position Controls
240
Adjusting the Transfer Dwell Time and Temperature
242
Using the Default Button
246
Using the Magnetic Encoding Tab
247
Using the Encoding Mode Dropdown
248
Selecting the Coercivity/Magnetic Track
252
Reviewing the Shift Data Left Function
253
Reviewing the Magnetic Track Options
254
Using the Magnetic Track Options
256
Using the Character Size Buttons
258
Using the ASCII Offset Dropdown List
259
Using the Bit Density Dropdown List
260
Using the LRC Generation Dropdown List
261
Using the Encoding Mode Dropdown List
262
Reviewing the ISO Track Locations
263
Sending the Track Information
264
Reviewing the Sample String
265
Reviewing the ASCII Code and Character Table
266
Using the Default Button (Image Transfer Tab)
267
Using the K Panel Resin Tab
268
Using the Scroll Controls
269
Using the Click and Drag Capability
270
Selecting "Inches or MM" Radio Button
270
Using the Add and Delete Buttons
270
Selecting the Full Card
271
Selecting the Defined Area(S)
272
Selecting the Undefined Area(S)
273
Defining the Area to Activate the Card Grid
274
Measuring the Total Card Area
275
Measuring the Area to be Positioned on the Card
276
Selecting the Print YMC under the K and Print K Only Options
277
Using the Printer Supplies Tab
279
Reviewing Information on the Supplies Tab
280
Section 8: Inhibit Panel Usage
282
Using the Inhibit Panel (HDPII)
282
Using Inhibit Panel (Via the Fargo Workbench Printer Utility)
282
Using Inhibit Panel with an Application
285
Generating Text Objects
285
Rendering Print Jobs
286
Using the Test Print
294
Troubleshooting the Inhibit Panel
296
Section 9: Toolbox
297
Accessing the Toolbox
297
Selecting the Configuration Tab
298
Using the Configuration Tab
299
Using the Optional Printer Features Group Box
299
Reviewing the Ribbon Low Message
300
Using the Event Monitoring Group Box
300
Using the Film Low Message
301
Selecting the Set Language for Printer LCD Display Group Box
301
Selecting the Calibrate Film Tab
302
Selecting the Calibrate Ribbon Tab
303
Selecting the Clean Printer Tab
304
Using the Clean Printer Group Box
306
Selecting the Advanced Settings Tab
307
Reviewing the no Printer Connected Error Message
309
Reviewing the Value Outside the Range Error Message
309
Section 10: Cleaning
310
Using the Required Supplies
310
Safety Messages (Review Carefully)
311
Accessing the Clean Printer Tab
312
See below
312
Cleaning the Printer Platen Roller and Card Feed Rollers
313
Cleaning Outside the Printer
316
Cleaning Procedures
316
Cleaning Inside the Printer
316
Cleaning the Printhead
317
Replacing the Card Cleaning Roller
318
Cleaning the Magnetic Encoder
319
Section 11: Fargo Workbench Printer Utility
321
Using the Inhibit Panel (Hdpii)
321
Using Inhibit Panel (Via the Fargo Workbench Printer Utility)
321
Using Inhibit Panel (from an Application)
324
Generating Textout Commands
324
Rendering Print Jobs
324
Using the Inhibit Panel (Via Application) (Continued)
325
Using the Test Print
332
Inhibit Panel Feature Operation
333
Using the Fargo Workbench Printer Utility for Inhibit Area Placement
333
Using the Application for Inhibit Area Placement
334
Background Information - Windows Printing System
335
Inhibit Bitmap - Local Printer Instances Functions
335
Inhibit Bitmap - Network (Shared) Printer Instances Functions
335
Inhibit Bitmap File Placement Examples
336
Inhibit Bitmap File Description
336
Section 12: Packing the Card Printer
337
Section 13: Firmware Updates
338
Performing the Firmware Updates
339
Contacting Fargo Technical Support
345
Section 14: Fargo Technical Support
345
Finding out When a Card Printer was Manufactured
346
Reading the Serial Numbers on a Fargo Printer
346
Reviewing Example No. 1: Serial Number A1280224
346
Section 15: Reviewing Spare Parts Lists
347
Reviewing Spare Parts List for
347
Section 16: Glossary of Terms
348
Section 17: Index
368
Advertisement
Advertisement
Related Products
FARGO electronics HDPii
FARGO electronics HDP600
FARGO electronics HDP600-LC
FARGO electronics HDP700 Series
FARGO electronics HDP5000 single-side
FARGO electronics HDP820
FARGO electronics HDP600 CR100
Fargo HDP5000 single-side (with dual-side lamination)
FARGO Electronics HDP820-LC
FARGO electronics HDP5000 dual-side (with dual-side lamination)
FARGO electronics Categories
Printer
More FARGO electronics Manuals
Login
Sign In
OR
Sign in with Facebook
Sign in with Google
Upload manual
Upload from disk
Upload from URL