Sign In
Upload
Manuals
Brands
Excelsior-HENDERSON Manuals
Motorcycle
1999 HCX
Excelsior-HENDERSON 1999 HCX Manuals
Manuals and User Guides for Excelsior-HENDERSON 1999 HCX. We have
1
Excelsior-HENDERSON 1999 HCX manual available for free PDF download: Riders Handbook
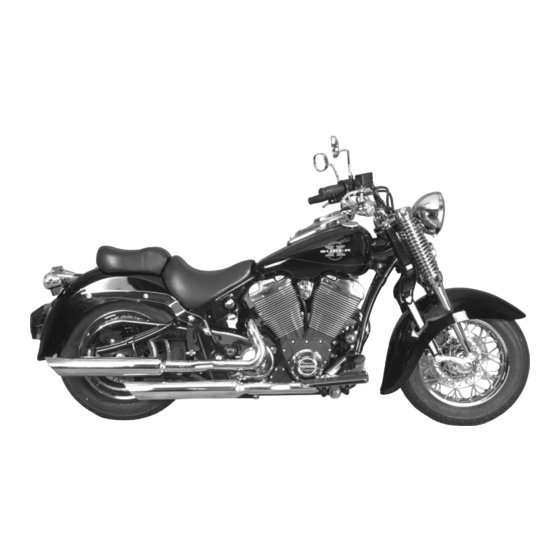
Excelsior-HENDERSON 1999 HCX Riders Handbook (279 pages)
Brand:
Excelsior-HENDERSON
| Category:
Motorcycle
| Size: 38 MB
Table of Contents
Thank You
7
Table of Contents
11
Introduction
23
Read the Rider's Handbook
23
Hazard Symbol and Terms in the Rider's Handbook
24
Safety Information
27
Safe Riding
28
Super X Design Characteristics
28
Safe Riding Practices
29
Carrying a Passenger
33
Transporting the Super X
34
Protective Apparel
34
Product Modifications
35
Gross Vehicle Weight Rating
36
Loading
37
Selecting and Installing Accessories
39
Gasoline and Exhaust Gases
40
Parking
41
Maintenance
42
Safety and Vehicle Information Labels
44
Reporting Safety Defects
47
Product Description
49
Vehicle Components
50
Vehicle Identification Number (VIN)
52
Engine Identification Number
53
Key Identification Number
54
Instruments and Controls
57
Location
57
Key
59
Fork Lock
59
Main Switch
60
Instrument Pod
62
Indicator Lights
62
Headlamp High Beam Indicator
63
Check Engine Indicator
63
Turn Signal Indicator
63
Neutral Indicator
64
Low Oil Pressure Indicator
64
Low Battery Voltage Indicator
64
Low Fuel Indicator
65
Speedometer
65
Odometer/Trip Meter
65
Odometer/Trip Meter Function Button
66
Tachometer
66
Fuel Gauge
66
Handlebar Controls
67
Left Side Handlebar Controls
67
Clutch Lever
67
Left Mirror
67
Headlamp Dimmer Switch
68
Turn Signal Switch
68
Horn Button
68
Right Side Handlebar Controls
69
Front Brake Lever
69
Throttle Control Grip
69
Right Mirror
69
Engine Stop/Run Switch
70
Emergency Flasher Switch
70
Electric Starter Button
71
Foot Controls
71
Gear Shift Pedal
71
Rear Brake Pedal
72
Fuel Cap
72
Rear Suspension Adjustment
73
Location of Adjusters
74
Factory Adjustment Settings
74
Adjusters and Their Setting Ranges
74
Changing Adjustment Settings
75
Changing Preload Adjustment
76
Changing Damping Rate Adjustment
79
Effects of Rear Suspension Adjustments
80
Sidestand
83
Saddles
83
Pre-Operation Check
85
Fuel
86
Fuel Level
86
Fuel Hose, Rail, and Connections
86
Evaporative Emission Control System (California Model Only)
86
Engine Oil Level
87
Tires
88
Tire Pressure
88
Tire Condition
89
Tread Depth
89
Drive Belt
90
Steering
90
Hydraulic Controls - Clutch and Brakes
90
Check Hoses and Connections
90
Check Front Brake & Clutch Fluid Level
91
Check Rear Brake Fluid Level
91
Check Clutch Lever Movement
91
Check Front Brake Lever Movement
92
Check Rear Brake Pedal Movement
92
Check Brake Pads
93
Throttle Control Grip and Cables
93
Electrical Equipment
94
Engine Stop/Run Switch
94
Instrument Pod
94
Headlamp
95
Brake Light
95
Running Lights
95
Turn Signals
95
Sidestand
96
Fasteners
96
Operation and Riding
99
Operating During Break-In Period (First 500 Miles)
100
Fueling and Fuel Fill Height
101
Starting the Engine
102
Jump-Starting
104
Shifting Gears
106
Recommended Shift Points
109
Accelerating
110
Braking
111
Stopping the Engine
112
Parking
113
Maintenance
117
New Motorcycle Break-In Maintenance
118
Periodic Maintenance Intervals
118
Engine Oil
121
Change Oil and Oil Filter
121
Check Oil Level
123
Air Filter Element
125
Drive Belt
126
Check Drive Belt Tension
126
Adjust Drive Belt Tension
127
Check Drive Belt Condition
128
Throttle
129
Check Throttle Control Grip and Cables
129
Adjust Throttle Freeplay
129
Fuel Hose, Rail, and Connections
130
Evaporative Emission Control System (California Model Only)
130
Oxygen Sensor
131
Hydraulic Controls - Clutch and Brakes
132
Check Hoses and Connections
132
Check Front Brake & Clutch Fluid Level
132
Check Rear Brake Fluid Level
133
Add Hydraulic Fluid
133
Check Clutch Lever Movement
134
Check Front Brake Lever Movement
135
Check Rear Brake Pedal Movement
135
Check Brake Pads
136
Spark Plugs
136
Inspect Spark Plugs
136
Remove Spark Plugs
137
Replace Spark Plugs
138
Saddles
139
Tandem Saddle
139
Rider's Saddle
140
Battery
141
Remove Battery
142
Charge Battery
143
Install Battery
144
Electrical Equipment
145
Replace Fuse
145
Check Engine Stop/Run Switch
146
Check Instrument Pod Lights
146
Replace Instrument Pod Light Bulb
147
Check Headlamp
147
Replace Headlamp Sealed Beam Lamp
148
Check Brake Light
148
Replace Brake/Tail or License Plate Light Bulb
149
Check Running Lights
149
Check Turn Signals
150
Replace Turn Signal/Running Light Bulb
150
Steering
151
Inspect Steering Movement
151
Inspect Steering Head Bearings
151
Tires
152
Check Tire Pressure
152
Check Tire Surface Condition
152
Check Tread Depth
152
Wheels
153
Check Spokes
153
Remove Front Wheel
154
Inspect Front Wheel Bearings
155
Install Front Wheel
156
Remove Rear Wheel
157
Inspect Rear Wheel Bearings
159
Install Rear Wheel
160
Align Rear Wheel
161
Sidestand
163
Fasteners
163
Road Test
164
Cleaning and Storage
167
Cleaning
167
Washing and Drying
168
Waxing, Polishing, and Applying Protectants
170
Repairing Painted Surface Damage
171
Storage
171
Preparing for Storage
172
Choose an Adequate Storage Location
172
Clean and Protect the Motorcycle
172
Stabilize Fuel
173
Protect Engine Components
173
Inflate Tires
174
Remove, Clean, and Store Battery
174
Park and Cover the Motorcycle
175
Maintaining During Storage
175
Removing from Storage
175
Our Tradition of State of the Art
179
Traditions Alive Today
182
The 1999 Super X
182
The Company
188
The Road from 1993 through 1998
194
The Trail from 1876 through 1931
207
1876-1910: the Beginnings of Excelsior
208
1911-1917: the Joining of Forces
212
1918-1925: Excelsior-Henderson and the Super X
232
1926-1931: the Birth of the "Cruiser
246
Specifications
257
Fuel Specifications
260
Engine Oil Specifications
261
Torque Specifications
262
Identification Numbers for Your Super X
264
Index
267
Advertisement
Advertisement
Related Products
EXCELSIOR HENDERSON HCX 1999
Excelsior-HENDERSON Super X 1999
Excelsior-HENDERSON Super X HCX 1999
Excelsior-HENDERSON Categories
Motorcycle
More Excelsior-HENDERSON Manuals
Login
Sign In
OR
Sign in with Facebook
Sign in with Google
Upload manual
Upload from disk
Upload from URL