Sign In
Upload
Manuals
Brands
epiphan video Manuals
Media Converter
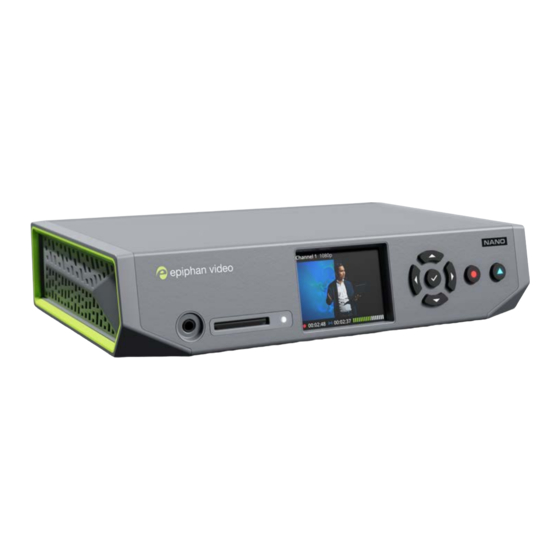
Pearl Nano
epiphan video Pearl Nano Portable Encoder Manuals
Manuals and User Guides for epiphan video Pearl Nano Portable Encoder. We have
2
epiphan video Pearl Nano Portable Encoder manuals available for free PDF download: User Manual
epiphan video Pearl Nano User Manual (484 pages)
Brand:
epiphan video
| Category:
Media Converter
| Size: 10 MB
Table of Contents
Table of Contents
6
Start here
14
About this Guide
14
What Is Pearl Nano
15
Front and Back View of Pearl Nano
17
SD Card and SATA M.2 2280 SSD Storage
19
Quick Start
21
Monitoring Audio
28
Selecting an Audio Source
30
Connecting Microphones to the XLR Line Level Inputs
31
Specifications
32
AV Inputs
32
Tech Specs
33
Power Adapter Specifications
41
Optimum CPU Performance
41
International Character Support
43
Vesa Mounting the Device
43
User Interfaces and Remote Access
45
The Front Panel Control Interface
46
About the Front Screen and Control Key Interface
46
The Front Screen Channel View
50
The Front Screen Menu and Control Keys
51
Record and Stream Using the Control Keys
52
DIM the Front Screen and Control Interface
54
Set the Front Screen Timeout
55
Set a PIN Security Code
56
One Touch Streaming and Recording Control
58
About One Touch Streaming and Recording
58
Enable One Touch Control
60
The Admin Panel
62
About the Admin Panel
62
Connect to Admin Panel
64
Enable Local Console Access to the Admin Panel
65
Connect Using a DNS-Based Service Discovery
69
Connect Using Persistent Static IP Address
71
Cloud-Based Device Management
73
About Device Management with Epiphan Cloud
73
Enable or Disable Epiphan Cloud Access
74
Pair and Unpair from Epiphan Cloud
76
Remote Login to the Admin Panel
80
PART 1: Setup
82
Configure Network Settings
83
Network Ports Used by Pearl Nano
83
Verify IP Address and MAC Address of Pearl Nano
85
Configure a Static IP Address
87
Configure DHCP
90
Configure DHCP Option
94
Configure Dynamic DNS
94
Change the HTTP/HTTPS Port Values
97
Perform Network Diagnostics
98
Disable the Network Discovery Port
99
Configure Network Security
101
Configure 802.1X Network Security and Manage User Certificates
101
Manage CA and Self-Signed Certificates
103
Configure HTTPS
104
Configure Date and Time
107
View the Current Date and Time Settings
107
Configure a Time Server
108
Manually Set the Date, Time, and Zone
109
Configure Device Info, Name, Description, and Location
111
Format the SD Card
112
Install and Format a SATA M.2 2280 SSD
113
Audio Input Ports
116
Configure Audio Ports for Stereo or Mono
116
Assign Audio Sources to an Input
118
Adjust Audio Gain and Delay
120
Mute Audio
124
Video Output Ports
127
About Video Output Ports
127
Video Output Port Resolution
129
Set up the Video Output Port Using the Admin Panel
129
Set up and Enable Multiviewer
131
Select the Video Output Source Using the Front Screen Menu
135
Preview the Video Output Port
136
Disable the Video Output Port
137
Disable or Enable Audio and Output Port Volume
137
Display and Reposition the Audio VU Meter
139
Rename a Video Output Port
140
Mirror the Video Output Port Display
141
Connect an External Keyboard
142
Connect a USB Status Light
144
User Administration
145
User Types and Privileges
145
Change User Passwords
149
Overcome Lost Passwords
151
Remove User Password
151
Log in Using a Different User Account
152
Assign Administrator Privileges to Operators
152
Configure LDAP User Authentication
155
Restrict Viewers by IP Address
157
IP Restriction Examples
159
Configuration Presets
162
About Configuration Presets
162
Configuration Preset Considerations
164
Configuration Groups
166
The Factory Default Configuration Preset and Factory Reset
167
Create a Configuration Preset
169
Apply a Configuration Preset Using the Admin Panel
170
Apply a Configuration Preset Using the Front Screen Menu
172
Export and Import Configuration Presets
173
Update a Configuration Preset
175
Delete a Configuration Preset
176
Status and Monitoring
178
Monitoring Audio and VU Sensitivity
178
Confidence Monitoring Using the Front Screen
179
View System Status Using the Front Screen Menu
181
View System Information Using the Admin Panel
183
View Network Status
183
View 802.1X Network Connection Status
184
View Channel Status and Stream Information
185
View the Video Output Port Status
186
View AFU and File Transfer Progress
187
View Scheduled CMS Events and History
189
PART 2: Capture
192
What Is a Channel
193
Channel Layout Examples
193
About Automatic Channels
195
Channel Configuration
198
Configure an Auto Channel
198
Add Video Sources
199
Add an Audio Source to a Layout
202
Rename a Channel
204
Preview a Channel
205
Add or Remove Channel Metadata
206
Configure Encoding
208
Codecs and File Format Compatibility
208
Configure Video Encoding
210
Configure Audio Encoding
214
Custom Layout Configuration
217
About the Custom Layout Editor
217
Move and Size Items in the Layout Editing Area
218
Audio Source Selection and Saving Edits
220
Resize and Position Items Using Percents or Pixels
220
Open the Custom Layout Editor for a Channel
227
Configure a Custom Layout for a Channel
228
Rename a Layout
230
Set the Background Color
231
Add an Image to a Layout
232
Upload or Remove an Image Using the Media Page
234
Add a Text Overlay
236
Custom System Variables for Text Overlays
239
Crop a Video Source
241
Video and Audio Input Sources
244
About Connecting Video and Audio Sources
244
Connect an RTSP Source
247
Connect an SRT Stream as an Input
250
Preview a Video Source Using the Admin Panel
253
Rename an Input Port
254
Configure a Video Input Source
255
HDMI and DVI Video Settings
256
SDI Video Settings
257
Add a Custom no Signal Image
258
PART 3: Stream
260
What Is Streaming
261
Streaming to a CDN, Multicasting, and Streaming to Multiple Destinations
262
Directly Sharing Channel Stream Urls with Viewers
264
About Streaming Using SRT
265
Secure Streaming
267
Suggested Stream Settings
268
Streaming a Channel Direct to Viewers
270
Share a Live Broadcast Stream (HTTP, HTTPS or RTSP)
271
Enable HLS (Pull)
273
Restrict Viewer Access to Channel Streams
275
Restrict Viewers by IP Address
276
IP Restriction Examples
278
Change HTTP and RTSP Streaming Port Values
280
Disable and Enable Direct Channel Streaming
281
Viewing a Channel's Live Broadcast Stream
283
View the Live Broadcast URL Using a Web Browser
284
View the Streaming URL Using a Media Player
286
Streaming to Servers, Cdns, and Other Devices
289
Set up an RTMP or RTMPS (Push) Stream
289
Set up an SRT Stream Using Rendezvous Mode
291
Set up an SRT Stream Using Caller and Listener Modes
294
Adjust Latency and View the SRT Stream Status
299
Set AES Encryption and a Passphrase for SRT
301
Set up an HLS (Push) Stream
303
Set up an MPEG-DASH (Push) Stream
306
Set up an RTSP Announce Stream
309
Set up a Stream to the CDN Using an XML Profile
311
Start and Stop Streaming to a CDN
312
Multicast Streaming
316
MPEG-TS Streams Using RTP/UDP Push
316
MPEG-TS Streams Using UDP Push
318
Multicast Streaming Using RTP/UDP
320
Set up Traffic Shaping
321
Viewing with Session Announcement Protocol (SAP)
323
Streaming to a Media Player or Smart TV
326
Stream Using Upnp
326
Enable Upnp
327
Disable Upnp
330
Viewing with Upnp
331
Change Upnp Device Name
332
PART 4: Record
333
About Recording
334
Record a Channel
336
Configure Recording Settings, File Size and Type
339
Restart Recording to a New File
342
Manage Recorded Files
343
View List of Recorded Files
343
Download Recorded Files Manually
344
Join Recorded Files Together
345
Rename Recorded Files
346
Delete Recorded Files
347
Automatic File Transfers
349
About Automatic File Upload (AFU)
349
Set the Channel to Include in AFU
350
Enable AFU, Schedule, and Set Options
352
Configure AFU to FTP Server Parameters
355
Configure AFU to SFTP Server Parameters
357
Configure AFU to Rsync Server Parameters
359
Configure AFU to CIFS Server Parameters
361
Configure AFU to SCP Client Parameters
362
Configure AFU to AWS S3 Parameters
364
Configure AFU to Webdav Server Parameters
366
AFU or Copy to USB
368
AFU to a USB Storage Device
368
Do a One-Time Copy/Move All Recordings to USB Storage Device
369
Manually Copy Recordings to a USB Storage Device
371
View File Transfer Status and Cancel File Copy to a USB Device
373
View Available USB Storage Space
374
Safely Eject USB Storage Device
375
Add Recordings to an AFU Queue
377
View the AFU Log
378
Manage the AFU Queue
379
PART 5: Integration
380
Kaltura Registration
381
Enable CMS and Register with Kaltura
381
Disable or Deregister from Kaltura
384
Change the Resource Name Used for Kaltura
386
Reassign a Registered Resource
387
Kaltura Recording and Webcasting Setup
390
About Kaltura Recording and Webcasting
390
Set up Channel for Kaltura VOD Events
393
Set up Channel and Urls for Kaltura Webcasting Events
393
Set Kaltura Ad Hoc Event Parameters
395
Set the Extend Kaltura CMS Event Interval
397
Change the Events Schedule Refresh Interval
398
Use RTMPS for a Kaltura Webcasting Event
399
Panopto Registration
400
Enable CMS and Register with Panopto
400
Disable CMS and Disconnect from Panopto
403
Panopto Recording and Webcasting Setup
405
About Panopto Recording and Webcasting
405
Setup Panopto Authentication for Ad Hoc Events
408
Set Panopto Ad Hoc Event Parameters
411
Set the Extend Panopto CMS Event Interval
411
Enable Mute and Display Image on Pause
413
Disable Low Disk Space Panopto Alerts
415
CMS Recording and Webcasting Control
418
Start/Stop Scheduled CMS Events Using the Admin Panel
418
Stop/Start Scheduled CMS Events Using the Front Screen Menu
420
Extend or Pause CMS Recordings and Webcasts
422
Create Ad Hoc Events Using the Admin Panel
424
Logout of an Ad Hoc Session
427
Schedule When CMS Event Recordings Upload
428
Upload the Local Panopto Webcast Recording
429
Recover Channel Backup Recordings
431
PART 6: Maintenance
434
Power down and System Restart
435
Backup Your Pearl Nano Setup
437
Perform a Factory Reset
438
Firmware Upgrade
440
Support
447
Register Your Device
451
Storage Capacity and Maintenance
453
PART 7: Troubleshooting
457
Diagnostic Tools
457
Connectivity Status Results
459
Run Diagnostic Tests Using the Admin Panel
460
Troubleshooting Quick Reference
462
Remove Black Bars (Matte) from the Video
466
Use a Specific EDID for the Video Input Port
469
Previous Releases and Features
472
External Keyboard Shortcuts
473
Software License
475
Advertisement
epiphan video Pearl Nano User Manual (413 pages)
Brand:
epiphan video
| Category:
Media Converter
| Size: 28 MB
Table of Contents
Table of Contents
3
Thank You for Choosing Epiphan
10
Start here
11
Release Notes
12
Previous Releases and Features
12
Product Overview
15
Pearl Nano Overview
16
Front and Back View of Pearl Nano
17
Monitoring Audio
19
About 4K on Pearl Devices
20
Pearl Nano AV Inputs
21
Pearl Nano Tech Specs
23
Pearl Nano Power Adapter Specifications
29
Optimum System Load
30
International Character Support
31
Quick Start
31
Next Steps
33
Pearl Nano Sample Recording
33
Setup
35
Access Network IP Address and Admin Panel
35
Vesa Mounting the Device
36
User Interfaces and Remote Access
37
Pearl Nano's Front Panel Control Interface
37
About the Front Screen and Control Key Interface
38
The Front Screen Channel View
41
The Front Screen Menu and Control Keys
42
Record and Stream Using the Control Keys
43
DIM the Front Screen and Control Interface
44
Set the Pearl Device Screen Timeout
45
Set a PIN Security Code
46
One Touch Streaming and Recording Control
46
The Admin Panel
49
About the Admin Panel
50
Connect to the Admin Panel
52
Enable Local Console Access to the Admin Panel
53
Connect Using a DNS-Based Service Discovery
56
Connect Using Persistent Static IP Address
57
Cloud-Based Device Management
58
About Epiphan Edge
58
Enable or Disable Epiphan Edge Access
59
Pair and Unpair from Epiphan Edge
60
Remote Login to the Admin Panel and Epiphan Live
62
Configure Network Settings
64
Network Ports Used by Pearl Nano
64
Verify IP Address and MAC Address
65
Configure a Static IP Address
67
Configure DHCP
70
Configure DHCP Option 81
73
Configure Dynamic DNS
74
Change the HTTP/HTTPS Port Values
77
Perform Network Diagnostics
77
Disable the Network Discovery Port
79
Configure Network Security
79
Configure 802.1X Network Security and Manage User Certificates
80
Manage CA and Self-Signed Certificates
82
Configure HTTPS
82
Configure System Settings
84
Configure Date and Time
85
View the Current Date and Time Settings
85
Configure a Time Server
86
Manually Set the Date, Time, and Time Zone
87
Configure Device Info, Name, Description, and Location
87
SD Card and SATA M.2 2280 SSD Storage
88
Install and Format an SD Card for the Pearl Mini and Pearl Nano
89
Install and Format a SATA M.2 2280 SSD for Pearl Nano
91
Format the SD Card
93
Audio Input Ports
94
Selecting an Audio Source
95
Connecting Microphones to the XLR Line Level Inputs
97
Configure Audio Ports for Stereo or Mono
97
Assign Audio Sources to an Input
99
Adjust Audio Gain and Delay
101
Mute Audio
104
Video Output Ports
106
About Video Output Ports
107
Video Output Port Resolution
108
Set up the Video Output Port Using the Admin Panel
109
Set up and Enable Multiviewer
111
Multiviewer System Information
113
Select the Video Output Source Using the Device Screen
114
Preview the Video Output Port
116
Disable the Video Output Port
116
Disable or Enable Audio and Output Port Volume
117
Display and Reposition the Audio VU Meter
119
Rename a Video Output Port
120
Mirror the Video Output Port Display
120
Connect External Devices
121
Connect an External Keyboard
122
Connect a USB Status Light
123
Feature Add-Ons
124
Add-Ons Overview
124
About 4K on Pearl Devices
126
User Administration
127
User Types and Privileges
127
Change User Passwords
132
Overcome Lost Passwords
133
Remove User Password
133
Log in Using a Different User Account
134
Assign Administrator Privileges to Operators
134
Configure LDAP User Authentication
136
Restrict Viewers by IP Address
138
Configuration Presets
142
About Configuration Presets
142
Configuration Preset Considerations
144
Configuration Preset Considerations
145
Recording and Streaming States
145
Recorded Files in a Channel or Recorder
146
Configuration Groups
146
The Factory Default Configuration Preset and Factory Reset
147
Create a Configuration Preset
148
Apply a Configuration Preset Using the Admin Panel
149
Apply a Configuration Preset Using the Front Screen Menu
150
Export and Import Configuration Presets
152
Update a Configuration Preset
153
Delete a Configuration Preset
154
Status and Monitoring
154
Monitoring Audio and VU Sensitivity
154
Confidence Monitoring Using the Front Screen
155
View System Status Using the Front Screen Menu
157
View System Information Using the Admin Panel
159
View Network Status
159
View 802.1X Network Connection Status
160
View Channel Status and Stream Information
160
View the Video Output Port Status
161
View AFU and File Transfer Progress
162
View Scheduled CMS Events and History
165
Capture
168
What Is a Channel
169
Channel Layout Examples
169
About Automatic Channels
171
Channel Configuration
173
Configure an Auto Channel
174
Add Video Sources
175
Add an Audio Source to a Layout
178
Rename a Channel
179
Preview a Channel
180
Add or Remove Channel Metadata
181
Configure Encoding
182
Codecs and File Format Compatibility
183
Configure Video Encoding
185
Configure Audio Encoding
188
Custom Layout Configuration
190
About the Custom Layout Editor
190
Resize and Position Items Using Percents or Pixels
193
Open the Custom Layout Editor for a Channel
198
Configure a Custom Layout for a Channel
199
Rename a Layout
200
Set the Background Color
200
Add an Image to a Layout
201
Upload or Remove an Image or Video File Using the Media Page
203
Add a Text Overlay
204
Custom System Variables for Text Overlays
207
Crop a Video Source
208
Video and Audio Input Sources
211
About Connecting Video and Audio Sources
211
Tested RTSP-Based IP Cameras
212
Connect an RTSP Source
214
Connect an SRT Stream as an Input
215
Preview a Video Source Using the Admin Panel
217
Rename an Input Port
218
Configure a Video Input Source
218
Add a Custom no Signal Image
219
Stream
221
What Is Streaming
222
Streaming to a CDN, Multicasting, and Streaming to Multiple Destinations
223
Directly Sharing Channel Stream Urls with Viewers
224
About Streaming Using SRT
225
Secure Streaming
227
Suggested Stream Settings
228
Streaming a Channel Direct to Viewers
230
Share a Live Broadcast Stream (HTTP, HTTPS, or RTSP)
231
Enable HLS (Pull)
232
Restrict Viewer Access to Channel Streams
233
Restrict Viewers by IP Address
234
Change HTTP and RTSP Streaming Port Values
238
Disable and Enable Direct Channel Streaming
239
Viewing a Channel's Live Broadcast Stream
240
View the Live Broadcast URL Using a Web Browser
242
View the Streaming URL Using a Media Player
243
Streaming to Servers, Cdns, and Other Devices
245
Set up an RTMP or RTMPS (Push) Stream
245
Set up an SRT Stream Using Rendezvous Mode
246
What's Next
249
Set up an SRT Stream Using Caller and Listener Modes
249
Adjust Latency and View the SRT Stream Status
252
Set AES Encryption and a Passphrase for SRT
255
Set up an HLS (Push) Stream
255
Set up an RTSP Announce Stream
257
Set up a Stream to the CDN Using an XML Profile
258
Start and Stop Streaming to a CDN
259
Multicast Streaming
260
MPEG-TS Streams Using RTP/UDP Push
261
MPEG-TS Streams Using UDP Push
263
Multicast Streaming Using RTP/UDP
265
Set up Traffic Shaping
265
Viewing with Session Announcement Protocol (SAP)
267
Streaming to a Media Player or Smart TV
269
Record
270
About Recording
270
Pearl Mini and Pearl Nano Recording Storage Information
272
Record a Channel
273
Configure Recording Settings, File Size, and Type
275
Restart Recording to a New File
276
Manage Recorded Files
278
Join Recorded Files Together
279
Automatic File Transfers
280
About Automatic File Upload (AFU)
280
Set Channels and Recorders to Include in AFU
281
Enable AFU, Schedule, and Set Options
282
Configure AFU to FTP Server Parameters
284
Configure AFU to SFTP Server Parameters
285
Configure AFU to Rsync Server Parameters
287
Configure AFU to CIFS Server Parameters
288
Configure AFU to SCP Client Parameters
290
Configure AFU to AWS S3 Parameters
292
Configure AFU to Webdav Server Parameters
294
AFU or Copy to USB
295
AFU to a USB Storage Device
296
Manually Copy Recordings to USB Storage Device
298
Automatic File Upload to a USB Storage Device
303
Manually Copy Recordings to USB
303
One-Time Copy All Recordings to USB Storage Device
307
Manually Copy Recordings to USB
309
Manage USB File Transfer Queue
313
Manage USB Drive
315
Add Recordings to an AFU Queue
316
View the AFU Log
316
Manage the AFU Queue
317
Integration
318
Kaltura Registration
318
Enable CMS and Register with Kaltura
318
Disable or Deregister from Kaltura
321
Change the Resource Name Used for Kaltura
322
Reassign a Registered Resource
322
Kaltura Recording and Webcasting Setup
323
About Kaltura Recording and Webcasting
324
Kaltura Settings
326
Set up Channel for Kaltura VOD Events on Pearl Nano
328
Set up Channel and Urls for Kaltura Webcasting Events
328
Set Kaltura Ad Hoc Event Parameters
329
Set the Extend Kaltura CMS Event Interval
331
Change the Events Schedule Refresh Interval
331
Use RTMPS for a Kaltura Webcasting Event
332
Panopto Registration
332
Enable CMS and Register with Panopto
333
Disable CMS and Disconnect from Panopto
334
Panopto Recording and Webcasting Setup
335
About Panopto Recording and Webcasting
335
Set up Panopto Authentication for Ad Hoc Events
337
Set Panopto Ad Hoc Event Parameters
340
Set the Extend Panopto CMS Event Interval
341
Enable Mute and Display Image on Pause
342
Disable Low Disk Space Panopto Alerts
344
Yuja Setup
347
Yuja Known Issues
347
Yuja Registration
347
Yuja Settings
349
Creating, Modifying, and Deleting Yuja Events
350
Accessing Yuja Recordings
350
Set the Extend Yuja CMS Event Interval
350
View Yuja Events
351
CMS Recording and Webcasting Control
351
Set up a CMS Start Screen
352
Start/Stop Scheduled CMS Events Using the Admin Panel
353
Stop/Start Scheduled CMS Events Using Pearl Nano's Front Screen Menu
354
Extend or Pause CMS Recordings and Webcasts
356
Create Ad Hoc Events Using the Admin Panel
358
Log out of an Ad Hoc Session
361
Schedule When CMS Event Recordings Upload
362
Upload the Local Panopto Webcast Recording
363
Recover Channel Backup Recordings
363
Maintenance
367
Power down and System Restart
367
Back up Your Pearl Device Setup
369
Perform a Factory Reset
370
Firmware Upgrade
371
Check for Firmware Updates
372
Update the Firmware
373
BIOS Update
375
Register Your Device
377
Support
378
Configure Remote Support
379
Disable Remote Support
381
Storage Capacity and Maintenance
381
Troubleshooting
385
Diagnostic Tools
385
Connectivity Status Results
386
Run Diagnostic Tests Using the Admin Panel
388
Run Diagnostic Tests Using the Device Screen
389
Troubleshooting Quick Reference
391
Remove Black Bars (Matte) from the Video
394
Use a Specific EDID for the Video Input Port
397
Upload a New EDID
398
Restore Factory Default EDID
399
External Keyboard Shortcuts
400
Limitations and Known Issues
402
Terms and Conditions
405
Software License
406
Thank You for Choosing Epiphan
413
Advertisement
Related Products
epiphan video Pearl-2
epiphan video Pearl Mini
epiphan video AV.io 4K
epiphan video DVI2USB 3.0
epiphan video ESP1782
epiphan video Categories
Media Converter
TV Tuner
Security Camera
Switch
Recording Equipment
More epiphan video Manuals
Login
Sign In
OR
Sign in with Facebook
Sign in with Google
Upload manual
Upload from disk
Upload from URL