Sign In
Upload
Manuals
Brands
Epiphan Manuals
DVR
Pearl Mini
Epiphan Pearl Mini Manuals
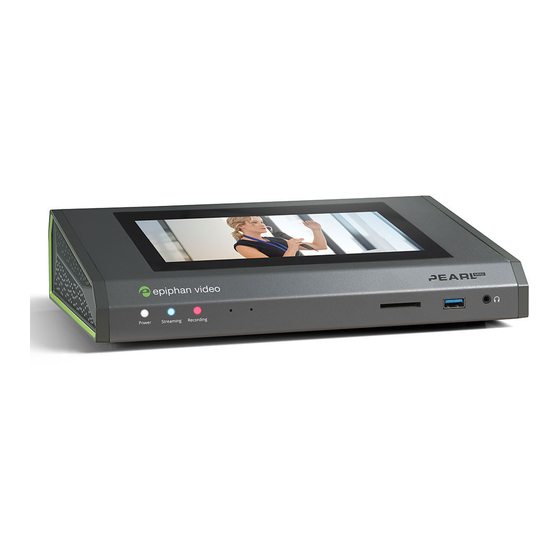
Manuals and User Guides for Epiphan Pearl Mini. We have
1
Epiphan Pearl Mini manual available for free PDF download: User Manual
Epiphan Pearl Mini User Manual (447 pages)
Brand:
Epiphan
| Category:
DVR
| Size: 16 MB
Table of Contents
Terms and Conditions
2
Technical Support
3
Table of Contents
6
Start here
13
About this Guide
13
What Is Pearl Mini
14
Front and Back View Pearl Mini
16
SD Card Installation and File Management
18
Quick Start
20
Live Video Mixing / Switching
26
Monitoring Audio
27
Selecting an Audio Source
29
Specifications
32
AV Inputs
32
Tech Specs
34
Optimum CPU Performance
37
Vesa Mounting the Device
38
User Interfaces and Remote Access
40
The Touch Screen
41
About the Touch Screen
41
The Channel View
43
Record a Channel Using the Touch Screen
45
Stream a Channel Using the Touch Screen
45
Switching / Mixing Using the Touch Screen
46
One Touch Streaming and Recording Control
49
Configure the Touch Screen
56
Touch Screen
60
The Admin Panel
64
About the Admin Panel
64
Connect to the Admin Panel
66
Connect Using the Epiphan Discovery Utility
68
Connect Using a DNS-Based Service Discovery
69
Connect Using Persistent Static IP Address
70
Switching / Mixing Using the Admin Panel
71
Epiphan Live
73
About Epiphan Live
73
The Dashboard Interface
74
Access Epiphan Live Using a Web Browser or Mobile Device
76
Access Epiphan Live from the Admin Panel
77
Stream, Record, and Monitor Using the Dashboard Interface
78
Switching / Mixing Using Epiphan Live
86
Your Recordings
90
Remote Login Access
92
About Remote Login and Control
92
Enable or Disable AV Studio for Remote Login
93
Pair and Unpair Pearl Mini from AV Studio
94
Access Cloud Versions of the Admin Panel and Epiphan Live
96
Using AV Studio to Control Pearl Mini
97
About Using AV Studio to Control Pearl Mini
98
Select Channels for Remote Control
99
Control Recording Using AV Studio
100
View and Download AV Studio Recordings Locally
101
Configure Channel Encoding Using AV Studio
103
PART 1: Setup
105
Configure Network Settings
106
Network Ports Used by Pearl Mini
106
Verify IP Address and MAC Address of Pearl Mini
108
Configure a Static IP Address
109
Configure DHCP
112
Change the HTTP/HTTPS Port Values
114
Perform Network Diagnostics
115
Disable the Network Discovery Utility
116
Configure Network Security
118
Configure 802.1X Network Security and Manage User Certificates
118
Manage CA and Self-Signed Certificates
120
Configure HTTPS
121
Tether to a Mobile Network
122
Configure Date and Time
125
Format the SD Card
128
Audio Input Ports
130
Enable or Disable Phantom Power
130
Configure Audio Ports for Stereo or Mono
131
Assign Audio Sources to an Input
132
Adjust Audio Gain and Delay
133
Mute Audio
135
Video Output Ports
138
About Video Output Ports
138
Video Output Port Resolution
139
Show a Channel or Video Source on the Output Port
140
Preview the Video Output Port
142
Disable the Video Output Port
143
Disable or Enable Audio and Output Port Volume
144
Display and Reposition the Audio VU Meter
146
Rename a Video Output Port
147
Mirror the Video Output Port Display
148
Set up Kaltura CMS Integration
150
Enable CMS and Register with Kaltura
150
Disable or Deregister the Device from Kaltura
151
Change the Resource Name Used for Kaltura
153
Reassign a Registered Resource
154
User Administration
156
User Types and Privileges
156
Set or Change User Passwords
160
Remove User Passwords
161
Overcome Lost Passwords
162
Configure LDAP User Authentication
163
Change the Logged-In User
165
Restrict Viewers by IP Address
165
IP Restriction Examples
167
Configuration Presets
170
About Configuration Presets
170
Configuration Preset Considerations
172
Configuration Groups
176
The Factory Default Configuration Preset
177
Create a Configuration Preset
179
Apply a Configuration Preset Using the Admin Panel
180
Apply a Configuration Preset Using the Touch Screen
182
Export and Import Configuration Presets
183
Update a Configuration Preset
185
Delete a Configuration Preset
186
Status and Monitoring
188
PART 2: Capture
201
What Is a Channel
202
Channel Layout Examples
203
Channel Configuration
207
Create a Channel
207
Add Video Sources or a Channel as a Source
211
Add an Audio Source to a Layout
215
Duplicate a Channel
216
Rename a Channel
217
Delete a Channel
218
Preview Channel
219
Add or Remove Channel Metadata
222
Configure Encoding
223
Codecs and File Format Compatibility
223
Configure Video Encoding
225
Configure Audio Encoding
230
Multi-Encoding and Channel as a Source
231
Custom Layout Configuration
233
About the Custom Layout Editor
233
Resize and Position Items Using Percents or Pixels
237
Open the Custom Layout Editor for a Channel
243
Add or Edit a Custom Layout
244
Rename a Layout
246
Delete, Move, or Duplicate a Layout
247
Set the Background Color
249
Add an Image to a Layout
250
Upload or Remove an Image Using the Media Page
252
Add a Text Overlay
254
Custom System Variables for Text Overlays
257
Crop a Video Source
257
Video and Audio Input Sources
260
About Connecting Video and Audio Sources
260
Connect an RTSP Source
262
Preview a Video Source Using the Admin Panel
264
Rename an Input Port
265
Configure a Video Input Source
266
DVI and HDMI Signals
266
SDI Signals
267
USB Signals
268
RTSP Sources
271
Add a Custom no Signal Image
271
PART 3: Stream
273
What Is Streaming
274
Stream Settings for Video and Slides
275
View Supported Streaming Formats
276
Streaming a Channel Directly to Viewers
277
Stream Content Using HTTP, HTTPS or RTSP
278
Directly Share Stream Urls with Viewers
279
View the Live Broadcast URL Using a Web Browser
280
View the Streaming URL Using a Media Player
282
Restrict Viewer Access to Channel Streams
284
Restrict Viewers by IP Address
285
IP Restriction Examples
287
Change HTTP and RTSP Streaming Port Values
289
Disable and Enable Direct Channel Streaming
291
Streaming to a Server
292
Stream to a CDN
293
Start and Stop Streaming to a CDN
294
Set up a Stream Using RTMP or RTMPS Push
296
Set up a Stream Using RTSP Announce
297
Stream to a CDN Using an XML Profile
298
Stream Using Multicast
300
MPEG-TS Streams Using RTP/UDP Push
300
MPEG-TS Streams Using UDP Push
302
Multicast Streaming Using RTP/UDP
304
Viewing with Session Announcement Protocol (SAP)
305
Stream to Kaltura CMS
306
Set up a Channel for a Scheduled Webcasting Event
306
Use RTMPS for a Kaltura Webcasting Event
308
Stream to a Media Player or Smart TV
310
Stream Using Upnp
310
Enable Upnp
311
Disable Upnp
314
Viewing with Upnp
315
Play Directly to a Media Player
317
Auto-Restart Playback to a Upnp Device
317
Change Upnp Device Name
318
PART 4: Record
319
About Recording
320
Record a Channel
322
Record Using One Touch Control
323
Configure Recording Settings, File Size and Type
324
Restart Recording
327
Recorders
329
Add a Recorder
329
Select Channels to Record
330
Start and Stop a Recorder
331
Rename a Recorder
332
Duplicate a Recorder
333
Delete a Recorder
334
Record to Kaltura CMS
335
About Recording to Kaltura CMS
335
Select Channels for VOD Event Views
338
Manually Start/Stop Scheduled VOD Events
339
Manually Start/Stop an Ad Hoc Event
341
Manage Recorded Files
344
View List of Recorded Files
344
Download Recorded Files Manually
345
Join Recorded Files Together
346
Extract Tracks from a Recording
347
Rename Recorded Files
349
Delete Recorded Files
349
FTP and Automatic File Transfers
351
About Automatic File Upload (AFU)
351
Choose Files to Include in AFU
352
Enable AFU and Set Parameters
354
Configure AFU to FTP Server Parameters
357
Configure AFU to Rsync Server Parameters
358
Configure AFU to CIFS Server Parameters
360
Configure AFU to SCP Client Parameters
361
Configure AFU to SFTP Server Parameters
363
Configure AFU to AWS S3 Parameters
366
Configure AFU to Webdav Server Parameters
367
AFU or Copy to USB
369
AFU to a USB Storage Device
369
Do a One-Time Copy/Move All Recordings to USB Storage Device
370
Manually Copy Recordings to USB Storage Device
372
View Available USB Storage Space
374
Safely Eject USB Storage Device
374
View the AFU Log
375
Manage the AFU Queue
376
Local FTP Server
378
PART 5: Maintenance
382
Power down and System Restart
383
Backup Your Pearl Mini Setup
385
Perform a Factory Reset
386
Firmware Upgrade
387
Update the Firmware
388
Support
392
Storage Space Maintenance
396
Third Party Integration
399
Controlling Pearl Mini Using RS-232 / Serial Port
400
Controlling Pearl Mini Using HTTP/HTTPS Commands
406
Configuration Keys for Third Party Apis
412
Troubleshooting
424
Limitations and Known Issues
436
Software License
439
April
444
Advertisement
Advertisement
Related Products
epiphan Pearl
epiphan Pearl-2 Rackmount
epiphan Pearl Nexus
epiphan av.io hd
Epiphan Categories
Media Converter
Recording Equipment
DVR
PCI Card
TV Tuner
More Epiphan Manuals
Login
Sign In
OR
Sign in with Facebook
Sign in with Google
Upload manual
Upload from disk
Upload from URL