Ensemble Designs BrightEye NXT 410 Manuals
Manuals and User Guides for Ensemble Designs BrightEye NXT 410. We have 3 Ensemble Designs BrightEye NXT 410 manuals available for free PDF download: Installation, Configuration And Operations Manual, Quick Start Manual
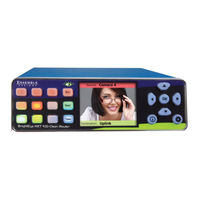
Ensemble Designs BrightEye NXT 410 Installation, Configuration And Operations Manual (132 pages)
Compact Routers 3G/HD/SD/HDMI
Brand: Ensemble Designs
|
Category: Network Router
|
Size: 11 MB
Table of Contents
Advertisement

Ensemble Designs BrightEye NXT 410 Installation, Configuration And Operations Manual (132 pages)
Compact Routers 3G/HD/SD/HDMI
Brand: Ensemble Designs
|
Category: Network Router
|
Size: 10 MB
Table of Contents

Ensemble Designs BrightEye NXT 410 Quick Start Manual (16 pages)
Brand: Ensemble Designs
|
Category: Wireless Router
|
Size: 5 MB
Table of Contents
Advertisement
Advertisement
Related Products
- Ensemble Designs BrightEye NXT 410-H
- Ensemble Designs BrightEye NXT 415
- Ensemble Designs BrightEye NXT 430
- Ensemble Designs BrightEye NXT 41
- Ensemble Designs BrightEye NXT 450
- Ensemble Designs BrightEye NXT 900
- Ensemble Designs BrightEye NXT 910
- Ensemble Designs BrightEye NXT 950
- Ensemble Designs BrightEye NXT 955
- Ensemble Designs BrightEye NXT 430-X