Sign In
Upload
Manuals
Brands
Endress+Hauser Manuals
Laboratory Equipment
analytikjena PlasmaQuant 9100
Endress+Hauser analytikjena PlasmaQuant 9100 Manuals
Manuals and User Guides for Endress+Hauser analytikjena PlasmaQuant 9100. We have
1
Endress+Hauser analytikjena PlasmaQuant 9100 manual available for free PDF download: Operating Manual
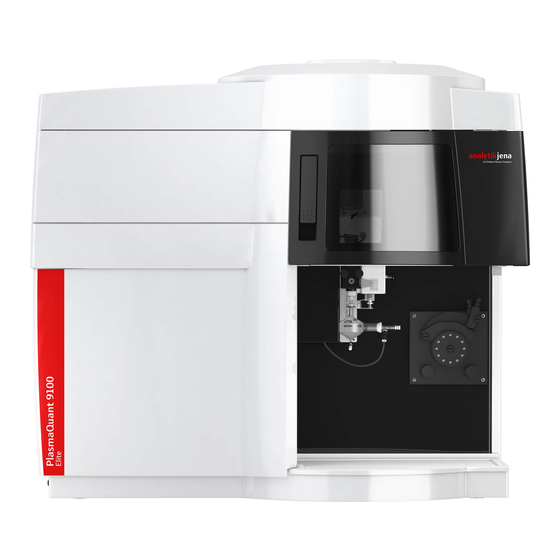
Endress+Hauser analytikjena PlasmaQuant 9100 Operating Manual (87 pages)
Brand:
Endress+Hauser
| Category:
Laboratory Equipment
| Size: 2.1 MB
Table of Contents
Table of Contents
3
About this User Manual
5
Basic Information
5
Intended Use
6
Security
7
Safety Labeling on the Device
7
Requirements for the Operating Personnel
8
Safety Instructions, Transport and Commissioning
8
Safety Instructions: During Operation
9
Basic Safety Information for Operation
9
Safety Instructions - Protection against Explosion and Fire
9
Safety Instructions - Electrical Equipment
9
Hazards Caused by Plasma Operation
10
Behavior in Case of Ring Plasmas
10
Handling of Samples, Auxiliary and Operating Materials
11
Safety Instructions on the Formation of Ozone and Toxic Vapors
11
Safety Instructions for the Operation of Compressed Gas Containers and Compressed Gas Systems
11
Safety Instructions on Cleaning and Decontamination Measures
12
Safety Instructions for Maintenance and Repair
12
Behavior During Emergencies
12
Function and Design
13
Function and Measuring Principle
13
Design
13
Plasma Generation
14
Figure 1 Emission Spectrometer, with Opened Plasma Compartment
14
Sample Supply
15
Figure 2 Torch Diagram with Gas Flows
15
Figure 3 Demountable Torch
15
Figure 4 One-Piece Torch
15
Figure 5 Concentric Nebulizer and Spray Chamber
16
Optical System
16
Supply and Control Connections
17
Figure 6 Connections on the Left Device Side
17
Connections
17
Figure 7 Interfaces and Fuses
18
Figure 8 Gas and Cooling Water Connections
19
Figure 9 Plug-In Connectors for Gas Connections
19
Figure 10 Type Plate
20
Figure 11 Device Rear
20
Connections in the Plasma Compartment and in the Sample Chamber
21
Figure 12 Plasma Compartment
21
Figure 13 Sample Chamber
21
ASPQ 3300 Sampler
22
Figure 14 ASPQ 3300 Sampler
22
Other Accessories
23
Power Supply
25
Installation and Commissioning
25
Installation Location Requirements
25
Installation Conditions
25
Gas Supply
26
Exhaust Unit
26
Recirculating Chiller
27
Device Layout and Space Requirements
28
Unpacking and Setting up the Device
29
Figure 15 Spatial Requirements (View from Front)
29
Figure 16 Spatial Requirements (View from Above)
29
Installing the Sample Supply System
30
Putting the ASPQ 3300 into Operation
33
Figure 17 ASPQ 3300 Sampler
33
Figure 18 Connection Panel on the Right Side of the Sampler
34
Figure 19 Purging Vessel and Pump on the Sampler
34
Figure 20 Connecting the Sampler and the Dilution System
37
Coupling the Teledyne Cetac ASX-560 Sampler with Other Accessories
37
Installing Other Accessories
37
Figure 21 Control PC Connection Via Hub
38
Figure 22 Hose Connections on the Dilution System
38
Figure 23 Connecting the Switching Valve Control Unit
39
Figure 24 Connecting the Hoses to the Switching Valve
39
Figure 25 Autosampler Page, Dilute Tab
40
Installing the Isomist XR Temperature-Controlled Spray Chamber
41
Figure 26 Installing the Temperature-Controlled Spray Chamber
42
Installing the Argon Humidifier
43
Figure 27 Installing the Argon Humidifier
43
Installing the Inline Filter
44
Figure 28 Installing the Inline Filter
44
Figure 29 Fit of the Ferrule in the Banjo Bolt
44
Switching on the Emission Spectrometer and Igniting the Plasma
45
Operation
45
Switching off the Emission Spectrometer
46
Switching off the Device Via the Plasma Deactivation Switch in an Emergency
47
Starting a Measurement Routine
47
Troubleshooting
49
Fault Messages in the Software
49
Device Faults and Analytical Problems
52
Maintenance and Care
56
Maintenance Overview
57
Basic Device Maintenance
58
Cleaning the Dismantleable Torch
58
Replacing the Glass
60
Maintenance of the One-Piece Torch
63
Cleaning the Nebulizer
66
Figure 30 Nebulizer Cleaning Tool
66
Figure 31 Plug-In Connectors for Gas Connections
67
Checking the Gas System for Leaks
67
Cleaning the Sample Chamber and the Plasma Compartment
67
Replacing the Argon Hose
68
Changing the Plasma Compartment Windows
68
Figure 32 Connections for Argon and Oxygen
68
Replacing Fuses
71
7.2.10 Replacing the Water Filter
71
Figure 33 Device Fuses
71
7.2.11 Replacing the Air Filter
72
Sampler Maintenance
72
Replacing the Cannula and Sample Hose
72
Figure 34 Replacing the Cannula and Sample Hose of the Sampler
73
Replacing the Pump Hoses of the Purging Pump
74
Figure 35 Cannula and Sample Hose of the Sampler (Disassembled)
74
Figure 36 Purging Vessel and Pump on the Sampler
75
Figure 37 Replacing the Fuses on the Sampler
76
Maintenance of the Recirculating Chiller: Replacing the Cooling Water
76
Replacing Fuses
76
Transport and Storage
78
Preparing the Device for Transport
78
Moving the Device in the Laboratory
78
Transport
79
Storage
79
Recommissioning the Device
79
Installing the Recirculating Chiller
80
Disposal
81
Specifications
82
10.1 Technical Data
82
10.1.1 Basic Device Technical Data
82
10.1.2 Control Computer Technical Data
84
10.1.3 Recirculating Chiller Technical Data
84
10.1.4 ASPQ 3300 Sampler Technical Data
85
10.1.5 Technical Data for Other Accessories
85
10.2 Guidelines and Standards
86
Table of Figures
87
Advertisement
Advertisement
Related Products
Endress+Hauser Analytik Jena Biometra TAdvanced 96 G
Endress+Hauser Analytik Jena Biometra TAdvanced 96 S
Endress+Hauser Analytik Jena Biometra TAdvanced 96 SG
Endress+Hauser 95-0330-01
Endress+Hauser 95-0330-02
Endress+Hauser 95-0330-03
Endress+Hauser analytikjena PlasmaQuant 9100 Elite
Endress+Hauser Proline Prosonic Flow 91W
Endress+Hauser Proline Prosonic Flow 93U
Endress+Hauser Proline Prosonic Flow 92F
Endress+Hauser Categories
Measuring Instruments
Transmitter
Radar
Switch
Accessories
More Endress+Hauser Manuals
Login
Sign In
OR
Sign in with Facebook
Sign in with Google
Upload manual
Upload from disk
Upload from URL