Sign In
Upload
Manuals
Brands
Dolby Laboratories Manuals
Digital Presenters
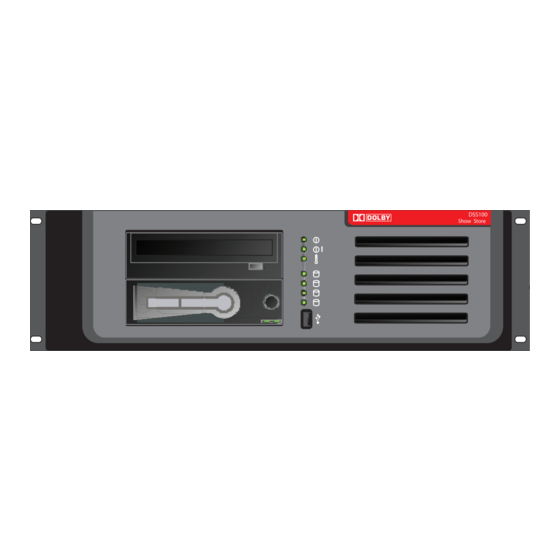
DSS100
Dolby Laboratories DSS100 Manuals
Manuals and User Guides for Dolby Laboratories DSS100. We have
1
Dolby Laboratories DSS100 manual available for free PDF download: User Manual
Dolby Laboratories DSS100 User Manual (76 pages)
Dolby Digital Cinema Presentation System
Brand:
Dolby Laboratories
| Category:
Digital Presenters
| Size: 30 MB
Table of Contents
Table of Contents
7
List of Figures
9
List of Tables
11
Chapter 1: Introduction
13
Dolby Digital Cinema Network Overview
13
Figure 1-1 Dolby Digital Cinema Network
14
Chapter 2: Show Store and Show Player
15
Dolby Show Store
15
Product Configuration
15
What's Included
15
Show Store Front Panel
16
Figure 2-1 Dolby Show Store Front Panel
16
Show Store Rear Panel
18
Figure 2-2 Dolby Show Store Rear Panel
18
Launching Show Manager
19
Installing Show Manager Software
19
Dolby Show Player
20
What's Included
20
Dolby Show Player Front Panel
20
Figure 2-3 Dolby Show Player Front Panel
20
Dolby Show Player Rear Panel
21
Figure 2-4 Dolby Show Player Rear Panel
21
Chapter 3: Using the System
23
Show Player Controls
23
User Control Screen
23
Figure 3-1 Show Player Controls
23
Navigation Buttons
24
Figure 3-2 Show Player Menu Bar Icons and System Clock
24
Transport Control Buttons
25
Auto Button
25
A/V Mute Button
25
Status Indicators
25
Getting Started
26
Load Content
26
Figure 3-3 Insert Removable Drive with Content into the Show Store
26
Figure 3-4 Load Content Using Show Player
27
Figure 3-5 Loading Content Progress Screen
27
Figure 3-6 Do Not Remove Drive When Flashing Red Icon Appears
28
Figure 3-7 Pulling the Removable Drive out of the Show Store
28
Load Licenses
29
Figure 3-8 Load Licenses for Selected Content
29
Select and Play Content
30
Figure 3-9 License Loading Screens
30
Figure 3-10 Select Content
30
Figure 3-11 Select a Clip for Playback
31
Figure 3-12 Clip Is Ready to Play
31
Show Player Menus and Functions
32
Monitor Screen
33
Figure 3-13 Monitor Screen if Startup Is in Progress (or Disconnected)
33
Figure 3-14 Monitor Screen (Select a Show or Clip)
33
Figure 3-15 Ready to Manually Play Show
34
Figure 3-16 Monitor Screen (Show in Progress)
34
Figure 3-17 Paused Show
35
Figure 3-18 Stopped Show
35
Content Menu
36
Figure 3-19 Content Menu (Select Content)
36
Figure 3-20 Disable Auto Button/Stop Playback to Select Content
36
Figure 3-21 Content Menu (Select a Show)
37
Figure 3-22 Clips Without Licenses Listed in Red (Selecting Not Allowed)
37
Figure 3-23 Show Has Clips with no Licenses
38
Figure 3-24 Licenses Pop-Up Messages
38
Figure 3-25 Content Menu/Load Content
39
Figure 3-26 Available Clips on the Show Store
39
Figure 3-27 Load Content Confirmation Dialog Box
40
Figure 3-28 Loading Content Progress Screen
40
Figure 3-29 Content Menu/Delete Content
41
Figure 3-30 Delete Content from Show Store Internal and Removable Drives
41
Figure 3-31 Delete Content Confirmation Screen
42
Figure 3-32 Deleted Content Is Part of a Show
42
Figure 3-33 Content Menu/Offload Content
43
Figure 3-34 Content Menu/Load Licenses
44
Figure 3-35 License Loading Progress Screen
44
Figure 3-36 License Loading Screens
45
Figure 3-37 Licenses Not Valid for this Show Player
45
Schedule Screen
46
Figure 3-38 Schedule Screen (Current Day's Shows)
46
Figure 3-39 Schedule Screen (no Schedule Available)
46
Status Menu
47
Figure 3-40 Status Menu (All Parameters OK)
47
Figure 3-41 Video Status Screen
47
Figure 3-42 Audio Status Screen
48
Figure 3-43 Auditorium Status Screen
48
Figure 3-44 Show Player System Status Screen
49
Figure 3-45 Show Store System Status Screen
49
System Menu
50
Figure 3-47 Brightness Screen
50
Figure 3-48 Time Format Menu
51
Figure 3-49 Video Reference Menu
51
System Menu/Playback Mode
52
Figure 3-50 Playback Mode Menu
52
Figure 3-51 Timecode Output Menu
52
Figure 3-52 Timecode Offset Menu
53
Figure 3-53 Video Playback Rate Menu
53
Chapter 4: System Maintenance
55
Maintaining the Show Store Internal Hard Drives
55
Replacing a Drive
55
Figure 4-1 Identifying a Failed Drive in the Show Store
55
Figure 4-2 Removing the Show Store Front Panel
56
Figure 4-3 Removing the Show Store Retaining Bracket
56
Figure 4-4 Removing the Failed Drive from the Show Store
57
Figure 4-5 Inserting the Replacement Drive in the Show Store
57
Figure 4-6 Reinstalling the Show Store Retaining Bracket
58
Figure 4-7 Reinstalling the Show Store Front Panel
58
Rebuilding an Internal Drive
59
Replacing a Show Store Power Supply
60
Figure 4-8 Show Store Front-Panel Power Supply Indicator
60
Figure 4-9 Show Store Rear-Panel Failed Power Supply
60
Figure 4-10 Turn off Buzzer and Disconnect AC Power
61
Figure 4-11 Removing the Retaining Clip
61
Figure 4-12 Removing the Failed Power Supply
61
Figure 4-13 Inserting the Replacement Power Supply
62
Figure 4-14 Reinstalling the Retaining Clip
62
Replacing a Show Player Power Supply
63
Figure 4-15 Reconnecting AC Power
63
Figure 4-16 Failed Power Supply with LED off
63
Figure 4-17 Disconnect Power, Loosen Screws, Remove Failed Unit
64
Figure 4-18 Inserting the Replacement Unit
64
Figure 4-19 Installing the Blanking Plate
65
Installing the Show Player Power Supply Blanking Plate
65
Show Player Diagnostics and Testing
66
Figure 4-20 Removing the Show Player Front Panel
66
Figure 4-21 Show Player Hidden Diagnostics Compartment
66
Figure 4-22 Reinstalling the Show Player Front Panel
68
Troubleshooting
69
Chapter 5: Dolby NA10
71
Figure 5-1 Dolby NA10
71
Glossary
73
Index
75
Advertisement
Advertisement
Related Products
Dolby Laboratories DSP100
Dolby Laboratories DSS200
Dolby Laboratories DSS220
Dolby Laboratories DSR1260
Dolby Laboratories DSR1280
Dolby Laboratories DSR1090
Dolby Laboratories DSL100
Dolby Laboratories Select DVD7016
Dolby Laboratories DP524
Dolby Laboratories DolbyRemote DP569
Dolby Laboratories Categories
Media Converter
Computer Hardware
Processor
Home Theater System
Speakers
More Dolby Laboratories Manuals
Login
Sign In
OR
Sign in with Facebook
Sign in with Google
Upload manual
Upload from disk
Upload from URL