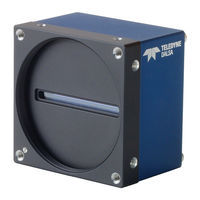
Sign In
Upload
Manuals
Brands
Dalsa Manuals
Security Camera
P4-CC-08K03T-01-R
Dalsa P4-CC-08K03T-01-R Manuals
Manuals and User Guides for Dalsa P4-CC-08K03T-01-R. We have
2
Dalsa P4-CC-08K03T-01-R manuals available for free PDF download: User Manual
Dalsa P4-CC-08K03T-01-R User Manual (85 pages)
8K Color Camera
Brand:
Dalsa
| Category:
CCD Cameras
| Size: 2.45 MB
Table of Contents
Table of Contents
3
Tables
6
Figures
6
The Piranha4 Color Camera
8
Camera Highlights
8
Key Features
8
Programmability
8
Applications
8
Part Numbers and Software Requirements
9
Specifications
9
Camera Performance
9
Table 1: Available Camera Models
9
Table 2: Software
9
Table 3: Frame Grabbers
9
Table 4: Camera Performance Specifications
9
Camera Characterization
10
Certifications
10
Table 5: Camera Characterization
10
Table 6: Camera Certification & Compliance
10
Flash Memory Size
11
Supported Industry Standards
11
Genicam
11
Table 7: Camera Flash Memory Specifications
11
Sensor Responsivity and QE
12
Spectral Responsivity
12
Figure 1: Trilinear Spectral Responsivity
12
Quantum Efficiency
13
Filters
13
Figure 2: Trilinear Quantum Efficiency
13
Precautions
14
Electrostatic Discharge and the CMOS Sensor
14
Recommended System Requirements
14
Quick Setup and Image Acquisition
15
Factory Settings
15
Setup Steps: Overview
16
Step 1: Install and Configure Frame Grabber and Software
16
Step 2: Connect Camera Link and Power Cables
16
Step 3: Establish Communication with the Camera
17
Figure 3:Camexpert Device List
17
Figure 4: Camexpert Camera and Board Parameters
18
Figure 5: Camexpert Grab Button
18
Using Sapera Camexpert
19
Camexpert Panes
20
Figure 6. Camexpert Control Window
20
Camera Operation
22
Spatial Correction
22
Figure 7: Sensor Row Spacing Diagram
22
Figure 8: Spatial Correction Example 1
23
Figure 9: Spatial Correction Example 2
23
Figure 10: Spatial Correction Example 3
23
Parallax Correction
24
Figure 11: Image with Horizontal Color Alignment Issues
24
Figure 12: Camexpert Parallax Correction Controls
24
Figure 13: Corrected Image
24
Check Camera and Sensor Information
25
Verify Temperature
25
Camera Link Configuration
25
Table 8: Camera Link Configuration Details
25
Trigger Modes
26
Exposure Controls
26
Exposure Modes in Detail
27
Table 9: Exposure Controls
27
Line Rate
29
Maximum Line Rates
30
Gain and Black Level
30
Contrast Enhancement
30
Table 10: Maximum Line Rates Vs Camera Link Mode
30
Table 11: Line Rate Calculation for Camera Link Clock Rates and Mode
30
Calibrating the Camera
31
Overview
31
Figure 14: Camera Calibration Process
31
Calibration
32
Internal Test Pattern Generator
34
Figure 15: Test Patterm Grey Horizontal Ramp
34
Figure 16: Test Patterm Grey Vertical Ramp
34
Scan Direction
35
Figure 17: Object Movement and Camera Direction Example, with a Lens
35
Pixel Readout Direction (Mirroring Mode)
36
Saving and Restoring Camera Settings
36
Figure 18: Line Mirroring, Horizontal Flip
36
Figure 19. Relationship between the Camera Settings
37
Resetting the Camera
38
Serial Port Baud Rate
38
Technical Specifications
39
Mechanical Drawing
39
Figure 20: P4-CC-08K03T-01-R Mechanical Drawing
39
Input / Output Connectors and LED
40
Data Connector: Camera Link
40
Table 12. Camera Link Connector Pin out
40
Figure 21: Camera I / O Connectors
40
Figure 22. SDR26 Camera Link Connector
40
Camera Link Bit Definitions
41
Camera Link Cable Quality and Length
41
Input Signals, Camera Link
41
Table 13. Camera Link Bit Definitions
41
Table 14. Camera Link Cable Maximum Distance
41
Output Signals, Camera Link Clocking Signals
42
Power Connector
42
Table 15. Camera Link Clocking Signals
42
Table 16. Power Plug Pinout
42
Figure 23: 6-Pin Hirose Circular Male Power Plug-Power Connector
42
Status LED
43
Table 17. Status LED States
43
Appendix A: Genicam Commands
44
Camera Information Category
44
Figure 24 Example Camexpert Camera Information Panel
44
Camera Information Feature Descriptions
45
Camera Power-Up Configuration Selection Dialog
46
Camera Power-Up Configuration
46
User Set Configuration Management
46
Figure 25 Camexpert Power-Up Configuration Dialog
46
Camera Control Category
47
Camera Control Feature Descriptions
47
Figure 26: Camera Control Panel
47
Digital I / O Control Category
50
Digital I/O Control Feature Descriptions
50
Figure 27 Digital I/O Control Panel
50
Flat Field Category
51
Flat Field Control Feature Description
51
Figure 28: Flat Field Panel
51
Image Format Category
53
Image Format Control Feature Description
53
Figure 29: Image Format Panel
53
Transport Layer Control Category
54
Transport Layer Feature Descriptions
54
Figure 30: Transport Layer Panel
54
Serial Port Category
55
Serial Port Control Feature Descriptions
55
Figure 31: Transport Layer Panel
55
File Access Control Category
56
File Access Control Feature Descriptions
56
Figure 32: File Access Control Panel
56
File Access Via the Camexpert Tool
58
Figure 33: File Access Control Tool
58
File Transfer Protocol
59
Upload File to Camera
60
Appendix B: ASCII Commands
61
Serial Port Configuration
61
Figure 34: Sapera Configuration COM Port Mapping
61
Accessing the Three Letter Commands (TLC)
62
Figure 35: Serial DLL Hierarchy as Mentioned in the Camera Link Specification
62
Notes on Using Alternatives to Hyperterminal
63
Port Configuration
63
Commands
64
Appendix C: Evaluation Setup & Configuration
74
Optical Configuration
74
Camera Timing & Control
74
Camera Link Mode
74
Exposure Time
74
Acquiring an Image
74
Appendix D: Color Deca and Full Mode Acquisition
76
Overview
76
Supported Sapera LT
76
Programming Deca Mode
76
Figure 36: Camera Link Deca Mode Port Assignment
76
Appendix E: Error and Warning Messages
79
Hardware Status under "Camera Information
79
Table 18: Hardware Status Bitfield
79
Gencp Error Codes
80
Table 19: Gencp Error Codes
80
Appendix F: the Sensor Window
81
Cleaning and Protecting against Dust, Oil, and Scratches
81
Important Note on Window Blemishes
81
Cleaning the Sensor Window
82
EC & FCC Declaration
83
Standard Conformity
83
CE Conformity
83
FCC Conformity
83
Revision History
84
Table 20: Revision History
84
Technical Support
85
Contact Information
85
Sales Information
85
Advertisement
Dalsa P4-CC-08K03T-01-R User Manual (95 pages)
8K Color Cameras
Brand:
Dalsa
| Category:
Security Camera
| Size: 3.19 MB
Table of Contents
Table of Contents
3
System Precautions
6
Precautions
6
Electrostatic Discharge and the CMOS Sensor
6
The Piranha4 Color Camera
7
Camera Highlights
7
Key Features
7
Programmability
7
Applications
7
Camera Performance Specifications
8
Camera Characterization
9
Certifications
10
Flash Memory Size
10
Supported Industry Standards
10
Genicam
10
Sensor Responsivity and Qe
10
Spectral Responsivity
10
Spectral Responsivity
11
Quantum Efficiency
11
Spatial Correction
12
Parallax Correction
14
Camera Direction
15
Mechanicals
16
Filters
17
Software and Hardware Setup
18
Recommended System Requirements
18
Setup Steps: Overview
18
Install and Configure Frame Grabber and Software
18
Connect Camera Link and Power Cables
18
Establish Communicating with the Camera
18
Operate the Camera
18
Step 1. Install and Configure the Frame Grabber and Software
19
Install Frame Grabber
19
Install Sapera LT and Camexpert GUI
19
Step 2. Connect Data, Trigger, and Power Cables
19
Input / Output Connectors and Led
19
Data Connector: Camera Link
20
Camera Link Bit Definitions
20
Camera Link Cable Quality and Length
21
Input Signals, Camera Link
21
Output Signals, Camera Link Clocking Signals
21
Power Connector
22
Leds
22
Step 3. Establish Communication with the Camera
23
Power on the Camera
23
Connect to the Frame Grabber
23
Connect to the Camera
23
Check LED Status
23
Software Interface
23
Using Sapera Camexpert
24
Camexpert Panes
25
Camera Operation
28
Factory Settings
28
Check Camera and Sensor Information
28
Verify Temperature
29
Saving and Restoring Camera Settings
29
Camera Link Configuration
31
Trigger Modes
32
Exposure Controls
32
Exposure Modes in Detail
33
Exposure Mode in Detail
33
Set Line Rate
35
Set Exposure Time
36
Control Gain and Black Level
36
Set Image Size
37
Set Baud Rate
37
Pixel Format
38
Binning
38
Camera Direction Control
38
Pixel Readout Direction (Mirroring Mode)
38
Resetting the Camera
39
Calibrating the Camera
39
Calibration
40
Appendix A: Genicam Commands
43
Camera Information Category
43
Camera Information Feature Descriptions
44
Camera Configuration Selection Dialog
47
Camera Power-Up Configuration
47
User Set Configuration Management
47
Camera Control Category
48
Camera Control Feature Descriptions
48
Digital I/O Control Feature Descriptions
52
Flat Field Category
54
Flat Field Control Feature Description
54
Image Format Control Category
56
Image Format Control Feature Description
57
Transport Layer Control Category
58
Transport Layer Feature Descriptions
59
Serial Port Control Category
60
Serial Port Control Feature Descriptions
60
File Access Control Category
61
File Access Control Feature Descriptions
62
File Access Via the Camexpert Tool
63
Download a List of Camera Parameters
64
Appendix B: Ascii Commands
66
Port Configuration
67
Commands
68
Appendix C: Quick Setup and Image Acquisition
78
Appendix D: the Sensor Window
81
Cleaning the Sensor Window
82
Appendix E. Color Deca and Full Mode Acquisition
83
P Rogramming F Ull M Ode
86
Appendix F: Camera, Frame Grabber Communication
88
Appendix G: Error and Warning Messages
90
Ec & Fcc Declaration
92
Revision History
93
Index
94
Advertisement
Related Products
Dalsa P-2 Series
Dalsa Piranha3
Dalsa P3-80-**k40-R
Dalsa P3-87-**K40-01-R
Dalsa PT-41-04M60
Dalsa PT-21-04M30
Dalsa PT-41-04M60-XX-R
Dalsa PC-30-02K80-R
Dalsa PC-30-02K60-R
Dalsa PC-30-04K80-R
Dalsa Categories
Digital Camera
Security Camera
Media Converter
Security Sensors
Computer Hardware
More Dalsa Manuals
Login
Sign In
OR
Sign in with Facebook
Sign in with Google
Upload manual
Upload from disk
Upload from URL