Sign In
Upload
Manuals
Brands
Cybernetics Manuals
Storage
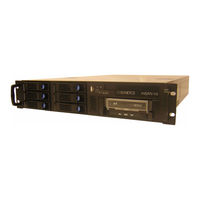
miSAN-V6
User Manuals: Cybernetics miSAN-V6 Tape Backup System
Manuals and User Guides for Cybernetics miSAN-V6 Tape Backup System. We have
1
Cybernetics miSAN-V6 Tape Backup System manual available for free PDF download: Operator's Manual
Cybernetics miSAN-V6 Operator's Manual (190 pages)
miSAN-V-Series D2D2T Backup with removable AIT Tape Drive
Brand:
Cybernetics
| Category:
Storage
| Size: 4 MB
Table of Contents
Guide to Conventions
2
FCC Notice
2
Table of Contents
3
Chapter 1 Introduction to the Misan
11
Misan-V-Series Overview
11
Options
11
Features
12
Hardware
12
Software
12
Functionality
13
Network Connection
13
Parallel SCSI Connection
13
High-Speed Archiving
13
Multiple Host Access
13
Selective Device Visibility
13
Web Control Panel
14
Telnet Menu System
14
Network Traffic
14
Information Available Without Password
14
Uninterruptable Power Supply (UPS)
14
Introduction
15
Java™ Installation
15
Telnet Installation
15
Iscsi Initiator Driver Installation
15
Chapter 2 Setting up the Misan
17
Installation Requirements
17
Installing the Hardware Components
18
Rackmount Installation
18
Parallel SCSI
18
Connecting the Cables
18
Figure 2-1 Misan-V-Series Rear Components
18
Network
19
Iscsi Network Ports (ETH1, ETH2)
19
Management LAN Port (ETH0)
19
Power
19
Connecting Power to an Uninterruptible Power Supply (UPS)
19
Figure 2-2 Misan-V-Series Front Components
20
Power Button
20
Configuring the Network and Iscsi Settings
21
Prerequisites
21
Network Setup Preparation
21
Network Setup
22
Iscsi Communication
22
Remote Iscsi Target Device Setup
23
Host Iscsi Setup
24
Misan-V-Series Iscsi Features
24
User Types
24
The Administrator
25
The User
25
The Security Officer
26
Setting up the Misan-V-Series Virtual Components
26
Initial Setup Guide
26
Creating Virtual Components
26
Deciding How Many Virtual Tapes to Create
27
Deciding What Kind of Virtual Tape Drives to Create
27
Creating Virtual Tapes
28
Deciding How to Assign Virtual Tapes
28
Virtual Stacker Drives
28
Virtual Standalone Drives
28
Creating Virtual Devices
29
Assigning Virtual Tapes to Virtual Devices
30
Configuring a Physical Stacker
30
Testing the Installation
31
Shut down
31
Figure 2-3 "Confirm Shutdown Method" Window
32
Chapter 3 Operating the Web Control Panel
33
Interface Layout
33
Introduction
33
Main Menu Bar Introduction
33
Figure 3-1 Main Menu Bar
33
Figure 3-2 "Tools" Menu
34
Figure 3-3 "HSTC Options" Menu
34
HSTC Options
34
Information
34
Tools
34
Browser Links
35
Help
35
Tabs Introduction
35
Devices Tab
35
Figure 3-4 Information
35
Figure 3-5 Information
35
Figure 3-6 "Browser Links" Menu
35
Figure 3-7 "Help" Menu
35
Jobs
36
Messages
36
Physical Tapes Tab
36
Virtual Tape Tab
36
Main Menu
36
Tools
36
Disk Storage
37
Figure 3-8 "Tools" Menu
37
Create Virtual Tapes
38
Figure 3-9 Virtual Tape Disk Space Allocation
38
Basic Tab
39
Advanced Tab
40
Figure 3-10 Create Virtual Tapes Basic Tab
40
Figure 3-11 Create Virtual Tapes "Advanced" Tab
40
Format Disks Tab
40
Configure Virtual Devices
41
Figure 3-12 Create Virtual Tapes "Format Disks" Tab
41
Assign Virtual Tapes
42
Figure 3-13 "Configure Virtual Devices" Window
42
Figure 3-14 "Virtual Tape Assignments" Window
42
Figure 3-15 "Physical Stacker Copy Profiles" Window
43
Physical Stacker Copy Profiles
43
Configure Auto-Archive
44
Figure 3-16 "Auto-Archive Configuration" Window
44
Set Date and Time
45
Export or Import Configuration
46
Figure 3-17 "Set Date and Time" Window
46
Figure 3-18 "Update License" Window
46
Rescan Physical Devices
46
Update License
46
Figure 3-19 "Rescan Physical Devices" Window
47
Shut down the HSTC
47
Figure 3-20 "Confirm Shutdown Method" Window
48
HSTC Options
49
Configuration
49
Device ID Order
49
Figure 3-21 Configuration
49
Host Vs. Job I/O Policy
50
Host I/O Idle Minutes
51
Overwrite Non-Committed
51
Copy Volume Tags
52
Drive Compression for Copying
52
Virtual Device Emulations
52
Receive SNMP Messages from UPS
53
Configuring a Tripp Lite® Smartpro®/Smartonline™ Model UPS with
54
Snmpwebcard
54
Data Compression
55
HBA X Base SCSI ID
56
HBA X Direction
56
SCSI Configuration
56
SCSI HBA Ports
56
HBA X Speed
57
Incoming Iscsi Connections from Hosts
57
Iscsi Access Password
57
Iscsi Host Username
57
Iscsi Login Control
57
Device X DNS Name or IP Address
58
Device X Iscsi Password
58
Device X Iscsi Username
58
Iscsi Host Password
58
Outgoing Iscsi Connections to Devices
58
Remote Iscsi Device X
58
Default Gateway
62
Ethx ( 1000 Mbps)
62
Hostname
62
Nameserver
62
Network Configuration
62
Ethx IP Address
64
Ethx IP Bonding
64
Ethx MTU
64
Ethx Subnet Mask
64
Bondx
65
Bondx IP Address
65
Bondx MTU
65
Bondx Subnet Mask
65
Message Delivery
65
Email Address(Es)
66
Send Messages by Email
66
SMTP Password
66
SMTP Server
66
SMTP Username
66
Accounts
67
Admin
67
User
67
Advanced Menu(S)
68
Advanced Options
68
Define Emulations
68
Debugging
69
Host Iscsi Debug Messages
69
Information
69
Product Information
69
Browser Links
70
Credits and Licenses
70
Physical Devices
70
Virtual Device Assignments
70
Virtual Devices
70
Tabs
71
Devices Tab
71
Figure 3-22 "Devices" Tab
71
Figure 3-23 Renaming a Virtual Tape Drive
71
Autoload Checkbox
72
Figure 3-24 Virtual Tape Drive Device Panel
72
Mounted Medium Listbox
72
Virtual Stacker Device Panel
72
Virtual Tape Drive Device Panel
72
Figure 3-25 Virtual Stacker Device Panel
73
Figure 3-26 "Move to Slot" Popup Menu
74
Figure 3-27 "Move to Drive" Popup Menu
74
Figure 3-28 Physical Tape Drive Device Panel
75
Physical Tape Drive Device Panel
75
Menu Button
76
Figure 3-29 "Setup Offload" Window
77
Figure 3-30 "Select Virtual Tape" Window
77
Figure 3-31 "Clear VT for Offloading" Option
78
Figure 3-32 "Offload Disk to Tape" Window
79
Figure 3-33 "Load Tape Onto Disk" Window
80
Host Access
81
Job Control
81
Inventory Tab
82
Physical Stacker Device Panel
82
Figure 3-34 Physical Stacker Device Panel
83
Figure 3-35 "Setup Offload" Window
84
Figure 3-36 Assigning a Virtual Tape to a Physical Tape
84
Figure 3-37 "Wait for Backup" Option
86
Figure 3-38 "Clear VT for Offloading" Option
86
Figure 3-39 "Copy Selections" Tab
87
Figure 3-40 "Copy Profiles" Frame
87
Figure 3-41 "Copy Options" Tab
87
Figure 3-42 "Load Tapes Onto Disk" Window
89
Figure 3-43 Assigning Physical Tapes to Copy
89
Figure 3-44 Physical Stacker "Properties" Tab
91
Optical Drive Device Panel
91
Properties Tab
91
Figure 3-45 Optical Drive Device Panel
92
Figure 3-46 "Select Virtual Tape to Backup" Window
93
Figure 3-47 "Virtual Tapes" Tab
93
Status Fields
93
Virtual Tapes Tab
93
Figure 3-48 Virtual Tape Popup Menu
94
Figure 3-49 "Rename Virtual Tapes" Window
94
Virtual Tape Popup Menu
94
Figure 3-50 "Select Copy Destination" Window
95
Figure 3-51 "Confirm Data Overwrite" Window
95
Bar Code
96
Figure 3-52 "Manage Volume Tags" Window
96
Figure 3-53 "Copy Profiles" Frame
96
Figure 3-54 "Edit" Tab for Volume Tags
97
Figure 3-55 Virtual Tape Properties Windows
97
Physical Tapes Tab
97
Figure 3-56 "Physical Tapes" Tab
98
Status Fields
98
Figure 3-57 "Jobs" Tab
99
Jobs Tab
99
Jobs Table
99
Job Log
100
Activity Monitor
101
Figure 3-58 Exporting the "Job Log
101
Figure 3-59 "Activity Monitor" Tab
101
Messages Tab
102
USB Offload
102
Figure 3-60 "Messages" Tab
102
Figure 3-61 New Message Indicator
102
Chapter 4 Telnet Menu System
105
Telnet Menu System
105
Misan-V-Series Messages
106
Menu Operation
106
SCSI Configuration
107
Assign Virtual Devices to Hosts
107
Configure Iscsi Hosts
107
Swap SCSI HBA Ports
108
Offline Maintenance
108
Display Debug Output
108
Rescan SCSI Buses
108
Reset Options to Defaults
109
Shut down
109
Test System Memory
109
Chapter 5 Using the 3Ware Disk Manager
111
Browser Requirements
111
Accessing from a Browser
111
Logging in
112
Working with the 3DM Screens
112
Figure 5-1 3DM Main Screen
112
3DM Menus
113
Figure 5-2 3DM Menu Bar
113
Refreshing the Screen
113
3DM Screens and What They're Used for
114
Setting up 3DM Preferences
115
Setting and Changing 3DM Passwords
115
Managing E-Mail Event Notification
115
Caution about Disabling Remote Access
116
Caution about Changing Incoming Port
116
Setting the Frequency of Page Refreshes
116
3DM2 Reference
117
Controller Summary Page
118
Figure 5-3 Controller Summary Page
118
Controller Details Page
119
Figure 5-4 Controller Details Page
119
Unit Information Page
120
Figure 5-5 Unit Information Page
120
Unit Details Page
121
Figure 5-6 Unit Details Page
121
Drive Information Page
122
Figure 5-7 Drive Information Page
122
SMART Details about Drive at Particular Port Page
123
Figure 5-8 S.M.A.R.T Data Page
123
Controller Settings Page
124
Figure 5-9 Controller Settings Page
124
Background Task Rate
125
Unit Policies
125
Other Controller Settings
126
Unit Names
126
Scheduling Page
127
Figure 5-10 Scheduling Page
127
About Self-Tests
128
About Task Schedules
128
Maintenance Page
129
Figure 5-11 Maintenance Page
129
Rescan Controller
129
Drive Information
130
Unit Information
130
Unit Maintenance
130
Maintenance Task Buttons
131
Available Drives (to Create Units)
132
Alarms Page
133
3DM Settings Page
134
Figure 5-12 3DM Settings Page
134
E-Mail Notification
135
Page Refresh
135
Password
135
Incoming Port
136
Remote Access
136
Configuring Units
136
Creating a New Unit
136
Drives to be Included in the Unit
136
Rebuilding a Unit
137
Type of RAID Configuration
137
Configuring Drives
138
Adding a Drive
138
Creating a Hot Spare
138
Removing a Drive
138
Figure 5-13 Removing a Drive in 3DM
139
Figure 5-14 Result of Removing Drive from Unit in 3DM
140
Chapter 6 Packing and Shipping Instructions
141
Removing the Misan-V-Series from Its Installation Environment
141
Using the Proper Packing Materials
142
Chapter 7 Product Specifications
147
Supported Iscsi Initiators
147
Drive Interface Compatibility
147
Ethernet Interfaces
147
Management LAN Port (ETH0)
147
Iscsi Network Ports (ETH1, ETH2)
148
SCSI Parallel Interfaces
148
Low Voltage Differential (LVD)
148
Physical Dimensions
148
Power Supply
148
Humidity and Temperature
148
Non-Operating
148
Operating
148
Appendix A Microsoft® Iscsi Initiator Software Client
149
Downloading the Setup Program
149
Installing the Software
151
Configuring the Iscsi Initiator
154
Changing Initiator Node Name
155
Adding Target Devices
155
Figure A-1 Advanced Settings
156
Creating System Dependencies
158
Using Iscsi Disk Devices with the Iscsi Initiator
158
Using Backup Software with the Iscsi Initiator
160
Logging off
161
Appendix B Linux Iscsi Initiator
163
Introduction
163
Installation
163
Linux Kernel 2.6 Notes
163
Core-Iscsi Setup
164
Debian Lk 2.6
164
Red hat 9 & Enterprise Linux 3
165
Suse Linux Pro 9.1
165
Setup
165
Source Compilation
165
Test the Setup
165
Appendix C Glossary
167
Appendix D Common Questions
175
Appendix E Return Policies
179
Shipping Damage
179
Hardware Products
179
Software Products
180
Tape Media Products
180
Promotional Items
180
Maintenance Contracts
180
Exceptions to Cybernetics' 30-Day Hardware Return Policy
180
Return Procedure
180
Appendix F Technical Support
183
Advertisement
Advertisement
Related Products
Cybernetics V Series CY-miSAN-V
Cybernetics Categories
Storage
More Cybernetics Manuals
Login
Sign In
OR
Sign in with Facebook
Sign in with Google
Upload manual
Upload from disk
Upload from URL