Sign In
Upload
Manuals
Brands
Curtiss-Wright Manuals
Switch
DuraNET 3300
Curtiss-Wright DuraNET 3300 Switch Manuals
Manuals and User Guides for Curtiss-Wright DuraNET 3300 Switch. We have
1
Curtiss-Wright DuraNET 3300 Switch manual available for free PDF download: User Manual
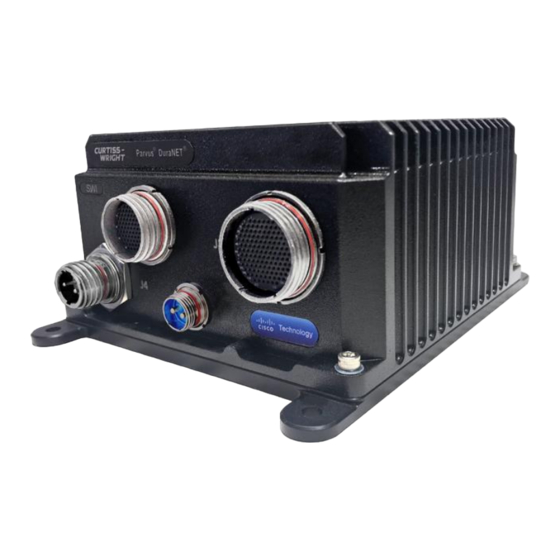
Curtiss-Wright DuraNET 3300 User Manual (84 pages)
Rugged Cisco ESS-3300 L2/L3 Ethernet Switch 24x 1000BASE-T w/PoE+ and 2x 10GBASE-SR
Brand:
Curtiss-Wright
| Category:
Switch
| Size: 3 MB
Table of Contents
Table of Contents
3
List of Figures
5
List of Tables
6
Chapter 1 Introduction
7
About this Document
7
Manual Organization
7
Definitions
7
Description of Safety Symbols
7
Functional Description
8
Features
9
Cisco Technology
9
Rugged MIL-STD Design
9
Target Applications
9
Configurations
10
Table 1.1: EAU System Configurations
10
Table 1.2: EAU Breakout I/O Cable Configurations
10
Table 1.3: Production System Configurations
11
Table 1.4: Production Breakout I/O Cable Configurations
11
Architecture Block Diagram
12
Figure 1.1: Duranet 3300 Architecture Block Diagram
12
Chapter 2 Quick-Start Guide
13
Table 2.1: Duranet 3300 Breakout Cables, Cisco Ports and Port Labels
13
Starter Breakout Cable Sets
14
Table 2.2: Physical Cable Labels Vs Cisco Port Numbers/Long Names
14
Cable Install and Connections
15
Figure 2.1: Cable Diagram
15
Accessing the CLI through the Console Port
16
Software Terminal Emulator and Serial Console Setup
16
Linux
16
Figure 2.2: Minicom Term
16
Figure 2.3: Minicom Serial Setup
16
Figure 2.4: Minicom Baud
17
Figure 2.5: Minicom Default
17
Windows
18
Execute and Configure the Putty Installer
18
Figure 2.6: Putty Install
18
Figure 2.7: Putty Destination
19
Figure 2.8: Putty Features
19
Figure 2.9: Putty Completed
20
Running Putty
21
Figure 2.10: Putty Configuration
21
Figure 2.11: Putty COM Port Assigned
21
Figure 2.12: Putty Configuration with COM
22
Figure 2.13: Console Prompt
22
Setting an Open Firewall Port
29
USB Console Port
31
Linux
31
Windows
32
RS-232 Console Port
32
Figure 2.14: Null Modems
32
Recommended Settings
33
Figure 2.15: Duranet 3300 Switch> Prompt
33
Chapter 3 Connector Descriptions
34
Connector Identification
34
Figure 3.1: EAU Front View
34
Table 3.1: EAU Connector Identification & Part Numbers
34
Connector Pinouts
35
Figure 3.2: Production Front View
35
Table 3.2: Production Connector Identification & Partnumbers
35
J1 Power Connector
36
Figure 3.3: J1 EAU Pin Arrangement
36
Table 3.3: J1 EAU Connector Information
36
Table 3.4: J1 Connector Pinout
36
Figure 3.4: J1 Production Pin Arrangement
37
Table 3.5: Phoenix Power Cables
37
Table 3.6: J1 Production Connector Information
37
Table 3.7: J1 Connector Pinout
37
J2 Copper I/O Connector
38
Figure 3.5: J2 Pin Arrangement
38
Table 3.8: J2 EAU Connector Information
38
Table 3.9: J2 Production Connector Information
38
Table 3.10: J2 Connector Pinout - by Pin Number
38
Table 3.11: J2 Connector Pinout - by Function
40
J3 Copper I/O Connector
42
Figure 3.6: J3 Pin Arrangement
42
Table 3.12: J3 EAU Connector Information
42
Table 3.13: J3 Production Connector Information
42
Table 3.14: J3 Connector Pinout - by Pin Number
42
Table 3.15: J3 Connector Pinout - by Function
45
J4 Optical I/O Connector
47
Figure 3.7: J4 Pin Arrangement
47
Table 3.16: J4 Connector Information
47
Table 3.17: J4 Connector Pinout
47
Chapter 4 Operational Description
48
Configure IP Address, User Name and Password
48
Updating Cisco IOS-XE Version
49
Figure 4.1: Show Configuration Listing
50
Figure 4.2: Show Boot Listing
50
Install TFTP Server (Linux)
51
Figure 4.3: Update APT Package Repository Cache
51
Figure 4.4: Install the Tftpd-Hpa Package
51
Figure 4.5: Tftpd-Hpa Package Installed
52
Figure 4.6: Check Whether the Tftpd-Hpa Service Is Running
52
Figure 4.7: Tftpd-Hpa Is Running
53
Figure 4.8: Modify the /Etc/Default/Tftpd-Hpa Configuration File
53
Figure 4.9: Configuration File Editing
54
Figure 4.10: Adding the --Create Option
54
Figure 4.11: Create a New Directory
55
Figure 4.12: Change the Owner and Group
55
Figure 4.13: Restart the Tftpd-Hpa Service
55
Figure 4.14: Enter Command to Check that Tftpd-Hpa Service Is Running
55
Loading a New Image
56
Select a Cisco IOS Software Image
56
Figure 4.15: Tftpd-Hpa Is Running
56
Poe Type1 and Poe+ Type2 Functionality and Power Check
58
Figure 4.16: Max Poe Power Vs Temperature
58
Figure 4.17: Minicom IP Address
59
Figure 4.18: DUT Login Window
60
Figure 4.19: DUT Login Window
60
Figure 4.20: Click Yes to Continue
61
Figure 4.21: Poe Power Consumption Box
61
Zeroization or Declassification
62
Command Line Interface
62
Zeroization Trigger
63
Recovery Procedures
63
Chapter 5 Specifications
65
Mechanical & Technical Specifications
65
Dimensions
65
Physical
65
Figure 5.1: Front Panel Dimensions
65
Installation & Mounting
66
Orientation
66
Choosing a Mounting Location - Thermal Considerations
66
Vertical Mounting
66
Figure 5.2: Mounting Holes
66
Horizontal Mounting
67
Figure 5.3: Side Mounting Holes
67
Grounding
68
Figure 5.4: Rear View Grounding Hole
68
Power
69
Environmental Specifications
69
Temperature
69
Shock/Vibration
69
EMI/EMC Compliance
69
Operating Conditions
70
Cisco Specifications
70
Other Specifications
74
Reliability
74
Export Jurisdiction
74
Regulatory Compliance
74
Warranty
74
Chapter 6 Troubleshooting
75
Product Identification
75
Technical Assistance
75
Returning for Service
75
Chapter 7 Contact Info
76
Firefox Browser Issue and Correction
77
Minicom Client Install and Setup - Ubuntu
78
Iperf Install and Setup - Linux Ubuntu
79
Automated Diagnostic Software Install and Execute
80
Duranet 3300 Port to Cisco Name Mapping
82
Glossary
83
Advertisement
Advertisement
Related Products
Curtiss-Wright Parvus DuraNET 30-2020
Curtiss-Wright DuraNET 1059
Curtiss-Wright DuraCOR 311
Curtiss-Wright DuraCOR 312
Curtiss-Wright DuraCOR 310
Curtiss-Wright NET-20-11-01
Curtiss-Wright NET-20-12-02
Curtiss-Wright Parvus DuraMAR 5915-3X
Curtiss-Wright Parvus DuraNET 20-11
Curtiss-Wright Parvus DuraNET 20-12
Curtiss-Wright Categories
Computer Hardware
Controller
PCI Card
Switch
Measuring Instruments
More Curtiss-Wright Manuals
Login
Sign In
OR
Sign in with Facebook
Sign in with Google
Upload manual
Upload from disk
Upload from URL