Sign In
Upload
Manuals
Brands
Community Manuals
Speakers
Cloud1266t
User Manuals: Community Cloud1266t Ceiling Speaker
Manuals and User Guides for Community Cloud1266t Ceiling Speaker. We have
1
Community Cloud1266t Ceiling Speaker manual available for free PDF download: Installation And Operation Manual
Community Cloud1266t Installation And Operation Manual (28 pages)
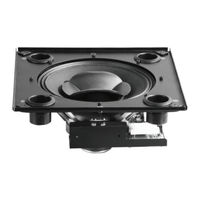
CLOUD12 Series 12-Inch Ceiling Loudspeakers
Brand:
Community
| Category:
Speakers
| Size: 7 MB
Table of Contents
Ec Statement of Conformity
2
Table of Contents
3
Important Safety Information
4
Unpacking and Inspection
4
Cloud12 Overview
5
Table 1: CLOUD12 Models and Accessories
5
Figure 1: CLOUD12 Ceiling Loudspeaker Mounted on a Standard Ported Baffle
6
Figure 2: C12BB3 Metal Backbox
6
Figure 3: C12SQGRL Square White Grille
7
Figure 4: Channel Rails Available in Lengths of 23.75 Inches
7
Figure 5: CLOUD12 Dimensions
8
Figure 6: CLOUD12SUB Dimensions
9
Figure 7: C12BB3 Backbox Dimensions
10
Figure 8: C12SQGRL Grille Dimensions
11
Figure 9: RAIL24-PR Channel Rail Dimensions
11
Figure 10: RAIL30-PR Channel Rail Dimensions
12
Figure 11: RAIL48-PR Channel Rail Dimensions
12
Cloud12 Assembly
13
Figure 12: CLOUD12 Assembly with Backbox, Grille and Channel Rails
13
Wiring and Installation
14
Installing Backbox Fittings for Conduit and Strain Relief
14
Figure 13: Knocking out the Knockout with a Hammer and Punch
14
Connecting Strain Relief to Cable and Loudspeaker Assembly
15
Figure 14: Connecting Strain Relief
15
Connecting the Loudspeaker Cable for 8 Ohm (Low Impedance) Connections
16
Figure 15: CLOUD1266 and CLOUD1299 Input Panel (8 Ohm Operation)
16
Figure 16: Attaching the Loudspeaker Cable to the CLOUD12 Input Panel
16
Connecting the Loudspeaker Cable for 70V/100V Connections
17
CLOUD12SUB Ceiling Mount Subwoofer Overview
17
Figure 17: CLOUD1266T and CLOUD1299T Input Panel (70V/100V Operation)
17
Figure 18: CLOUD12SUB and CLOUD12SUB-T
18
Figure 19: CLOUD12SUB Wiring and Input Panel (8 Ohm Operation)
18
Attaching Channel Rail Kits to the C12BB3 Backbox
19
Figure 20: CLOUD12SUB-T Wiring and Input Panel (70V/100V Operation)
19
Figure 21: Channel Rail Kit with Tools and Accessories
20
Suspending the C12BB3 Backbox
21
Figure 22: Tightening the Rail Kit to the Backbox
21
Figure 23: "Snugging" the ¼-Inch Eyebolts
22
Figure 24: Eyebolt Load Ratings
22
Attaching the CLOUD12 Loudspeaker to the C12BB3 Backbox
23
Figure 25: Proper Handling of the CLOUD12 Loudspeaker
23
Figure 26: Aligning the CLOUD12 with the Backbox
24
Figure 27: CLOUD12 Installed / Gasket Compressed
24
Attaching the C12SQGRL Grille to the CLOUD12/C12BB3 Assembly
25
Figure 28: C12SQGRL Grille in Place on the CLOUD12 Assembly
25
Warranty Information and Service
26
Advertisement
Advertisement
Related Products
Community Cloud1299
Community Cloud1299t
Community Cloud12sub
Community Cloud12SUB-T
Community Cloud1266
Community CLOUD 6
Community CLOUD 4
Community C6-B
Community C8
Community C4
Community Categories
Speakers
Speaker System
Subwoofer
Indoor Furnishing
Recording Equipment
More Community Manuals
Login
Sign In
OR
Sign in with Facebook
Sign in with Google
Upload manual
Upload from disk
Upload from URL