Sign In
Upload
Manuals
Brands
Clearcube Manuals
Server
Capio One
Clearcube Capio One Thin Client Server Manuals
Manuals and User Guides for Clearcube Capio One Thin Client Server. We have
3
Clearcube Capio One Thin Client Server manuals available for free PDF download: Product Manual & Installation Manual, Quick Start Manual, Technical Document
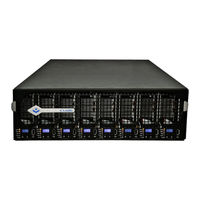
Clearcube Capio One Product Manual & Installation Manual (142 pages)
Clearcube R4300 Chassis: Install Guide
Brand:
Clearcube
| Category:
Server
| Size: 4 MB
Table of Contents
Technical Support
2
Table of Contents
3
Tables
11
Introduction
11
How to Use this Guide
11
FCC Warning
11
California Proposition 65 Statement
11
WEEE Information
12
Warning Regarding Medical and Clinical Use of Clearcube Products
12
Informations Sur la DEEE
13
Avertissement Concernant L'usage Médical et Clinique des Produits Clearcube
13
Informationen über WEEE
14
Warnung zum Medizinischen oder Klinischen Einsatz von Clearcube-Produkten
14
La Información de REEE
15
El Cuidado con Respecto al Uso Médico y Clínico de Los Productos de Clearcube
15
Symbols - English
16
Safety Guidelines
17
Symboles - Français
19
Guide de Sécurité
20
Symbole - Deutsche
22
Sicherheitsrichtlinien
23
Símbolos - Español
25
Directrices de Seguridad
26
Clearcube Architecture and Product Overview
29
R Series PC Blade
29
Figure 1 R Series PC Blades (Single and Dual Processor)
30
Figure 2 Clearcube R Series Blade Front Panel Display
30
Table 1 Blade LED Functions
31
R Series Cage
32
Figure 3 Clearcube R Series Cage Front View
32
Backpack
33
R4300 Backpack
33
Figure 4 R4300 Backpack Rear View
33
Blade Switching Backpack
34
Figure 5 Blade Switching Backpack Rear View
34
Direct Connect Backpack
35
Figure 6 Direct Connect Backpack Rear View
35
C/Port
36
Figure 7 Clearcube C/Port
36
Table 2 C/Port Connection Limits
36
Multi-Video Solution
37
Figure 8 Clearcube MVX Rear View
37
Fiber Optic Extension System
38
Fiber Transceiver
38
Fiber C/Port
38
Figure 9 Clearcube Fiber Transceiver
38
Figure 10 Clearcube Fiber C/Port
38
I/Port
39
Eon E100
39
Figure 11 Clearcube I/Ports
39
Capio One
40
Windows Xpe Operating System
40
Neolinux Operating System
40
Remote Desktop Protocol
40
Clearcube Grid Center Software
41
Neoware Ezremote Manager Software
41
Network Planning and Site Preparation
43
Rack and Cabinet Requirements
43
Figure 12 Standard 19" Rack (Left) and Standard 19" Cabinet
43
Space and Floor Support Requirements
44
Cooling and Airflow Requirements
45
Power Requirements
45
Japan-Specific Requirements
46
Table 3 Power and Cooling Requirements - R1200
46
Table 4 Power and Cooling Requirements - R2100
46
Cable Requirements
47
Figure 13 Clearcube C/Port Architecture Cabling Diagram
47
Figure 14 Clearcube Fiber C/Port Architecture Cabling Diagram
48
Figure 15 Clearcube I/Port Architecture Cabling Diagram
48
Free IP Address Requirement
49
Cage and Blade Installation
51
Tools for Installation
51
Shipment Components
51
Cage Installation
52
Unpacking the Cage
52
Installing the Cage
52
Standard Cage Mounting Hardware
53
Figure 16 Side View of Cage Centered in a 2-Post Rack
54
Cage Rapid Mount Kit
55
Figure 17 Rack Bracket for Cage Rapid Mount Kit
55
Chassis Power Requirements
56
Figure 18 Rack Bracket Attachment Points
56
Backpack Configuration and Operation
57
R4300 Backpack
57
R4300 Modules
58
Figure 19 R4300 Exploded View
58
Figure 20 Module Designator Labels
59
Table 5 Serial Number Formats for R4300 Modules
59
Figure 21 R4300 Module Bays
60
Figure 22 R4300 Modules
60
Table 6 R4300 Connect Module Features
61
Table 7 R4300 Status Leds
62
Table 8 R4300 Remote Management Module Features
62
Power Modules
64
Table 9 R4300 Network Module Features
64
Blade Switching Backpacks
65
Figure 23 R4300 Power Modules Locations
65
Figure 24 Adding Remote Control over PC Blade-To-C/Port Connections
66
Figure 25 Cage with Blade Switching Backpack
66
Table 10 Blade Switching Backpack Connections
66
Direct Connect Backpack
67
Connecting the Cables
67
Spare Allocation Examples
68
Figure 26 Spare Allocation Examples
68
R4300 Backpack
69
Blade Switching and Direct Connect Backpacks
70
Figure 27 R4300 Daisy-Chain Cabling Example
70
Mixed-Mode Backpack Cabling
71
Figure 28 BSBP Daisy-Chain Cabling Example
71
Remote Management Card Configuration
72
Control Chain Auto-Negotiation
72
Figure 29 Mixed-Mode Daisy-Chain Cabling Example
72
Figure 30 RMM JP1 Location
73
Configuring the RMM
74
Figure 31 Telnet Commands for the RMM
74
Resetting the RMM Settings to the Factory Defaults
75
Table 11 R4300 RMM Default Configuration Settings
75
Configuring the RMC
76
Changing the IP Address of the RMC
78
Resetting the RMC IP Settings to the Factory Defaults
79
Fiber Transceiver Installation
81
Installing the Fiber Transceiver
81
Fiber Transceiver Power Requirements
81
Cable Requirements
81
Connect the Cables
82
Figure 32 Fiber Transceiver/R4300 Connection Diagram (R4300)
83
Figure 33 Fiber Transceiver/Bsbp Connection Diagram (BSBP)
84
PC Blade Installation
85
Unpacking the PC Blades
85
Installing the PC Blades
85
Video Resolution
86
CMOS Settings
86
User Port Installation
87
C/Port Installation
87
Unpacking the C/Port
87
Installing the C/Port on the Desktop
87
Figure 34 Clearcube C/Port
87
Adjusting the C/Port
88
Setting Monitor Resolution
88
Adjusting Image Sharpness
89
Adjusting Color
89
Figure 35 Clearcube C/Port Color and Sharpness Tuning Guide
90
Figure 36 Clearcube C/Port Bottom View
90
Re-Adjusting the C/Port
91
Locking out Mass-Storage Devices
91
Figure 37 Model R1200 Mass Storage Lockout Jumper Location and Setting
91
Fiber C/Port Installation
92
Installing the Fiber C/Port
92
Figure 38 Model R2100 Mass Storage Lockout Jumper Location and Setting
92
Adjusting the Fiber C/Port
93
Adjusting the Monitor
93
Figure 39 Fiber C/Port Rear View
93
I/Port Installation
94
Caution Statements
94
Setup
94
Orientation and Venting
94
Power Sources
94
Unpacking the I/Port
95
Installing the I/Port on the Desktop
95
Configuring the PC Blade for the I/Port Connection
95
Figure 40 Eon E100 (Left) and Capio One (Right) Port Connections
95
Configuring the Xpe Eon E100 I/Port
96
Figure 41 Remote Desktop (RDP) Configuration Window
96
Optimizing RDP and the I/Port
97
Figure 42 RDP Display Tab
98
Adding a Printer
99
Figure 43 RDP Local Resources Tab
99
Figure 44 RDP Experience Tab
99
Configuring the Neolinux Capio One and Eon E100 I/Ports
100
Updating Software on the Eon E100 and Capio One I/Ports
101
MVX Installation
103
Hardware Installation
103
Installing the Video Adapter
103
Installing the MVX
103
Figure 45 MVX Connection Diagram
104
Table 12 MVX Resolution/Refresh Rate Support
104
Software Installation and Configuration
105
Removing Outdated NVIDIA Drivers
105
Table 13 Blade - C/Port - MVX Support Configuration
105
Installing the NVIDIA Driver
106
Figure 46 Removing the Old NVIDIA Drivers
106
Figure 47 Display Settings Tab
107
Figure 48 Monitor Tab
107
Figure 49 Quadro NVS Tab
108
Figure 50 Default 1X1 Monitor Configuration
108
Figure 51 Quadro NVS Tab
109
Figure 52 Desktop Management Tab
109
Important Notes about the MVX
110
Figure 53 Profiles Screen
110
Hardware Upgrade and Replacement Procedures
113
Upgrading Memory
114
Model R1200
114
Model R2100
114
Figure 54 R1200 Memory Layout
114
Figure 55 R2100 Memory Installation Layout
114
Replacing or Upgrading the Hard Drive
115
Figure 56 Exploded View of Blade (Typical)
115
Replacing R4300 Modules
116
Replacing the R4300 Fan Pack
116
Figure 57 Fan Pack Attachment Points
116
Replacing the BSBP or DCBP Fan Pack
117
Replacing an R4300 Power Supply Unit (PSU)
117
Replacing a Blade Switching or Direct Connect Backpack
117
Figure 58 Cage with Fan Pack Removed (DCBP Shown)
118
Troubleshooting
119
User Port Troubleshooting
119
C/Ports
119
Red Link Status Indicator on PC Blade and C/Port
119
No Link Status Indicator Light
119
No Ethernet Link Light
119
No Power to PC Blade
119
Poor Video Quality
120
Loss of Peripheral Devices (USB)
120
No Video or Link Lights at Desktops and no Power to Blades
120
Cage Power Does Not Come on
120
CMS Software Does Not Correctly Recognize Blades
120
MVX
120
No Video Is Present
120
The Monitor's Auto-Adjust Does Not Give a Clear, Sharp Image
121
The Video Signal Is Lost after Changing Display Settings
121
Mouse Movement Is Slow or Sluggish
121
Fiber Optic Troubleshooting
121
No Video And/Or Digital Link Present
121
Appendix A - Specifications
123
Table 14 Backpack Specifications
123
Table 15 C/Port Specifications
123
Table 16 Multi-Video Expander Specifications
124
Table 17 Fiber C/Port Specifications
124
Table 18 Fiber Transceiver Specifications
125
Table 19 I/Port Specifications
125
Table 20 PC Blade Specifications
126
Appendix B - Regulatory Compliance
127
Electromagnetic Compatibility (EMC)
127
Emissions (Radio Frequency Interference)
127
Electro-Magnetic Interference (EMI) Immunity
128
Power Harmonics and Flicker
128
Safety Compliance
128
CE Marking
129
Declaration of Conformity
130
Declares that the Product
130
Conforms to the Following Product Specifications
130
Appendix C - Technical Support
131
Contact Information
131
Product Updates
131
Return Merchandise Authorization (RMA)
132
Fuse and Power Cord Replacement
132
Appendix D - Warranty
134
Index
137
Advertisement
Clearcube Capio One Quick Start Manual (4 pages)
Clearcube Capio One Servers: Quick Start
Brand:
Clearcube
| Category:
Desktop
| Size: 0 MB
Table of Contents
Connections
1
Neolinux Operating System
1
The Grid Center Authentication Database
2
FCC Regulatory and Safety Information
3
Regulatory Information
3
Federal Communications Commission (FCC) (USA Only)
3
Federal Communications Commission Radio Frequency Interference Statement
3
End User License Agreement
3
Limitations of Liabilities and Exclusions
4
Limitations on Reverse Engineering, Decompilation, and Disassembly
4
Software Transfer Allowed but with Restrictions
4
Export Restrictions
4
Governing Law
4
Clearcube Capio One Technical Document (2 pages)
Capio One I/Ports, Grid Center Client
Brand:
Clearcube
| Category:
Desktop
| Size: 0 MB
Table of Contents
Overview / Environment
1
Detailed Description
1
To Install the Patch Using Ezremote Manager for Xpe
1
To Install the Patch Using Ezremote Manager for Neolinux
2
To Install the Patch Locally for Xpe
2
To Install the Patch Locally for Neolinux
2
Advertisement
Advertisement
Related Products
ClearCube A Series
Clearcube A1010
Clearcube A2100
Clearcube A3000
ClearCube A6108
Clearcube Categories
Server
Desktop
Extender
Chassis
Switch
More Clearcube Manuals
Login
Sign In
OR
Sign in with Facebook
Sign in with Google
Upload manual
Upload from disk
Upload from URL