Sign In
Upload
Manuals
Brands
Carbide3D Manuals
Power Tool
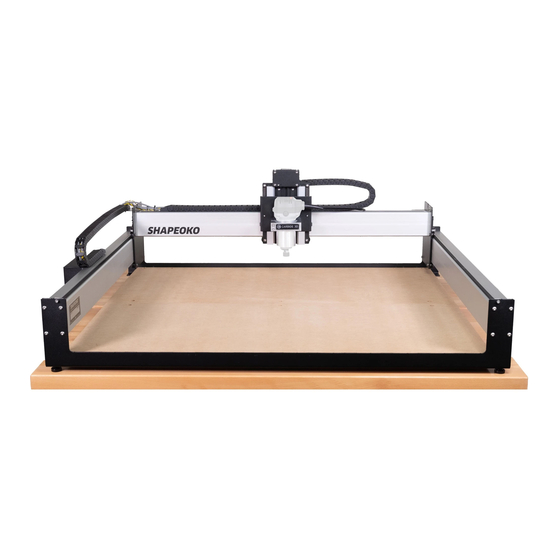
SHAPEOKO XXL
Carbide3D SHAPEOKO XXL Manuals
Manuals and User Guides for Carbide3D SHAPEOKO XXL. We have
1
Carbide3D SHAPEOKO XXL manual available for free PDF download: Assembly Manual
Carbide3D SHAPEOKO XXL Assembly Manual (72 pages)
Brand:
Carbide3D
| Category:
Power Tool
| Size: 7 MB
Table of Contents
Table of Contents
2
Welcome and Congratulations
3
Important Safety Instructions
4
Check the Machine
5
Secure the Workpiece
5
Examine the End Mill
5
Machine Operating Checklist
5
Disconnect the Touch Probe
6
Double Check the Work Area
6
Send NC File to Machine
6
Glossary of Terms
6
Unpack Components
7
Optional Items
7
Step 1: Inventory
7
Final Assembly Box
8
Y-Axis Left Assembly & Y-Axis Right Assembly Boxes
9
Pre-Assembled XXL Wiring Harness Box
10
X/Z+ Box
10
Sweepy Box
11
Aluminum Extrusion Rails
11
Endplates
11
Cross Straps
11
MDF Baseplates
12
Carbide Compact Router Box
12
Additional Required Tools
12
Recommended Tools
12
Before You Begin Assembly
13
Step 2: Baseframe
14
Required Components
15
Required Tools
15
Attach the Rear MDF Baseplate
16
Important Assembly Information
16
Lay out the Cross Straps
16
Attach the Front MDF Baseplate
17
Attach the Rear Endplate
17
Attach the Front Endplate
18
Screw in the Adjustable Leveling Feet
19
Level the Machine
19
Step 3: Carriages
20
Eccentrics and V-Wheels Explained
22
Open the V-Wheels
23
Assemble the Z-Plus
23
Attaching the X-Motor
23
Identifying Front of Tramming Plate
24
Attaching Router Mount to Tramming Plate
25
Attaching Tramming Plate to Z-Plus
25
Identify and Position the X-Rail
26
Install the Y1-Carriage
27
Install the Z-Plus
28
Install the Y2-Carriage
28
Step 4: Gantry
29
Assemble the Gantry
31
Positioning the X-Rail
31
Inserting the Y1-Rail
32
Inserting the Y2-Rail
32
Secure the Gantry
32
Positioning the Gantry
32
Securing the Y2-Rail
33
Completing Rail Assembly
33
Tension the V-Wheels
33
Step 5: Belting
34
Belts and Belt Clips
35
Install the X-Rail Belt
36
Install the Y1-Rail Belt
38
Install the Y2-Rail Belt
39
Step 6: Drag Chains
40
Install Drag Chain Supports
42
Installing the X-Axis Supports
42
Installing the Y-Axis Supports
42
Install the Wiring Harness
44
Important Wiring Harness Information
44
The Wiring Harness
45
Y-Axis Drag Chain
45
X-Axis Drag Chain
45
Stepper Motor Extension Cables
45
Installing the X-Axis Drag Chain
47
Step 7: Proximity Switches
48
Install the Proximity Switches
49
Installing the X-Axis Proximity Switch
49
Installing the Y-Axis Proximity Switch
50
Connecting the Z-Axis Proximity Switch
51
Step 8: Wiring
52
Install the PCB Riser Board
53
Mount the Controller Unit
54
Wire the Controller Unit
54
Wiring Proximity Switches
54
Connect the Stepper Motors
55
Wiring Stepper Motors
55
Connecting Z-Axis Stepper Motor
55
Connecting X-Axis Stepper Motor
56
Connecting Y1-Axis Stepper Motor
56
Connecting Y2-Axis Stepper Motor
56
Step 9: Cleanup
57
Cleanup the Gantry Cables
58
Securing Cables at the Y1-Carriage
58
Securing Cables Along the X-Rail
59
Securing the Cables at the Z-Plus
59
Step 10: Compact Router
60
Install the Carbide Compact
61
Secure the Router Power Cable
62
Install Sweepy Dust Boot
64
Install an End Mill
64
Installing the End Mill
64
Removing the End Mill
64
Confirm Tension of the V-Wheels
65
Confirm Level
65
Square the Machine
65
Step 11: Level and Square
65
Connect to Power
67
Download the Software
67
Connect to Carbide Motion 5
68
Upload Your Settings
68
Configure Carbide Motion 5
68
Initialize the Proximity Switches
69
Complete the Test Project
69
Run the Test Project
69
DIY Workholding Projects
70
Workholding Solutions Available in the Carbide 3D Store
70
Threaded Inserts
70
Workholding
70
Projects on Cutrocket
71
Cutting Tutorials and Projects
71
User Guides and Video Tutorials
71
Advertisement
Advertisement
Related Products
Carbide3D Categories
Power Tool
3D Printers
More Carbide3D Manuals
Login
Sign In
OR
Sign in with Facebook
Sign in with Google
Upload manual
Upload from disk
Upload from URL