Sign In
Upload
Manuals
Brands
Canon Manuals
Printer
MB2300 series
Canon MB2300 series Manuals
Manuals and User Guides for Canon MB2300 series. We have
3
Canon MB2300 series manuals available for free PDF download: Online Manual, Getting Started
Canon MB2300 series Online Manual (1155 pages)
Brand:
Canon
| Category:
Printer
| Size: 18 MB
Table of Contents
Online Manual
1
Table of Contents
2
Read Me First
19
How to Use the Online Manual
20
Trademarks and Licenses
21
Search Tips
25
Notes on Operation Explanations
27
Useful Functions Available on the Machine
28
Connect Wirelessly with Ease in "Access Point Mode
29
Download a Variety of Content Materials
30
Print Items with Easy-Photoprint+ (Web Application)
31
Print Photos on Facebook Easily Using a Facebook App "Print Your Days
32
Use the Machine more Conveniently with Quick Toolbox
33
Connection Methods Available on the Machine
34
Usb Connection
35
Connection Without Using an Access Point (Windows XP)
36
Restrictions
39
Notice for Web Service Printing
41
Use MAXIFY Cloud Link
43
Using MAXIFY Cloud Link from Your Printer
44
Before Using MAXIFY Cloud Link from Your Printer
45
Preparing to Use MAXIFY Cloud Link from Your Printer
46
Application Management
49
Using MAXIFY Cloud Link
54
Cloud Windows
57
Legal Information
59
Cloud Troubleshooting
60
Using MAXIFY Cloud Link from Your Smartphone, Tablet, or Computer
61
Before Using Canon Inkjet Cloud Printing Center
62
Requirements for Canon Inkjet Cloud Printing Center Operation
63
Preparations before Using Canon Inkjet Cloud Printing Center
65
User Registration
68
Printing Your Printer Registration ID
73
Canon Inkjet Cloud Printing Center Window
74
Description of the Main Screen
75
If You Are Using a Pc
83
Using Canon Inkjet Cloud Printing Center
91
Adding a Printer
95
Adding a MAXIFY Cloud Link User
97
Troubleshooting Canon Inkjet Cloud Printing Center
102
What Is a Security Code
104
Printing with Google Cloud Print
105
Preparations for Printing with Google Cloud Print
106
Printing from Computer or Smartphone with Google Cloud Print
109
Printing from Airprint Compliant Device
111
Paper Size
113
Checking the Print Status
113
Deleting a Print Job
114
Checking Printer Information
116
Online Storage Integration Function
119
How to Use Print from E-Mail
120
Preparing to Use Print from E-Mail
124
Timezone List
127
Print Easily from a Smartphone or Tablet with MAXIFY Printing Solutions
128
Printing with Windows RT
129
Overview of the Machine
130
Safety Guide
131
Safety Precautions
132
Regulatory and Safety Information
133
Connection of the Equipment
134
In Case of Equipment Malfunction
135
Rights of the Telephone Company
135
Users in Canada
135
Users in New Zealand
136
Energy Star
138
Environmental Information
138
Paper Types
138
Main Components and Basic Operations
140
Main Components
141
Front View
142
Rear View
144
Inside View
145
Operation Panel
146
About the Power Supply of the Machine
147
Confirming that the Power Is on
148
Turning the Machine on and off
149
Notice for the Power Plug/Power Cord
151
Notice for Unplugging the Power Cord
152
Using the Operation Panel
153
Entering Numbers, Letters, and Symbols
157
Loading Paper / Originals
159
Loading Paper
160
Paper Sources to Load Paper
161
Loading Plain Paper / Photo Paper
163
Loading Envelopes
168
Media Types You Can Use
172
Paper Weight
173
Paper Load Limit
174
Media Types You Cannot Use
176
Printing Area
177
Printing Area
178
Other Sizes than Letter, Legal, Envelopes
179
Letter, Legal
180
Envelopes
181
Loading Originals
182
Position to Load Originals
183
Loading Originals on the Platen Glass
184
Loading Documents in the ADF (Auto Document Feeder)
185
How to Load Originals for each Function
186
Originals You Can Load
188
Inserting the USB Flash Drive
190
Inserting the USB Flash Drive
191
Removing the USB Flash Drive
192
Replacing an Ink Tank
193
Replacing an Ink Tank
194
Checking the Ink Status from Your Computer
199
Checking the Ink Status
200
Checking the Ink Status with the Touch Screen on the Machine
201
Maintenance
202
When Printing Becomes Faint or Colors Are Incorrect
203
Maintenance Procedure
204
Printing the Nozzle Check Pattern
206
Examining the Nozzle Check Pattern
208
Cleaning the Print Head
210
Cleaning the Print Head Deeply
212
Aligning the Print Head
214
Aligning the Print Head Manually
216
Performing Maintenance from a Computer
220
Cleaning the Print Heads from Your Computer
221
Aligning the Print Head Position from Your Computer
223
Aligning the Print Head Position Manually from Your Computer
225
Use Your Computer to Print a Nozzle Check Pattern
228
Cleaning the Machine
230
Cleaning the Exterior of the Machine
231
Cleaning the Platen Glass and Document Cover
232
Cleaning the ADF (Auto Document Feeder)
233
Cleaning the Paper Feed Roller
235
Cleaning the Inside of the Machine (Bottom Plate Cleaning)
237
Cleaning the Pad in the Cassette
240
Changing the Machine Settings
241
Changing Machine Settings from Your Computer
242
Changing the Print Options
243
Registering a Frequently Used Printing Profile
244
Deleting Unnecessary Printing Profile
245
Managing the Printer Power
246
Reducing the Printer Noise
247
Changing the Printer Operation Mode
248
Changing the Machine Settings Using the Operation Panel
250
Changing the Machine Settings Using the Operation Panel
251
FAX Settings
253
Easy Setup
256
Print Settings
257
LAN Settings
258
Device User Settings
263
Language Selection
265
Firmware Update
266
Cassette Settings
267
Administrator Password Setting
268
Operation Restrictions
269
Reset Setting
270
About ECO Settings
272
About Quiet Setting
275
Using the Machine with the Access Point Mode
277
How to Terminate the Access Point Mode
278
Setting of the Access Point Mode
279
Registering the Favorite Settings (Custom Profiles)
281
Checking the Total Number of Uses of the Machine
283
Information about Network Connection
284
Useful Information about Network Connection
285
Default Values Set at Factory (Network)
286
Connecting the Machine to the Computer Using a USB Cable
287
When Detecting the Printers Have the same Name During Setup
288
Connecting to Other Computer with Lan/Changing the Connection Method from USB to LAN
289
Printing out Network Setting Information
290
About Network Communication
293
Changing and Confirming Network Settings
294
IJ Network Tool
295
Changing the Settings in the Wireless LAN Sheet
296
Changing the WEP Detailed Settings
298
Changing the WPA/WPA2 Detailed Settings
300
Changing the Settings in the Wired LAN Sheet
303
Changing the Settings in the Admin Password Sheet
304
Monitoring Wireless Network Status
305
Initializing the Network Settings of the Machine
308
Viewing the Modified Settings
309
Screens for Network Connection of IJ Network Tool
310
Canon IJ Network Tool Screen
311
Canon Ij Network Tool Menus
312
Configuration Screen
315
Wireless LAN Sheet
316
Search Screen
318
WEP Details Screen
320
WPA/WPA2 Details Screen
321
Authentication Type Confirmation Screen
322
Psk:passphrase and Dynamic Encryption Setup Screen
323
Setup Information Confirmation Screen
324
Wired LAN Sheet
325
Admin Password Sheet
326
Network Information Screen
327
Access Control Sheet
328
When Selecting Ip Address
329
Edit Accessible MAC Address Screen/Add Accessible MAC Address Screen
332
Edit Accessible IP Address Screen/Add Accessible IP Address Screen
333
Other Screens of IJ Network Tool
334
Canon IJ Network Tool Screen
335
Status Screen
339
Connection Performance Measurement Screen
340
Maintenance Screen
342
Network Setup of the Card Slot Screen
343
Associate Port Screen
345
Network Information Screen
346
Appendix For Network Communication
347
Using the Card Slot over a Network
348
When the Printer Driver Is Not Associated with a Port
350
About Technical Terms
351
Restrictions
358
About Firewall
359
Tips for Ensuring Optimal Printing Quality
360
Useful Information about Ink
361
Key Points to Successful Printing
362
Be Sure to Check Paper Settings before Printing
363
Be Sure to Set Cassette Paper Information after Loading Paper
364
Canceling a Print Job
365
Key to Enjoying Consistent Printing Quality
366
Precautions for Safe Transport of the Machine
367
Legal Limitations on Use of Your Product and Use of Images
369
Specifications
370
Copy Specifications
371
Scan Specifications
371
Fax Specifications
371
Network Specifications
372
Minimum System Requirements
373
Administrator Settings
375
About the Machine Administration
376
Setting the Administrator Password
377
Restricting the Operation
379
Sharing the Printer on a Network
381
Setting up a Shared Printer
382
Restrictions on Printer Sharing
384
About the Administrator Password
386
Printing
387
Printing from a Computer
388
Printing with Application Software that You Are Using (Printer Driver)
389
Printing with Easy Setup
390
Paper Settings on the Printer Driver and the Printer (Media Type)
393
Paper Settings on the Printer Driver and the Printer (Paper Size)
394
Various Printing Methods
395
Setting a Page Size and Orientation
396
Setting the Number of Copies and Printing Order
397
Setting the Stapling Margin
399
Fit-To-Page Printing
401
Scaled Printing
403
Page Layout Printing
406
Tiling/Poster Printing
408
Printing Only Specific Pages
409
Booklet Printing
411
Duplex Printing
413
Stamp/Background Printing
417
Printing a Background
418
Related Topics
419
Registering a Stamp
420
Changing and Registering some of Stamp Settings
422
Deleting an Unnecessary Stamp
422
Registering Image Data to be Used as a Background
423
Changing and Registering some Background Settings
424
Deleting an Unnecessary Background
425
Setting up Envelope Printing
426
Printing on Postcards
428
Switching the Paper Source to Match the Purpose
430
Displaying the Print Results before Printing
432
Setting Paper Dimensions (Custom Size)
433
Editing the Print Document or Reprinting from the Print History
435
Editing and Printing a Print Document
436
Reprinting from the Print History
437
Changing the Print Quality and Correcting Image Data
438
Printing a Color Document in Monochrome
439
Specifying Color Correction
441
Optimal Photo Printing of Image Data
443
Adjusting Colors with the Printer Driver
444
Printing with ICC Profiles
446
Adjusting Color Balance
449
Adjusting Color Balance Using Sample Patterns (Printer Driver)
451
Adjusting Brightness
455
Adjusting Intensity
457
Adjusting Contrast
459
Adjusting Intensity/Contrast Using Sample Patterns (Printer Driver)
461
Overview of the Printer Driver
465
Canon IJ Printer Driver
466
How to Open the Printer Driver Setup Window
467
Canon IJ Status Monitor
468
Canon IJ Preview
470
Deleting the Undesired Print Job
471
Instructions for Use (Printer Driver)
472
Printer Driver Description
474
Quick Setup Tab Description
475
Main Tab Description
481
Color Adjustment Tab
482
Page Setup Tab Description
487
Stamp Tab
495
Maintenance Tab Description
499
Initial Check Items
501
Canon IJ Preview Description
505
Canon IJ XPS Preview Description
508
Canon IJ Status Monitor Description
516
Updating the MP Drivers
519
Obtaining the Latest MP Drivers
520
Deleting the Unnecessary MP Drivers
521
Before Installing the MP Drivers
522
Installing the MP Drivers
523
Printing Using the Operation Panel of the Machine
524
Printing Photo Data
525
Printing Photographs Saved on a USB Flash Drive
526
Setting Items for Photo Printing Using the Operation Panel of the Machine
531
Using Useful Display Functions
533
Printing Documents (PDF File) Saved on a USB Flash Drive
535
Paper Setting for Printing
539
Copying
542
Making Copies
543
Displaying the Preview Screen
546
Setting Items for Copying
548
Reducing or Enlarging a Copy
551
Two-Sided Copying
553
About Special Copy Menu
555
Copying Thick Originals such as Books
556
Copying Two Pages to Fit Onto a Single Page
557
Copying Four Pages to Fit Onto a Single Page
559
Collated Copying
562
Scanning
564
Scanning from a Computer
565
Scanning with IJ Scan Utility
566
What Is IJ Scan Utility (Scanner Software)
567
Starting IJ Scan Utility
569
Scanning Documents
570
Scanning Photos
571
Scanning with Favorite Settings
572
Scanning Items Larger than the Platen (Image Stitch)
573
Extracting Text from Scanned Images (OCR)
577
Sending Scanned Images Via E-Mail
579
Scanning Multiple Items at One Time
580
Scanning Multiple Documents at One Time from the ADF (Auto Document Feeder)
583
Saving after Checking Scan Results
588
IJ Scan Utility Screens
591
IJ Scan Utility Main Screen
592
Settings Dialog Box
594
Save Settings Dialog Box
644
Image Stitch Window
647
Scanning with Application Software that You Are Using (Scangear)
652
What Is Scangear (Scanner Driver)
653
Advanced Mode
654
Scanning with Advanced Settings Using Scangear (Scanner Driver)
655
Starting Scangear (Scanner Driver)
656
Scanning in Basic Mode
657
Scanning in Advanced Mode
660
Scanning Multiple Documents from the ADF (Auto Document Feeder) in Advanced Mode
662
Scanning Multiple Documents at One Time with Scangear (Scanner Driver)
664
Correcting Images and Adjusting Colors with Scangear (Scanner Driver)
668
Correcting Images (Unsharp Mask, Reduce Dust and Scratches, Fading Correction, Etc.)
669
Adjusting Colors Using a Color Pattern
673
Adjusting Saturation and Color Balance
675
Adjusting Brightness and Contrast
677
Adjusting Histogram
679
Adjusting Tone Curve
683
Setting Threshold
686
Scangear (Scanner Driver) Screens
687
Basic Mode Tab
688
Advanced Mode Tab
696
Input Settings
702
Output Settings
705
Image Settings
708
Color Adjustment Buttons
713
Preferences Dialog Box
716
Scanner Tab
717
Preview Tab
720
Scan Tab
722
Color Settings Tab
723
Placing Items (When Scanning from a Computer)
725
Adjusting Cropping Frames (Scangear)
728
General Notes (Scanner Driver)
732
Useful Information on Scanning
734
Adjusting Cropping Frames in the Image Stitch Window
735
Resolution
736
Data Formats
738
Color Matching
739
IJ Network Scanner Selector EX Menu and Setting Screen
740
Uninstalling IJ Network Scanner Selector EX
743
Other Scanning Methods
744
Scanning with WIA Driver
745
Scanning Using the Control Panel (Windows XP Only)
749
Placing Items (When Scanning from a Computer)
751
Scanning from the Operation Panel of the Machine
754
Forwarding Scanned Data to the Computer Using the Operation Panel of the Machine
755
Attaching the Scanned Data to E-Mail Using the Operation Panel of the Machine
759
Saving Scanned Data on the USB Flash Drive Using the Operation Panel of the Machine
762
Forwarding Scanned Data to Shared Folder on the Computer Using the Operation Panel of the Machine
765
Deleting Scanned Data on USB Flash Drive
768
Setting Items for Scanning Using the Operation Panel of the Machine
770
Network Scan Settings
772
Selecting a Response to Commands from the Operation Panel Using IJ Scan Utility
776
Faxing
779
Preparing for Faxing
780
Connecting the Telephone Line
781
Setting the Telephone Line Type
784
Setting the Receive Mode
785
Setting the Sender Information
789
Sending Faxes Using the Operation Panel of the Machine
796
Sending Faxes by Entering Fax/Telephone Number
797
Resending Faxes (Redialing a Busy Number)
801
Setting Items for Sending Faxes
803
Sending Faxes Using Useful Functions
804
Sending a Fax after Speaking on Telephone
805
Sending a Fax to the Registered Recipient
807
Sending the same Document to Several Recipients (Sequential Broadcasting)
809
Preventing Mistransmission of Faxes
813
Using the on Hook Dial Function
815
Registering Recipients
817
Registering Recipients Using the Operation Panel of the Machine
818
Registering the Fax/Telephone Number of Recipients
819
Registering Recipients in Group Dial
823
Changing Registered Information
827
Deleting Registered Information
828
Printing a List of the Registered Destinations
829
Registering Recipients Using Speed Dial Utility
830
Starting up Speed Dial Utility
831
Speed Dial Utility Dialog Box
832
Saving Registered Information on the Machine to Your Computer
834
Registering a Fax/Telephone Number Using Speed Dial Utility
835
Changing a Fax/Telephone Number Using Speed Dial Utility
837
Deleting a Fax/Telephone Number Using Speed Dial Utility
839
Changing Sender Information Using Speed Dial Utility
840
Registering/Changing Rejected Number Using Speed Dial Utility
841
Machine
842
Uninstalling Speed Dial Utility
843
Receiving Faxes
844
Receiving Faxes
845
Changing the Paper Settings
850
Memory Reception
852
Receiving Faxes Using Useful Functions
854
Saving Received Faxes Automatically on a USB Flash Drive
855
Forwarding Received Faxes Automatically to Shared Folder on the Computer
857
Remote Reception
859
Rejecting Fax Reception
860
Using the Caller ID Service to Reject Calls
863
Other Useful Fax Functions
865
Using the Information Services
866
Transmission/Reception of Faxes Using ECM
869
Document Stored in Machine's Memory
870
Printing a Document in Machine's Memory
871
Deleting a Document in Machine's Memory
873
Saving a Document in Machine's Memory to USB Flash Drive
875
Forwarding a Document in Machine's Memory to Shared Folder on the Computer
878
Summary of Reports and Lists
881
Sending Faxes from a Computer
886
Sending a FAX (Fax Driver)
887
Canceling Transmission
889
Creating an Address Book (Fax Driver)
890
Setup When Opening the Address Book for the First Time (Windows XP)
894
How to Open the Setting Screen of the Fax Driver
895
Edit or Remove a Recipient from an Address Book (Fax Driver)
897
Search for a Recipient in an Address Book (Fax Driver)
900
Troubleshooting Problems Sending Faxes (Fax Driver)
902
General Notes (Fax Driver)
904
Advertisement
Canon MB2300 series Online Manual (1154 pages)
Brand:
Canon
| Category:
Printer
| Size: 18 MB
Table of Contents
Table of Contents
2
Read Me First
19
How to Use the Online Manual
20
Trademarks and Licenses
21
Search Tips
25
Notes on Operation Explanations
27
Useful Functions Available on the Machine
28
Connect Wirelessly with Ease in "Access Point Mode
29
Download a Variety of Content Materials
30
Print Items with Easy-Photoprint+ (Web Application)
31
Use the Machine more Conveniently with Quick Toolbox
32
Connection Methods Available on the Machine
33
Connection Without Using an Access Point (Windows XP)
35
Restrictions
38
Notice for Web Service Printing
40
Use MAXIFY Cloud Link
42
Using MAXIFY Cloud Link from Your Printer
43
Before Using MAXIFY Cloud Link from Your Printer
44
Preparing to Use MAXIFY Cloud Link from Your Printer
45
Application Management
48
Using MAXIFY Cloud Link
53
Cloud Windows
56
Cloud Troubleshooting
59
Using MAXIFY Cloud Link from Your Smartphone, Tablet, or Computer
60
Before Using Canon Inkjet Cloud Printing Center
61
Requirements for Canon Inkjet Cloud Printing Center Operation
62
Preparations before Using Canon Inkjet Cloud Printing Center
64
Printing Your Printer Registration ID
72
Canon Inkjet Cloud Printing Center Window
73
Using Canon Inkjet Cloud Printing Center
90
Adding a Printer
94
Adding a MAXIFY Cloud Link User
96
Troubleshooting Canon Inkjet Cloud Printing Center
101
What Is a Security Code
103
Printing with Google Cloud Print
104
Preparations for Printing with Google Cloud Print
105
Printing from Computer or Smartphone with Google Cloud Print
109
Printing from Airprint Compliant Device
111
Checking Printer Information
116
Online Storage Integration Function
119
How to Use Print from E-Mail
120
Preparing to Use Print from E-Mail
124
Timezone List
127
Print Easily from a Smartphone or Tablet with MAXIFY Printing Solutions
128
Printing with Windows RT
129
Overview of the Machine
130
Safety Guide
131
Safety Precautions
132
Regulatory and Safety Information
133
Main Components and Basic Operations
140
Main Components
141
Front View
142
Rear View
144
Inside View
145
Operation Panel
146
About the Power Supply of the Machine
147
Confirming that the Power Is on
148
Turning the Machine on and off
149
Notice for the Power Plug/Power Cord
151
Notice for Unplugging the Power Cord
152
Using the Operation Panel
153
Entering Numbers, Letters, and Symbols
157
Loading Paper / Originals
159
Loading Paper
160
Paper Sources to Load Paper
161
Loading Plain Paper / Photo Paper
163
Loading Envelopes
168
Media Types You Can Use
172
Paper Load Limit
174
Media Types You Cannot Use
176
Printing Area
177
Printing Area
178
Other Sizes than Letter, Legal, Envelopes
179
Letter, Legal
180
Envelopes
181
Loading Originals
182
Position to Load Originals
183
Loading Originals on the Platen Glass
184
Loading Documents in the ADF (Auto Document Feeder)
185
How to Load Originals for each Function
186
Originals You Can Load
188
Inserting the USB Flash Drive
190
Inserting the USB Flash Drive
191
Removing the USB Flash Drive
192
Replacing an Ink Tank
193
Replacing an Ink Tank
194
Checking the Ink Status
199
Checking the Ink Status with the Touch Screen on the Machine
200
Maintenance
201
When Printing Becomes Faint or Colors Are Incorrect
202
Maintenance Procedure
203
Printing the Nozzle Check Pattern
205
Examining the Nozzle Check Pattern
207
Cleaning the Print Head
209
Cleaning the Print Head Deeply
211
Aligning the Print Head
213
Aligning the Print Head Manually
215
Performing Maintenance from a Computer
219
Cleaning the Print Heads from Your Computer
220
Aligning the Print Head Position from Your Computer
222
Aligning the Print Head Position Manually from Your Computer
224
Use Your Computer to Print a Nozzle Check Pattern
227
Cleaning the Machine
229
Cleaning the Exterior of the Machine
230
Cleaning the Platen Glass and Document Cover
231
Cleaning the ADF (Auto Document Feeder)
232
Cleaning the Paper Feed Roller
234
Cleaning the Inside of the Machine (Bottom Plate Cleaning)
236
Cleaning the Pad in the Cassette
239
Changing the Machine Settings
240
Changing Machine Settings from Your Computer
241
Changing the Print Options
242
Registering a Frequently Used Printing Profile
243
Managing the Printer Power
245
Reducing the Printer Noise
246
Changing the Printer Operation Mode
247
Changing the Machine Settings Using the Operation Panel
249
Changing the Machine Settings Using the Operation Panel
250
FAX Settings
252
Print Settings
256
LAN Settings
257
Device User Settings
262
Language Selection
264
Firmware Update
265
Cassette Settings
266
Administrator Password Setting
267
Operation Restrictions
268
Reset Setting
269
About ECO Settings
271
About Quiet Setting
274
Using the Machine with the Access Point Mode
276
Registering the Favorite Settings (Custom Profiles)
280
Checking the Total Number of Uses of the Machine
282
Information about Network Connection
283
Useful Information about Network Connection
284
Default Values Set at Factory (Network)
285
Connecting the Machine to the Computer Using a USB Cable
286
When Detecting the Printers Have the same Name During Setup
287
Connecting to Other Computer with Lan/Changing the Connection Method from USB to LAN
288
Printing out Network Setting Information
289
About Network Communication
292
Changing and Confirming Network Settings
293
IJ Network Tool
294
Changing the Settings in the Wireless LAN Sheet
295
Changing the WEP Detailed Settings
297
Changing the WPA/WPA2 Detailed Settings
299
Changing the Settings in the Wired LAN Sheet
302
Changing the Settings in the Admin Password Sheet
303
Monitoring Wireless Network Status
304
Initializing the Network Settings of the Machine
307
Viewing the Modified Settings
308
Screens for Network Connection of IJ Network Tool
309
Canon IJ Network Tool Screen
310
Configuration Screen
314
Wireless LAN Sheet
315
Search Screen
317
WEP Details Screen
319
WPA/WPA2 Details Screen
320
Authentication Type Confirmation Screen
321
Psk:passphrase and Dynamic Encryption Setup Screen
322
Setup Information Confirmation Screen
323
Wired LAN Sheet
324
Admin Password Sheet
325
Network Information Screen
326
Access Control Sheet
327
Edit Accessible MAC Address Screen/Add Accessible MAC Address Screen
331
Edit Accessible IP Address Screen/Add Accessible IP Address Screen
332
Other Screens of IJ Network Tool
333
Canon IJ Network Tool Screen
334
Status Screen
338
Connection Performance Measurement Screen
339
Maintenance Screen
341
Network Setup of the Card Slot Screen
342
Associate Port Screen
344
Network Information Screen
345
Appendix For Network Communication
346
Using the Card Slot over a Network
347
When the Printer Driver Is Not Associated with a Port
349
About Technical Terms
350
Restrictions
357
About Firewall
358
Tips for Ensuring Optimal Printing Quality
359
Useful Information about Ink
360
Key Points to Successful Printing
361
Be Sure to Check Paper Settings before Printing
362
Be Sure to Set Cassette Paper Information after Loading Paper
363
Canceling a Print Job
364
Key to Enjoying Consistent Printing Quality
365
Precautions for Safe Transport of the Machine
366
Legal Limitations on Use of Your Product and Use of Images
368
Specifications
369
Administrator Settings
374
About the Machine Administration
375
Setting the Administrator Password
376
Restricting the Operation
378
Sharing the Printer on a Network
380
Setting up a Shared Printer
381
Restrictions on Printer Sharing
383
About the Administrator Password
385
Printing
386
Printing from a Computer
387
Printing with Application Software that You Are Using (Printer Driver)
388
Printing with Easy Setup
389
Paper Settings on the Printer Driver and the Printer (Media Type)
392
Paper Settings on the Printer Driver and the Printer (Paper Size)
393
Various Printing Methods
394
Setting a Page Size and Orientation
395
Setting the Number of Copies and Printing Order
396
Setting the Stapling Margin
398
Fit-To-Page Printing
400
Scaled Printing
402
Page Layout Printing
405
Tiling/Poster Printing
407
Booklet Printing
410
Duplex Printing
412
Stamp/Background Printing
416
Registering a Stamp
419
Registering Image Data to be Used as a Background
422
Setting up Envelope Printing
425
Printing on Postcards
427
Switching the Paper Source to Match the Purpose
429
Displaying the Print Results before Printing
431
Setting Paper Dimensions (Custom Size)
432
Editing the Print Document or Reprinting from the Print History
434
Changing the Print Quality and Correcting Image Data
437
Printing a Color Document in Monochrome
438
Specifying Color Correction
440
Optimal Photo Printing of Image Data
442
Adjusting Colors with the Printer Driver
443
Printing with ICC Profiles
445
Adjusting Color Balance
448
Adjusting Color Balance Using Sample Patterns (Printer Driver)
450
Adjusting Brightness
454
Adjusting Intensity
456
Adjusting Contrast
458
Adjusting Intensity/Contrast Using Sample Patterns (Printer Driver)
460
Overview of the Printer Driver
464
Canon IJ Printer Driver
465
How to Open the Printer Driver Setup Window
466
Canon IJ Status Monitor
467
Checking the Ink Status from Your Computer
468
Canon IJ Preview
469
Deleting the Undesired Print Job
470
Instructions for Use (Printer Driver)
471
Printer Driver Description
473
Quick Setup Tab Description
474
Main Tab Description
480
Page Setup Tab Description
486
Maintenance Tab Description
498
Canon IJ Preview Description
504
Canon IJ XPS Preview Description
507
Canon IJ Status Monitor Description
515
Updating the MP Drivers
518
Obtaining the Latest MP Drivers
519
Deleting the Unnecessary MP Drivers
520
Before Installing the MP Drivers
521
Installing the MP Drivers
522
Printing Using the Operation Panel of the Machine
523
Printing Photo Data
524
Printing Photographs Saved on a USB Flash Drive
525
Setting Items for Photo Printing Using the Operation Panel of the Machine
530
Using Useful Display Functions
532
Printing Documents (PDF File) Saved on a USB Flash Drive
534
Paper Setting for Printing
538
Copying
541
Making Copies
542
Displaying the Preview Screen
545
Setting Items for Copying
547
Reducing or Enlarging a Copy
550
Two-Sided Copying
552
About Special Copy Menu
554
Copying Thick Originals such as Books
555
Copying Two Pages to Fit Onto a Single Page
556
Copying Four Pages to Fit Onto a Single Page
558
Collated Copying
561
Scanning
563
Scanning from a Computer
564
Scanning with IJ Scan Utility
565
What Is IJ Scan Utility (Scanner Software)
566
Starting IJ Scan Utility
568
Scanning Documents
569
Scanning Photos
570
Scanning with Favorite Settings
571
Scanning Items Larger than the Platen (Image Stitch)
572
Extracting Text from Scanned Images (OCR)
576
Sending Scanned Images Via E-Mail
578
Scanning Multiple Items at One Time
579
Scanning Multiple Documents at One Time from the ADF (Auto Document Feeder)
582
Saving after Checking Scan Results
587
IJ Scan Utility Screens
590
IJ Scan Utility Main Screen
591
Settings Dialog Box
593
Save Settings Dialog Box
643
Image Stitch Window
646
Scanning with Application Software that You Are Using (Scangear)
651
What Is Scangear (Scanner Driver)
652
Scanning with Advanced Settings Using Scangear (Scanner Driver)
654
Starting Scangear (Scanner Driver)
655
Scanning in Basic Mode
656
Scanning in Advanced Mode
659
Scanning Multiple Documents from the ADF (Auto Document Feeder) in Advanced Mode
661
Scanning Multiple Documents at One Time with Scangear (Scanner Driver)
663
Correcting Images and Adjusting Colors with Scangear (Scanner Driver)
667
Correcting Images (Unsharp Mask, Reduce Dust and Scratches, Fading Correction, Etc.)
668
Adjusting Colors Using a Color Pattern
672
Adjusting Saturation and Color Balance
674
Adjusting Brightness and Contrast
676
Adjusting Histogram
678
Adjusting Tone Curve
682
Setting Threshold
685
Scangear (Scanner Driver) Screens
686
Basic Mode Tab
687
Advanced Mode Tab
695
Input Settings
701
Output Settings
704
Image Settings
707
Color Adjustment Buttons
712
Preferences Dialog Box
715
Scanner Tab
716
Preview Tab
719
Scan Tab
721
Color Settings Tab
722
Placing Items (When Scanning from a Computer)
724
Adjusting Cropping Frames (Scangear)
727
General Notes (Scanner Driver)
731
Useful Information on Scanning
733
Adjusting Cropping Frames in the Image Stitch Window
734
Resolution
735
Data Formats
737
Color Matching
738
IJ Network Scanner Selector EX Menu and Setting Screen
739
Uninstalling IJ Network Scanner Selector EX
742
Other Scanning Methods
743
Scanning with WIA Driver
744
Scanning Using the Control Panel (Windows XP Only)
748
Placing Items (When Scanning from a Computer)
750
Scanning from the Operation Panel of the Machine
753
Forwarding Scanned Data to the Computer Using the Operation Panel of the Machine
754
Attaching the Scanned Data to E-Mail Using the Operation Panel of the Machine
758
Saving Scanned Data on the USB Flash Drive Using the Operation Panel of the Machine
761
Deleting Scanned Data on USB Flash Drive
767
Setting Items for Scanning Using the Operation Panel of the Machine
769
Network Scan Settings
771
Selecting a Response to Commands from the Operation Panel Using IJ Scan Utility
775
Faxing
778
Preparing for Faxing
779
Connecting the Telephone Line
780
Setting the Telephone Line Type
783
Setting the Receive Mode
784
Setting the Sender Information
788
Sending Faxes Using the Operation Panel of the Machine
795
Sending Faxes by Entering Fax/Telephone Number
796
Resending Faxes (Redialing a Busy Number)
800
Setting Items for Sending Faxes
802
Sending Faxes Using Useful Functions
803
Sending a Fax after Speaking on Telephone
804
Sending a Fax to the Registered Recipient
806
Sending the same Document to Several Recipients (Sequential Broadcasting)
808
Preventing Mistransmission of Faxes
812
Using the on Hook Dial Function
814
Registering Recipients
816
Registering Recipients Using the Operation Panel of the Machine
817
Registering the Fax/Telephone Number of Recipients
818
Registering Recipients in Group Dial
822
Changing Registered Information
826
Deleting Registered Information
827
Printing a List of the Registered Destinations
828
Registering Recipients Using Speed Dial Utility
829
Starting up Speed Dial Utility
830
Speed Dial Utility Dialog Box
831
Saving Registered Information on the Machine to Your Computer
833
Registering a Fax/Telephone Number Using Speed Dial Utility
834
Changing a Fax/Telephone Number Using Speed Dial Utility
836
Deleting a Fax/Telephone Number Using Speed Dial Utility
838
Changing Sender Information Using Speed Dial Utility
839
Registering/Changing Rejected Number Using Speed Dial Utility
840
Machine
841
Uninstalling Speed Dial Utility
842
Receiving Faxes
843
Receiving Faxes
844
Changing the Paper Settings
849
Memory Reception
851
Receiving Faxes Using Useful Functions
853
Saving Received Faxes Automatically on a USB Flash Drive
854
Forwarding Received Faxes Automatically to Shared Folder on the Computer
856
Remote Reception
858
Rejecting Fax Reception
859
Using the Caller ID Service to Reject Calls
862
Other Useful Fax Functions
864
Using the Information Services
865
Transmission/Reception of Faxes Using ECM
868
Document Stored in Machine's Memory
869
Printing a Document in Machine's Memory
870
Deleting a Document in Machine's Memory
872
Saving a Document in Machine's Memory to USB Flash Drive
874
Forwarding a Document in Machine's Memory to Shared Folder on the Computer
877
Summary of Reports and Lists
880
Sending Faxes from a Computer
885
Sending a FAX (Fax Driver)
886
Creating an Address Book (Fax Driver)
889
Setup When Opening the Address Book for the First Time (Windows XP)
893
How to Open the Setting Screen of the Fax Driver
894
Edit or Remove a Recipient from an Address Book (Fax Driver)
896
Search for a Recipient in an Address Book (Fax Driver)
899
Troubleshooting Problems Sending Faxes (Fax Driver)
901
General Notes (Fax Driver)
903
Troubleshooting
904
Problems with Network Communication
905
Problems with the Machine While Using with Network
906
The Machine Stopped Working Suddenly
907
Ink Remaining Level Is Not Displayed on Printer Status Monitor of the Machine
911
Printing Speed Is Slow
912
Cannot Use the Machine on Replacing an Access Point or Changing Its Settings
913
Cannot Detect a Machine on a Network
915
Cannot Detect the Machine When Setting up Network Communication
916
Cannot Detect the Machine During Wireless LAN Setup: Check 1
917
Cannot Detect the Machine During Wireless LAN Setup: Check 2
918
Cannot Detect the Machine During Wireless LAN Setup: Check 3
919
Cannot Detect the Machine During Wireless LAN Setup: Check 4
920
Cannot Detect the Machine During Wireless LAN Setup: Check 5
921
Cannot Detect the Machine During Wireless LAN Setup: Check 6
922
Cannot Detect the Machine During Wired LAN Setup: Check 1
923
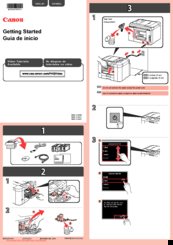
Canon MB2300 series Getting Started (4 pages)
Brand:
Canon
| Category:
All in One Printer
| Size: 2 MB
Table of Contents
Getting Started
1
Rear View
1
Video Tutorials Available
1
Insert the Ink Tank
2
Remove the Ink Tank from the Package.
2
Push the Ink Tank Firmly
2
Load Paper with the Print Side Facing Down.
3
If an Error Message Appears
3
Refer to the Following Explanations of Connection Types
4
How to Set up the FAX
4
Installed On-Screen Manual
4
Advertisement
Advertisement
Related Products
Canon MAXIFY MB2320
Canon MAXIFY MB2020
Canon MB2720
Canon MAXIFY MB2350
Canon MAXIFY MB2340
Canon MAXIFY MB2360
Canon MB5000 Series
Canon MB5120
Canon MB5170
Canon MAXIFY MB5020
Canon Categories
Printer
Digital Camera
All in One Printer
Camcorder
Scanner
More Canon Manuals
Login
Sign In
OR
Sign in with Facebook
Sign in with Google
Upload manual
Upload from disk
Upload from URL