Sign In
Upload
Manuals
Brands
Canon Manuals
All in One Printer
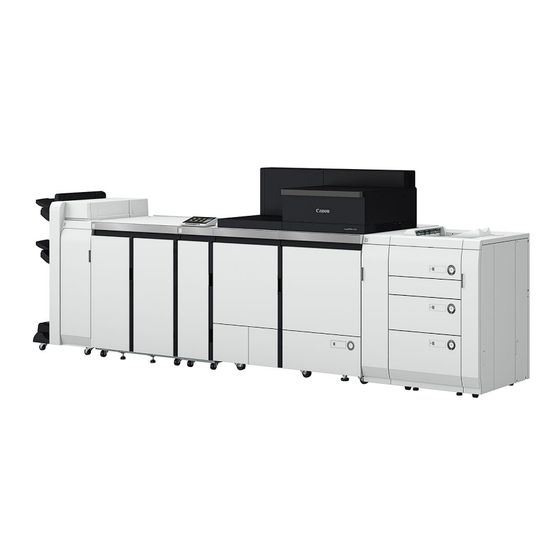
imagePRESS V1350
Canon imagePRESS V1350 Manuals
Manuals and User Guides for Canon imagePRESS V1350. We have
1
Canon imagePRESS V1350 manual available for free PDF download: Installation Manual
Canon imagePRESS V1350 Installation Manual (794 pages)
Brand:
Canon
| Category:
All in One Printer
| Size: 83 MB
Table of Contents
Important Notices
2
Description on the Parts Included in the Package
3
Table of Contents
4
Safety Precautions
9
Toner Safety
10
About Toner
10
Handling Adhered Toner
10
Points to Note at Installation
10
Selecting the Installation Site
10
Points to Note before Servicing
10
Essential Items to be Performed before Installation
11
Power Supply
11
Points to Note When Turning ON/OFF the Main Power
11
Checking the Installation Space
11
Handling of Packaging Materials
12
Illustrations
12
Product Lineup
13
Host Machine Options
14
Paper Feed / Paper Output Options
16
Paper Feed Options
16
Paper Output Options
17
Host Machine
18
About this Installation Procedure
19
Checking before Installation
20
Checking Power Supply
20
Explanation for Safety
20
Points to Note at Installation Work
20
Points to Note When Moving this Host Machine
20
Order of Installing the Host Machine and Options
21
Unpacking
23
Unpacking Main Station / Power Unit Station
23
Unpacking Sub Station
25
Unpacking Buffer Pass Station
28
Checking the Contents
31
Main Station
31
Power Unit Station
32
Buffer Pass Station
34
Installation Procedure
35
Preparing the Starter
35
Positioning and Securing the Main Station
35
Checking the Clearance between the Main Station and Power Unit Station
38
Before Installing the Deck
41
Before Installing the Feed Assembly
43
Preparation before Installing ITB Unit
47
Preparation before Installing Sub Station
50
Attaching the Pre-Fixing Feed Unit
61
Installing the Buffer Pass Station
64
Installing the Sub Station
78
Installing the Power Unit Station
96
Installing the Exhaust Filter
102
Installing the Developing Assembly
104
Installing the Control Panel
109
Attaching the Service Book Holder
110
Turning on the Main Power Supply
111
Setting the Toner Container
114
Supplying the Starter
116
Host Machine Settings (Starting Setup Guide)
121
Informing the System Administrator that Installation Is Complete
121
Registration of Installation Date Information
122
Settings at Installation
122
Paper Settings
122
Checking the Height of the Primary Charging Assembly
126
Attaching the Process Unit Cover
129
Executing Auto Adjust Gradation (Full Adjust)
131
Register Paper to Adjust
132
Executing Correct Shading
132
Image Position Adjustment
135
Affixing Labels
149
Checking the Serial Number
152
Setting Procedure When Installing the High Capacity Stacker
153
Record of Complete of Instruct to User
153
Connecting to the Network
153
When Relocating the Machine
154
Works before Relocation
154
Works after Relocation
179
Host Machine Options
180
Flat Control Panel-A1
181
Points to Note at Installation
181
Checking the Contents
181
Installation Outline Drawing
181
Installation Procedure
182
Operator Attention Light-A1
187
Checking the Contents
187
Installation Outline Drawing
187
Installation Procedure (for Imagepress Server)
188
1TB SSD-A1 / Memory Mirroring Kit-A1
191
Checking the Contents
191
Installation Outline Drawing
192
Installation Procedure
192
Imagepress Server E9000
198
Preparation before Connecting
198
Checking the Contents
199
Installation Procedure
200
Setting after Installation
207
Paper Feed Options
222
POD Deck Adjuster-A1
223
Pre-Checks
223
Installation Procedure
224
POD Deck-E1
238
Checking before Installation
238
Checking the Power Supply
238
Points to Note before Installation
239
Product Name
239
Unpacking
240
Checking the Contents
248
Installation Procedure
249
Connecting to Host Machine
251
Affixing the Label
267
Adjustments
269
Checking after Installation
278
Disposal Parts Check
278
Secondary POD Deck-E1
279
Checking before Installation
279
Points to Note before Installation
279
Unpacking
280
Checking the Contents
287
Installation Procedure
288
Adjustments
330
Horizontal Registration Adjustment
330
Checking after Installation
339
Disposal Parts Check
339
POD Buffer Unit-A1
340
Pre-Checks
340
Installation Procedure
341
Settings after Installation
376
Tab Feeding Attachment-E1
377
Checking the Contents
377
Installation Procedure
377
Cassette Heater Unit-32
379
Checking the Contents
379
Points to Note at Installation
379
Installation Procedure
379
Paper Output Options
394
Sensing Unit-B1
395
Pre-Checks
395
Unpacking
396
Checking the Contents
397
Installation Procedure
398
Adjustment Procedure
410
Operation Check
411
Work after Moving the Machine
412
Inspection Unit-B1
413
Pre-Checks
413
Installing the Inspection Unit
413
Connecting the Cables
432
When Relocating the Machine
434
Document Insertion Unit-R1
438
Checking before Installation
438
Unpacking Procedure
439
Checking the Contents
442
Installation Procedure
445
Connecting the Communication Cable
472
Height/ Inclination Checking and Adjustment
479
Checking after Installation
485
Perfect Binder-F1
488
Checking before Installation
488
Unpacking
490
Checking the Contents
492
Preparations before Installation
492
Installation Procedure
512
Checking after Installation
527
Relocating the Machine
533
Perfect Binder Continuous Kit-B1
545
Checking before Installation
545
Unpacking
545
Checking the Contents
546
Installation Procedure
547
Checking after Installation
571
Appendices
574
Setup Procedure
574
Paper Folding Unit-K1
578
Checking before Installation
578
Unpacking
578
Checking the Contents
581
Installation Procedure
582
Adjustment
604
Inclination Adjustment
611
Checking after Installation
617
Operation Checks
617
Staple Finisher-Af1/Booklet Finisher-AF1
619
Checking before Installation
619
Unpacking Procedure
621
Checking the Contents
625
Installation Procedure
626
Preparing the Finisher for Installation
626
Connecting to the Host Machine
628
Adjusting the Height
674
Connecting the LAN Cable
679
Connecting the Power Cord and Operation Check
687
Side Registration/Skew Adjustment
688
Attaching the Labels
694
Checking after Installation
697
Puncher Unit-BT1/BS1/BU1
698
Points to Note at Installation
698
Points to Note before Installation
698
Product Name
698
Checking the Contents
699
Installation Procedure
699
Affixing the A1 Labels
707
Adjustments
708
Finisher Long Sheet Catch Tray-B1
721
Checking before Installation
721
Checking the Contents
721
Installation Procedure
721
Checking after Installation
725
Removing the Finisher Long Sheet Catch Tray
727
Booklet Trimmer-G1
730
Pre-Checks
730
Finisher Long Sheet Catch Tray-B1
730
Unpacking
732
Checking the Contents
737
Installation Procedure
738
Connecting the Cable
762
Two-Knife Booklet Trimmer-B1
768
Pre-Checks
768
Unpacking Procedure
768
Checking the Contents
773
Installation Procedure
773
Adjustment
780
Two-Knife Booklet Trimmer Conveyor-B1
790
Points to Note at Installation
790
Checking the Contents
790
Installation Procedure
790
Revision History
794
Advertisement
Advertisement
Related Products
Canon imageRUNNER ADVANCE System V3.13
Canon varioPRINT 140 Series
Canon imagePRESS
Canon imagePRESS C1+
Canon IMAGEPRESS C6010S
Canon IMAGEPRESS C6010VPS
Canon IMAGEPRESS C7010VPS
Canon imagePRESS C7010VPS/C6010VPS/C6010S Series
Canon ImagePress 1125P
Canon imagePRESS C800 Series
Canon Categories
Printer
Digital Camera
All in One Printer
Camcorder
Scanner
More Canon Manuals
Login
Sign In
OR
Sign in with Facebook
Sign in with Google
Upload manual
Upload from disk
Upload from URL