Sign In
Upload
Manuals
Brands
Canon Manuals
Camcorder
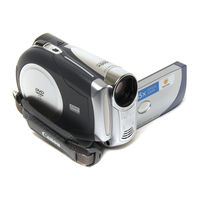
2064B001 - DC 210 Camcorder
User Manuals: Canon 2064B001 - DC 210 Camcorder DVD
Manuals and User Guides for Canon 2064B001 - DC 210 Camcorder DVD. We have
1
Canon 2064B001 - DC 210 Camcorder DVD manual available for free PDF download: Instruction Manual
Canon 2064B001 - DC 210 Camcorder Instruction Manual (85 pages)
Canon DVD Camcorder Instruction Manual DC210
Brand:
Canon
| Category:
Camcorder
| Size: 4 MB
Table of Contents
Instruction Manual
1
Important Usage Instructions
2
Important Safety Instructions
3
How to Select a DVD Disc
5
Recommended Discs
6
Table of Contents
8
About this Manual
11
About the Joystick and the Joystick Guide
11
About the Power Switch
12
About the Operating Modes
12
Getting to Know the Camcorder
14
Supplied Accessories
14
Components Guide
15
Back View
16
Bottom View
16
Screen Displays
17
Getting Started
20
Charging the Battery Pack
20
Inserting and Removing a Disc
22
Preparing the Camcorder
23
Adjusting the LCD Screen
24
Using the Menus
25
Selecting a FUNC. Menu Option
25
Selecting an Option from the Setup Menus
25
First Time Settings
26
Changing the Language
26
Changing the Time Zone
26
Date/Time Setup
26
Setting the Date and Time
27
When You Have Finished Recording
28
Recording
28
Shooting Video
28
Selecting the Aspect Ratio of Your Recordings (16:9 Widescreen or 4:3)
29
Taking Photos
30
Zooming
31
Quick Start Function
31
Playback
32
Playing Back the Video
32
To Adjust the Volume
33
Special Playback Modes
33
Displaying the Photos
33
Slide Show
34
Magnifying Photos During Playback
35
Menu Options Lists
36
FUNC. Menu
36
Setup Menus
37
Camera Setup (Digital Zoom, Image Stabilizer, Etc.)
37
Disc Operations (Photomovie, Finalize, Etc.)
39
Still Image Operations (Erase All Still Images)
39
Display Setup (LCD Brightness, Language, Etc.)
40
Date and Time
40
System Setup (Volume, Beep, Etc.)
41
Power Save
41
Date/Time Setup
42
Date Format
42
Recording Programs
43
Using the Recording Programs
43
Flexible Recording: Changing the Aperture and Shutter Speed
44
Special Scene: Recording Programs to Match Special Conditions
45
Adjusting the Picture: Exposure, Focus and Color
46
Manual Exposure Adjustment
46
Manual Focus Adjustment
46
White Balance
47
Image Effects
48
Still Image Recording Options
49
Selecting the Size and Quality of Still Images
49
Automatic Focus Priority
50
Camera Setup
50
Other Functions
51
On-Screen Displays
51
Display Setup
51
Self Timer
52
Digital Effects
52
T O Fade out
53
Managing Scenes
54
Adding Scenes to the Playlist
54
Add to Playlist
54
Moving Scenes in the Playlist
55
Deleting Scenes
55
Disc Operations
56
Dividing a Scene
56
Managing the Disc
57
Protecting the Disc
57
Initializing the Disc
57
Changing the Disc Title
58
Managing Photos
59
Erasing Photos
59
Converting Photos into Photomovie Scenes
60
Finalizing the Disc
61
Playing Back Your Disc on a DVD Player or a Computer's DVD Drive
62
Unfinalizing the Disc - Additional Recordings on a Finalized Disc
63
Connecting to a TV or VCR
64
Connection Diagrams
64
Sound from the Built-In Speaker will be Muted While the STV-250N Stereo Video Cable Is Connected to the Camcorder
64
Playback on a TV Screen
65
Recording to a VCR or Digital Video Recorder
65
Additional Information Trouble
66
Troubleshooting
66
List of Messages
70
Do's and Don'ts
72
Handling Precautions
72
Maintenance/Others
74
T O Avoid Condensation
75
When Condensation Is Detected
75
Resuming Use
75
Using the Camcorder Abroad
75
General Information
76
System Diagram
76
Optional Accessories
77
Product Codes
78
Specifications
79
CA-570 Compact Power Adapter
80
Index
81
To Obtain Warranty Service
84
Notice to Consumer
84
Advertisement
Advertisement
Related Products
Canon 2075B001
Canon 2059B001
Canon 2080B001 - XL H1S Camcorder
Canon Optura 200 MC
Canon 2487B001
Canon 2691B001
Canon 2699B001
Canon 2704B001AA
Canon 2680B001
Canon ES8600 - Hi8 Camcorder With 2.5" Color LCD
Canon Categories
Printer
Digital Camera
All in One Printer
Camcorder
Scanner
More Canon Manuals
Login
Sign In
OR
Sign in with Facebook
Sign in with Google
Upload manual
Upload from disk
Upload from URL