Sign In
Upload
Manuals
Brands
Cannon Manuals
Measuring Instruments
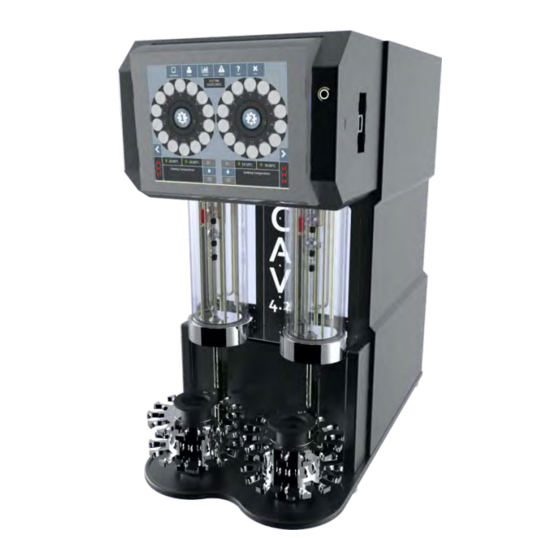
CAV 4.2
Cannon CAV 4.2 Manuals
Manuals and User Guides for Cannon CAV 4.2. We have
2
Cannon CAV 4.2 manuals available for free PDF download: Operator's Manual, Operation Manual
Cannon CAV 4.2 Operator's Manual (82 pages)
Automated Dual-Bath Kinematic Viscometer
Brand:
Cannon
| Category:
Measuring Instruments
| Size: 1 MB
Table of Contents
Revision History
4
Table of Contents
5
Overview
11
Related Documents
11
Table 1 - Related Documents
11
Specifications / Compliances
12
Table 2 - Specifications and Compliances
12
Notes/Cautions/Warnings
13
Safety Precautions
13
Getting Started
15
Unpack and Inspect
15
Table 3 - Packing List (Main Components)
15
Table 4 - Packing List (Installation)
16
Table 5 - Packing List (Tools)
16
Table 6 - Packing List (Consumables)
17
Table 7 - Packing List (Networking)
17
Table 8 - Packing List (Spares)
17
Setup the CAV® 4.2
18
Figure 1 - Complete CAV® 4.2 System
18
Table 9 - Tools and Materials Required
19
Connect Hoses
20
Figure 2 - Tubing Connections
20
Figure 3 - Solvent Inlets
21
Figure 4 - Temperature Baths
23
Fill Baths
23
Table 10 - Silicone Bath Fluid Selection
23
Figure 5 - Temperature Bath Details
24
Connect Cables
25
Figure 6 - Bath Top (Fill Hole)
25
Set Bath Temperature (CAV 4.2 GUI)
26
Figure 7 - Main Screen
26
Figure 8 - Temperature Settings Screen
26
Figure 9 - Field Entry Screen
26
Calibrate Temperature (CAV 4.2 GUI)
27
Figure 10 - Thermometer Access Holes
27
Table 11 - Tools and Materials Required
27
Figure 11 - Temperature Calibration Screen
28
Set Vacuum and Pressure (CAV 4.2 GUI)
29
Figure 12 - Bath Screen
29
Figure 13 - Services Menu
29
Figure 14 - Pressure/Vacuum Adjustment Screen
29
Table 12 - Tools and Materials Required
29
Adjust the Default Wash Settings (CAV 4.2 GUI)
30
Figure 15 - Settings Menu
30
Figure 16 - Wash Screen
30
Run a Wash (CAV 4.2 GUI)
31
Figure 17 - Main Screen (Wash Button)
31
Table 13 - Tools and Materials Required
31
Train Sensors (CAV 4.2 GUI)
32
Figure 18 - Train Screen
32
Table 14 - Tools and Materials Required
32
Run a Sample Test (CAV 4.2 GUI)
33
Figure 19 - Methods Screen
33
Figure 20 - Field Entry Screen
33
Table 15 - Tools and Materials Required
33
Review and Export Data (CAV 4.2 GUI)
34
Connecting with VISCPRO II
35
Figure 21 - Closed Network Settings
35
Connect Equipment
36
Install VISCPRO II
36
Table 16 - Tools and Materials Required
36
Table 17 - VISCPRO II Registry Entries
37
Set up Network Adapter
38
Figure 22 - Network Connections
38
Figure 23 - Connection Properties
38
Figure 24 - TCP/IP Properties
39
Figure 25 - Advanced Settings
39
Configure Firewall Rules
40
Configure USB Power Settings
42
CAV Registry Settings
43
Table 18 - CAV® 4.2 Registry Entries
43
Operation
45
Cav 4.2 Gui
45
Figure 26 - Main Screen Menu
45
Table 19 - GUI Screen Details
46
Figure 27 - Main Screen
47
Figure 28 - Bath Screen
48
VISCPRO® II Software Interface
49
Table 20 - VISCPRO Window Details
49
Figure 29 - VISCPRO Interface Window
50
Manage User Accounts (VISCPRO II / CAV 4.2 GUI)
51
Log in
51
Table 21 - Default User Accounts
51
Change Password
52
Setup and Edit User Accounts
52
Logout
52
Connect VISCPRO II to the CAV® 4.2
53
Set Bath Temperature (VISCPRO II)
53
Calibrate Temperature (VISCPRO II)
54
Set Vacuum and Pressure (VISCPRO II)
54
Train Sensors (VISCPRO II)
55
Run a Wash (VISCPRO II)
55
Run a Sample Test (VISCPRO II)
56
View Test Results (VISCPRO II)
59
Control Preheaters
59
Table 22 - Preheater Settings
59
Control Sample Cup Heaters
60
Table 23 - Sample Cup Heater Settings (May Vary between Instruments, this Is a Starting Point)
60
Advanced Setup
61
Calibrate Viscometer Tube (VISCPRO II)
61
Method/Test Settings
62
Print Method Settings
62
Edit Method Settings
63
Table 24 - Method Settings: Test
63
Table 25 - Method Settings: Wash
64
Table 26 - Method Settings: Advanced
65
Adjust Default Wash Settings
66
Table 27 - Method Settings: Drop Criteria
66
Create a Standard CAV Data Table Analysis
67
Table 28 - CAV Data Table Fields
67
Maintenance and Service
69
Update CAV 4.2 Software and Firmware
69
Tools and Materials Required
69
To Prepare the USB Flash Drive
69
To Replace the UI Updater
70
To Update the UI Software
70
To Update the Controller Firmware
70
To Update the VISCPRO II Software
71
Change Viscometer Tube
72
Replace Power Supply
73
Adjust Solvent Dosing Chamber Sensors
74
Figure 30 - Solvent Dosing Chamber
74
Specifications
75
Table 29 - Specifications
75
Warranty
77
Products Limited Warranty
77
Reagent and Chemical Warranty
77
Returning a Product to CANNON
78
Required Information
78
Hazardous Materials
78
Shipping Notification
78
Replacement Parts List
79
Table 30 - CAV 4.2 Replacement Parts
79
Advertisement
Cannon CAV 4.2 Operation Manual (64 pages)
Dual-Bath Kinematic Viscometer
Brand:
Cannon
| Category:
Measuring Instruments
| Size: 3 MB
Table of Contents
Table of Contents
3
Overview
7
Specifications/Compliances
7
Table 1 - Specifications and Compliances
7
Notes/Cautions/Warnings
8
Safety Precautions
8
Getting Started
10
Unpack and Inspect
10
Table 2 - Packing List (Main Components)
10
Table 3 - Packing List (Installation)
11
Table 4 - Packing List (Tools)
11
Table 5 - Packing List (Consumables)
11
Table 6 - Packing List (Networking)
12
Table 7 - Packing List (Spares)
12
Setup the CAV 4.2
13
Figure 1 - Complete CAV 4.2 System
13
Table 8 - Tools and Materials Required for Setup
13
Connect Hoses
14
Figure 2 - Tubing Connections
14
Figure 3 - Solvent Inlets
15
Fill Baths
17
Figure 4 - Temperature Baths
17
Table 9 - Silicone Bath Fluid Selection
17
Figure 5 - Temperature Bath Details
18
Figure 6 - Bath Top (Fill Hole)
18
Connect Cables
19
Set Bath Temperature (CAV 4.2 GUI)
19
Figure 7 - Main Screen
19
Calibrate Temperature (CAV 4.2 GUI)
20
Figure 8 - Temperature Settings Screen and Field Entry Screen
20
Table 10 - Tools and Materials Required to Calibrate Temperature
20
Figure 9 - Thermometer Access Holes
21
Figure 10 - Temperature Calibration Screen
21
Set Vacuum and Pressure (CAV 4.2 GUI)
22
Figure 11 - Services Menu
22
Figure 12 - Pressure/Vacuum Adjustment Screen
22
Table 11 - Tools and Materials Required to Set Vacuum and Pressure
22
Adjust the Default Wash Settings (CAV 4.2 GUI)
23
Run a Wash (CAV 4.2 GUI)
23
Figure 13 - Settings Menu and Wash Screen
23
Table 12 - Tools and Materials Required to Run a Wash
23
Train Sensors (CAV 4.2 GUI)
24
Figure 14 - Main Screen (Wash Button)
24
Table 13 - Tools and Materials Required to Train Sensors
24
Figure 15 - Train Screen
25
Run a Sample Test (CAV 4.2 GUI)
26
Figure 16 - Methods Screen
26
Figure 17 - Verify Known KV Field Entry Screen
26
Table 14 - Tools and Materials Required to Run a Sample Test
26
Review and Export Data (CAV 4.2 GUI)
27
Connecting with VISCPRO II
28
Figure 18 - Closed Network Settings
28
Connect Equipment
29
Table 15 - Tools and Materials Required to Connect Equipment
29
Install VISCPRO II
30
Table 16 - VISCPRO II Registry Entries
30
Set up Network Adapter
31
Figure 19 - Network Connections
31
Figure 20 - Connection Properties
31
Figure 21 - TCP/IP Properties
32
Figure 22 - Advanced Settings
32
Configure Firewall Rules
33
Configure USB Power Settings
34
CAV Registry Settings
35
Table 17 - CAV 4.2 Registry Entries
35
Operation
36
Cav 4.2 Gui
36
Figure 23 - Main Menu Screen
36
Table 18 - GUI Screen Details
37
Figure 24 - Main Screen
38
Figure 25 - Bath Screen
38
VISCPRO® II Software Interface
39
Figure 26 - VISCPRO Interface Window
39
Table 19 - VISCPRO Window Details
40
Manage User Accounts (VISCPRO II/CAV 4.2 GUI)
41
Log in
41
Change Password
41
Table 20 - Default User Accounts
41
Setup and Edit User Accounts
42
Logout
42
Connect VISCPRO II to the CAV 4.2
42
Set Bath Temperature (VISCPRO II)
43
Calibrate Temperature (VISCPRO II)
43
Set Vacuum and Pressure (VISCPRO II)
43
Train Sensors (VISCPRO II)
44
Run a Wash (VISCPRO II)
44
Run a Sample Test (VISCPRO II)
44
View Test Results (VISCPRO II)
47
Control Preheaters
47
Table 21 - Preheater Settings
47
Control Sample Cup Heaters
48
Table 22 - Sample Cup Heater Settings (May Vary between Instruments)
48
Advanced Setup
49
Calibrate Viscometer Tube (VISCPRO II)
49
Method/Test Settings
50
Print Method Settings
50
Edit Method Settings
50
Table 23 - Method Settings: Test
51
Table 24 - Method Settings: Wash
52
Table 25 - Method Settings: Advanced
53
Table 26 - Method Settings: Drop Criteria
54
Adjust Default Wash Settings
55
Create a Standard CAV Data Table Analysis
55
Table 27 - CAV Data Table Fields
56
Maintenance and Service
57
Update CAV 4.2 Software and Firmware
57
Tools and Materials Required
57
Prepare the USB Flash Drive
57
Replace the UI Updater
57
Table 28 - Tools and Materials Required for Software and Firmware Update
57
Update the UI Software
58
Update the Controller Firmware
58
Update the VISCPRO II Software
59
Change Viscometer Tube
59
Replace Power Supply
60
Adjust Solvent Dosing Chamber Sensors
61
Figure 27 - Solvent Dosing Chamber
61
Warranty
62
Products Limited Warranty
62
Reagent and Chemical Warranty
62
Returning a Product to CANNON
62
Required Information
63
Hazardous Materials
63
Shipping Notification
63
Advertisement
Related Products
Cannon CMRV-5000
Cannon CAV-2100
Cannon CAV-2200
Cannon CAV 4.1
Cannon CARRICK
CANNON CANTIBMLP
CANNON CANT
Cannon CANTERBUR
Cannon CAST18R
Cannon Canterbury CANTIBLP
Cannon Categories
Kitchen Appliances
Cookers
Measuring Instruments
Fishing Equipment
Indoor Fireplace
More Cannon Manuals
Login
Sign In
OR
Sign in with Facebook
Sign in with Google
Upload manual
Upload from disk
Upload from URL