Sign In
Upload
Manuals
Brands
Buchi Manuals
Laboratory Equipment
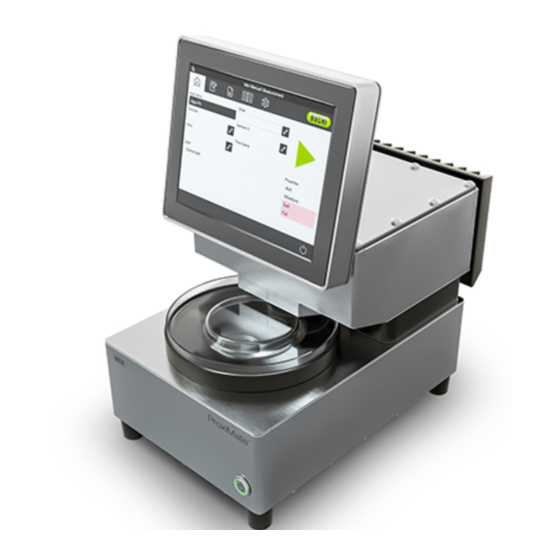
ProxiMate
Buchi ProxiMate Manuals
Manuals and User Guides for Buchi ProxiMate. We have
2
Buchi ProxiMate manuals available for free PDF download: Operation Manual
Buchi ProxiMate Operation Manual (100 pages)
Brand:
Buchi
| Category:
Industrial Equipment
| Size: 7 MB
Table of Contents
Table of Contents
3
About this Document
7
Warning Notices in this Document
7
Symbols
7
Warning Symbols
7
Mark-Ups and Symbols
8
Trademarks
8
Safety
9
Proper Use
9
Use Other than Intended
9
Staff Qualification
9
Residual Risks
9
Glass and Acrylic Breakage
10
Faults During Operation
10
Instrument Damage Due to an Incorrectly Installed IP Module
10
Malware Infection Due to Connections with Other Devices or Network
10
Data Loss
10
Damage to the Internal Memory Due to Incorrect Shutting down of the Instrument
10
Personal Protective Equipment
10
Modifications
10
Product Description
12
Description of Function
12
Sample Presentation Options
12
Up View Option
12
Down View Option
13
Measurement Modes
13
Diffuse Reflection Mode
13
Transflectance Mode
13
Configuration
14
Front View
14
Rear View
15
Connections (IP Module Removed)
16
Location of the Type Plate
17
Scope of Delivery
17
Type Plate
18
Technical Data
18
Proximate
18
Ambient Conditions
19
Materials
19
Transport and Storage
20
Transport
20
Storage
20
Lifting the Instrument
20
Installation
21
Before Installation
21
Installation Site
21
Securing against Earthquakes
21
Establishing Electrical Connections
22
Installing a USB Device
22
Software Settings
23
Request a License for Software or an Application
23
Import a License
24
Calibrating a Baseline Correction Vector (BCV)
24
Importing Standardized Reference Data
27
Changing the Language of the Instrument
28
Operation
29
Layout of the Control Panel
29
Function Bar
29
Menu Bar
31
Start Menu
32
History Menu
35
Application Menu
38
Tools Menu
39
Status Bar
40
Log in Administrator Mode
41
Editing an Application
42
Creating a New Application
42
Changing the Alias of an Application
43
Changing the Measurement View of an Application
43
Changing the Measurement Mode of an Application
44
Changing the Sample Presentation of an Application
45
Enter a Description for an Application
45
Changing the Rotation of an Application
46
Changing the Measurement Duration of an Application
46
Enter a Standard Operating Procedure (SOP) for an Application
47
Changing the Selection Ability of an Application
47
Deleting an Application
48
Editing a Property
49
Creating a New Property
49
Changing the Name of a Property
49
Changing the Alias of a Property
50
Changing the Sort Order of a Property
50
Changing the Prediction Type of a Property
51
Changing the Initial Wavelength Range (Calibration Model Only)
54
Changing the Postpredicted Value (Calibration Model Only)
55
Changing the Calibration Base (Calibration Model Only)
55
Changing the Display Basis (Calibration Model Only)
56
Changing the Formula (Calculated Property Only)
57
Changing the Observer (Color Only)
58
Changing the Illuminant (Color Only)
58
Changing the Metric (Color Only)
59
Changing the Metric Element (Color Only)
59
Changing the Decimal Places of a Property
60
Changing the Unit of a Property
60
Changing the Bias of a Property
61
Changing the Slope of a Property
61
Changing the Mahalanobis of a Property (Calibration Model Only)
62
Changing the Target of a Property
62
Changing the Limit Maximum of a Property
63
Changing the Limit Minimum of a Property
63
Changing the Tolerance Maximum of a Property
64
Changing the Tolerance Minimum of a Property
64
Deleting a Property
65
Enter Reference Values
65
Import Reference Values Via an Excel Template
66
Run Autocal to Create or Update Calibrations
67
Open the Calibration Summary to Find Statistical Information
69
Importing and Exporting
69
Exporting Measurement Data
69
Importing Application Data
72
Exporting Application Data
72
Create Reports
73
Create a Report of a Single Sample
73
Create a Report of Multiple Samples of the same Application
73
Create a Report of All Samples of the same Application
74
Access Created Data Files
75
Carrying out a Measurement
76
Preparing the Instrument
76
Starting Measurement
76
Ending Measurement
77
Shutting down the Instrument
77
Cleaning and Servicing
78
Regular Maintenance Work
78
Changing the Lamps
79
Changing the down View Lamp
79
Changing the up View Lamp
82
Confirm Lamp Replacement
86
Checking the Desiccant Cartridge
86
Changing the Desiccant Cartridge
88
Carrying out System Tests
90
Carrying out a Baseline Correction Vector Test
90
Carrying out a Comprehensive System Test
90
Carrying out an Advanced System Test
90
Carrying out a Data Backup
91
Cleaning the Display
91
Help with Faults
92
Troubleshooting
92
Error Messages
92
Taking out of Service and Disposal
94
Taking out of Service
94
Disposal
94
Returning the Instrument
94
Appendix
95
Measurement Results
95
File Explanations and Folder Locations
95
Rules Entering a Formula
96
Spare Parts and Accessories
97
Accessories
97
Spare Parts
99
Advertisement
Buchi ProxiMate Operation Manual (94 pages)
Brand:
Buchi
| Category:
Laboratory Equipment
| Size: 4 MB
Table of Contents
Table of Contents
3
About this Document
7
Warning Notices in this Document
7
Symbols
7
Warning Symbols
7
Mark-Ups and Symbols
8
Trademarks
8
Safety
9
Proper Use
9
Use Other than Intended
9
Staff Qualification
9
Residual Risks
10
Glass and Acrylic Breakage
10
Faults During Operation
10
Instrument Damage Due to an Incorrectly Installed IP Module
10
Malware Infection Due to Connections with Other Devices or Network
10
Data Loss
10
Damage to the Internal Memory Due to Incorrect Shutting down of the Instrument
10
Personal Protective Equipment
10
Modifications
11
Product Description
12
Description of Function
12
Sample Presentation Options
12
Up View Option
12
Down View Option
12
Measurement Modes
13
Diffuse Reflection Mode
13
Transflectance Mode
13
Configuration
14
Front View
14
Rear View
15
Connections (IP Module Removed)
16
Location of the Type Plate
16
Scope of Delivery
17
Type Plate
17
Technical Data
17
Proximate
18
Ambient Conditions
18
Materials
18
Transport and Storage
20
Transport
20
Storage
20
Lifting the Instrument
20
Installation
21
Before Installation
21
Installation Site
21
Securing against Earthquakes
21
Establishing Electrical Connections
22
Installing a USB Device
22
Software Settings
23
Apply for a Licence
23
Import Licence
24
Calibrating a Baseline Correction Vector (BCV)
24
Import External Reference Data
25
Changing the Language of the Instrument
26
Operation
27
Layout of the Control Panel
27
Function Bar
27
Menu Bar
28
Start Menu
29
History Menu
29
Application Menu
29
Tools Menu
29
Status Bar
38
Log in Administrator Mode
39
Editing an Application
40
Creating a New Application
40
Changing the Name of an Application
41
Changing the Alias of an Application
41
Changing the Measurement View of an Application
42
Changing the Measurement Mode of an Application
43
Changing the Sample Presentation of an Application
43
Enter a Description for an Application
44
Changing the Rotation of an Application
44
Changing the Measurement Duration of an Application
45
Enter a Standard Operating Procedure (SOP) for an Application
45
Changing the Selection Ability of an Application
46
Deleting an Application
47
Editing a Property
47
Creating a New Property
47
Changing the Name of a Property
48
Changing the Alias of a Property
48
Changing the Sort Order of a Property
49
Changing the Prediction Type of a Property
49
Changing the Initial Wavelength Range (Calibration Model Only)
53
Changing the Postpredicted Value (Calibration Model Only)
54
Changing the Calibration Base (Calibration Model Only)
55
Changing the Display Basis (Calibration Model Only)
55
Changing the Formula (Calculated Property Only)
56
Changing the Observer (Color Only)
57
Changing the Illuminant (Color Only)
57
Changing the Metric (Color Only)
58
Changing the Metric Element (Color Only)
59
Changing the Decimal Places of a Property
59
Changing the Unit of a Property
60
Changing the Bias of a Property
60
Changing the Slope of a Property
61
Changing the Mahalanobis of a Property (Calibration Model Only)
61
Changing the Target of a Property
62
Changing the Limit Maximum of a Property
62
Changing the Limit Minimum of a Property
63
Changing the Tolerance Maximum of a Property
63
Changing the Tolerance Minimum of a Property
64
Deleting a Property
65
Adding Measurement Data to a Calibration
65
Performing a Calibration Update with Autocal
65
Setting a Reference Value to a Property
66
Activating a Measurement for Autocal
66
Exporting Application Data
67
Importing Application Data
67
Creating a Report
68
Exporting Measurement Data
68
Carrying out a Measurement
69
Preparing the Instrument
69
Starting Measurement
69
Ending Measurement
70
Shutting down the Instrument
70
Cleaning and Servicing
71
Regular Maintenance Work
71
Changing the Lamps
72
Changing the down View Lamp
72
Changing the up View Lamp
76
Confirm Lamp Replacement
80
Checking the Desiccant Cartridge
80
Changing the Desiccant Cartridge
82
Carrying out System Tests
83
Carrying out a Baseline Correction Vector Test
83
Carrying out a Comprehensive System Test
84
Carrying out an Advanced System Test
84
Carrying out a Data Backup
84
Cleaning the Display
85
Help with Faults
86
Troubleshooting
86
Error Messages
86
Taking out of Service and Disposal
88
Taking out of Service
88
Disposal
88
Returning the Instrument
88
Appendix
89
Measurement Results
89
Folder Locations
89
Rules Entering a Formula
90
Spare Parts and Accessories
91
Accessories
91
Spare Parts
92
Advertisement
Related Products
Buchi Process Analyser X-One
Buchi Multivapor P-6
Buchi Multivapor P-12
Buchi NIR-Online PA2
Buchi Process Analyser PA2
Buchi Pure DAS / Dry Air Supply
Buchi 051999
Buchi 535
Buchi B-811
Buchi B-820
Buchi Categories
Laboratory Equipment
Water Pump
Dryer
Chiller
Industrial Equipment
More Buchi Manuals
Login
Sign In
OR
Sign in with Facebook
Sign in with Google
Upload manual
Upload from disk
Upload from URL