Sign In
Upload
Manuals
Brands
BK Medical Manuals
Medical Equipment
bk3000
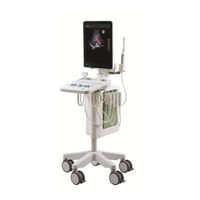
BK Medical bk3000 Manuals
Manuals and User Guides for BK Medical bk3000. We have
4
BK Medical bk3000 manuals available for free PDF download: Advanced User's Manual, Service Manual, User Manual, Getting Started
BK Medical bk3000 Advanced User's Manual (310 pages)
Ultrasound Systems
Brand:
BK Medical
| Category:
Medical Equipment
| Size: 11 MB
Table of Contents
Table of Contents
3
Chapter 1 Before You Begin
13
Chapter 2 The User Interface
15
Working with the Monitor
15
Selecting a Transducer
15
Selecting an Examination Type
16
Patient Information
17
Document Browser
17
Measurements and Image Data
17
Workflow Tabs
17
Keyboard Control Panel
20
Chapter 3 Controls on the Monitor
21
Chapter 4 Working with the Image
29
Selecting the Imaging Plane
29
Freezing the Image
29
Partial Freeze and the Update Key
30
Split Screen
30
Simultaneous Imaging
30
Linked Split/Dual
31
Labels and Bodymarks
31
Labels
31
Bodymarks
32
Cine
33
Using Cine
34
Using Cine in M-Mode or Doppler Mode
34
The Video Window and Picture in Picture (Pip)
35
Using the Video Window
35
Using Pip
36
Making Measurements
39
Video Display
35
Chapter 5 Making Measurements
39
Measurements and Calculations
39
Making a Measurement - General Procedure
39
B-Mode and Color Mode Measuring Tools
40
Doppler Mode Measuring Tools
47
Chapter 6 Documentation
51
Capturing 2D Images
52
Video Clips - Capturing While Imaging
52
Capturing 3D Data Sets
52
Saving Reports
52
Documentation
51
HIPAA Compliance
51
Saving Documents - Capturing Images and Video Clips
51
What Are Documents
51
Local Patient Archiving System
53
Reviewing Documents
53
The Document Browser
53
Viewing and Editing Video Clips
55
Viewing Exported Documents on the System
55
Viewing Exported Documents on an External Computer
56
Exporting Data
57
HIPAA Compliance and Exporting Data
57
Copying to a CD/DVD or USB Storage Device
57
Archiving to a CD/DVD or Network Drive
58
Using CD/Dvds
58
Using USB Storage Devices
61
Using a Network Drive
61
The Archive Window (Examination List and Patient Information)
61
Patient Information
62
Examination List
62
Deleting Documents or Exams from the System
64
Starting a New Examination from the Examination List
65
Pausing and Later Resuming an Examination
65
Password Protection of the Patient Archiving System
66
Hard Disk Quota
67
Reports
67
Creating a Report
68
Editing a Report
69
Printing a Report
69
Saving a Report to the Local Patient Archiving System
69
Printing Documents or Images on the Monitor
69
Printing Thumbnail Images
70
Printing Images Displayed on the Monitor
70
Using a Transducer Button
70
Imaging Modes
71
Adjusting the Thermal Index Limit
71
Chapter 7 Imaging Modes
71
B-Mode
72
Focus
72
Gain
73
Auto Gain
74
Zoom
75
Depth
76
Gray Scales
76
Combination Modes
77
Tissue Harmonic Imaging (True Echo Harmonics - TEH)
77
Contrast Imaging
78
X-Shine
81
Activate X-Shine Imaging
82
Adding Buttons to the Screen
83
Color Mode and Power Mode
84
Color Submodes
84
Color Coding of Flow
84
Independent D-Mode/C-Mode Steering
85
Color Box
85
Color Scales
85
Elastography
86
Color Box
87
Color Map
87
Quality Indicator
87
Strain Ratio Measurement
87
Diameter Comparison Measurement
88
Vector Flow Imaging (VFI)
89
Using VFI
91
Arrow Flow Indicators for VFI
91
Streamlined VFI Workflow
92
Assisted Doppler Gate Placement
93
Angle Correction
93
Assisted Doppler Steering
93
Inverting the Doppler Spectrum
93
Selecting the Appropriate Scale/Prf
93
Assisted Volume Flow Rate Estimation
94
Asymmetric Doppler Gate Cross
95
Outline of VFI Workflow
95
Doppler Mode - Spectral Doppler
96
Turning Doppler Mode on or off
96
Adjusting the Doppler Mode Image
97
Doppler Indicator
97
Independent D-Mode/C-Mode Steering
97
Doppler Trace (Automatic Curve Tracing)
97
Sweep Speed
98
M-Mode
98
The M-Mode Image
98
M-Mode Line
99
M-Mode Image Ruler
99
Saving a Preset
99
Chapter 8 Continuous Wave Doppler Mode
101
Adjusting MI
101
Adjusting the Thermal Index Limit
101
Overview
101
Turning CW Doppler Mode on or off
101
CW Doppler Line
102
Adjusting the Doppler Mode Image
103
Doppler Trace (Automatic Curve Tracing)
103
Auto
103
Gain
103
Scale
104
Smooth
104
Wall Filter
104
Invert
104
Baseline
105
Sweep Speed
105
Pro Packages
107
Audio Volume
103
Before You Begin
107
Chapter 9 Pro Packages
107
Presets
108
If You Perform a Puncture Procedure
107
What Is a Pro Package
107
Measurements
108
Doppler Measurements
109
Stenosis
110
VF (Volume Flow)
111
TAM (Time Average Mean) and TAMX (Time Average Max)
111
RI and PI (Resistance Index and Pulsatility Index)
112
Real-Time Measurements
113
Noise Limit
114
Carotid Velocities
114
Calculations
115
Using the Brachy Pro Package
115
Patient Setup
116
Calculating Volumes
116
Performing a Biopsy or Puncture Procedure (Including Brachytherapy)
118
Using the OB, Gyn, and Gyn Follicles Pro Packages
120
Gestational Age and Expected Date of Confinement
120
Patient Setup
120
Making Measurements
120
Calculation Methods
121
Obstetrics Reports
121
Chapter 10 Vascular Pro Package
125
Contents
125
Presets
125
Imaging Controls
126
B-Mode (2D)
126
Color Mode (CFM)
127
Doppler Mode
127
Volume Flow
128
Setting up the Patient - Patient ID
126
Annotations - Labels and Bodymarks
128
Labels
129
Bodymarks
129
Measurements and Calculations
130
Using the Calculation Package
130
Using Reports
132
Capturing and Documenting Images
133
Cine Review
133
Capturing Images
134
Copying and Archiving
134
Printing
135
Customization Examples
135
New Presets
135
Default Pro Packages and Presets
136
Making a New Screen Key
137
Vascular Measurement Abbreviations
138
Leg Vein Measurements
138
Artery Measurements
139
Where to Find more Information
141
Chapter 11 Cardiac Pro Package
143
Contents
143
Presets
143
Imaging Controls
144
B Mode (2D)
144
M-Mode
144
Color Mode (CFM)
145
Doppler Mode
145
Spectral Doppler Mode
145
Setting up the Patient - Patient ID
144
Annotations
146
Labels
146
Bodymarks
147
Measurements and Calculations
147
Basic Cardiac Measurements
147
LVV (Left Ventricular Volume)
148
Doppler Measurements
150
HR (Heart Rate)
151
Cardiac Output
152
Capturing and Documenting Images
153
Cine Review
153
Capturing Images
153
Copying and Archiving
154
Printing Images
154
Using Reports
153
Customization Examples
155
Creating a Custom Keyboard Key for M-Mode
155
Customizing Labels and Bodymarks Using Advanced Mode
155
FATE (Focus Assessed Transthoracic Echocardiography)
156
Preset
156
FATE Measurements
156
Where to Find more Information
158
Chapter 12 Urology Prostate Pro Package
159
Contents
159
Diagnostic Presets
159
Imaging Controls
160
B Mode (2D)
160
Setting up the Patient - Patient ID
160
Annotations - Labels and Bodymarks
162
Labels
162
Customizing Labels and Bodymarks Using Advanced Mode
163
Bodymarks
164
Measurements and Calculations
165
Automatic Measurement of Prostate Volume
165
Capturing and Documenting Images
166
Cine Review
166
Capturing Images
166
Copying and Archiving
167
Printing Images
167
User Reports
166
Customization Examples
168
New Presets
168
Default Pro Packages and Presets
168
Where to Find more Information
169
Chapter 13 Surgery Pro Package
171
Contents
171
Diagnostic Presets
171
Imaging Controls
172
B-Mode (2D)
172
Color Mode (CFM)
173
Doppler Mode
174
Elastography
174
Setting up the Patient - Patient ID
172
Annotations - Labels and Bodymarks
174
Labels
175
Bodymarks
176
Measurements and Calculations
176
Distance
176
Freehand Measurements - Area and Circumference
176
Volume
177
Capturing and Documenting Images
177
Cine Review
177
The Document Browser
178
Capturing Images
178
Copying and Archiving
178
Printing Images
179
Using Reports
177
Customization Examples
180
New Presets
180
Default Pro Packages and Presets
180
Making a New Screen Key
180
Customizing Labels and Bodymarks Using Advanced Mode
181
Where to Find more Information
182
Chapter 14 Neuro Pro Package
183
Contents
183
Diagnostic Presets
183
Imaging Controls
184
B Mode (2D)
184
Color Mode (CFM)
185
Doppler Mode
186
Elastography
186
Setting up the Patient - Patient ID
184
Annotations - Labels and Bodymarks
186
Labels
187
Bodymarks
188
Measurements and Calculations
189
Distance
189
Freehand Measurements - Area and Circumference
189
Volume
189
Capturing and Documenting Images
190
Cine Review
190
The Document Browser
190
Capturing Images
191
Copying and Archiving
191
Printing Images
191
Using Reports
190
Customization Examples
192
New Presets
192
Default Pro Packages and Presets
192
Making a New Screen Key
193
Customizing Labels and Bodymarks Using Advanced Mode
193
Imaging with Brainlab
194
Contact with the Company
194
Installation and Setup
194
Spinal Cord Pro Package
195
Where to Find more Information
195
3D Imaging
197
3D License
197
Chapter 15 3D Imaging
197
Introduction to 3D Ultrasound
197
Controlling Transducer Movement
198
System-Controlled Positioning
198
The 20R3 Transducer
198
The Magnetic Wheel Mover
198
Untracked Freehand Acquisition
198
3D Imaging Overview
199
Preparations
200
Adjusting the Image Capture Settings
201
ROI (3D Region of Interest)
201
3D Capture Settings
201
Acquisition
202
Viewing a 3D Data Set
202
Enhancing a 3D View
203
3D Layout Options
203
Working with the 3D Image
204
Manipulating the Volume
204
Annotating a 3D View
205
The 6 Data Presentation Views
206
Cube View
207
Render View
209
MIP View
211
Transparency View
211
4-Up View
211
6-Up View
212
User Views
206
Save, Capture and Close
212
Dicom
213
Chapter 16 DICOM
213
Archiving to a PACS
214
Reports
214
Deleting a Document
215
Discontinuing an Examination with an MPPS Server
215
DICOM on the System
213
New Patient Information from a DICOM Worklist
213
Saving or Printing to a DICOM Network
213
Filenames of Documents Exported in DICOM Format
213
Appendix A Glossary
217
Appendix B Measurement Abbreviations
223
Appendix C Setting up and Customizing Your System
243
Pro Package and Presets
244
Doppler and M-Mode Monitor Layout
245
User-Defined Keys
245
Imaging
246
Assigning User-Defined Keys
247
Customizing Key Brightness, Mouse Controls and Depth Control
247
Pro Packages
247
System Setup
248
General Setup
248
Clip Storage and Cine Setup
250
3D Setup
253
Printer Setup
253
Password Setup
255
Network Archiving
256
Version Information
256
Video I/O Setup
258
Battery Support Setup
259
Miscellaneous System Setup
260
Measurements
262
User-Defined Measurements
263
Curves
267
Miscellaneous Measurement Setup
270
Marks (Bodymarks, Labels, Puncture Guides)
272
Bodymark Setup
272
Label Setup
272
Transperineal Matrix, Brachy Matrix and Ruler, and Programmable Puncture
273
Guide Setup
273
Miscellaneous Marks Setup
279
Importing and Exporting System Configurations
280
License
280
Importing or Exporting Presets
282
Licenses
280
DICOM Setup
285
DICOM Setup (if Licensed)
285
Appendix D Redefining Screen Keys - Label, Bodymark, and Measurement
287
Other Settings
288
Appendix E Configuring the Bk3000 and Bk5000
291
Before You Begin
291
Configuration Mode
291
Key Definitions (Redefining an Existing Key)
291
Unavailable Spaces
293
The Imaging Tabs
293
Special 3D Mode Tab
294
Documentation Tab
294
Measure and Mark Tabs
294
Display Areas and Info Boxes
295
Prioritizing the Display of Measurements and Settings
297
Patient Dialog
295
Creating a New Pro Package in Configuration Mode
297
Index
299
Advertisement
BK Medical bk3000 Service Manual (180 pages)
Ultrasound System
Brand:
BK Medical
| Category:
Medical Equipment
| Size: 44 MB
Table of Contents
Section 1 General Information
4
Table of Contents
4
Safety Aspects
5
Terms and Symbols
5
Warnings and Cautions
6
System Overview
7
System Configuration
7
Scanner Serial Number
7
Engine Configurations
8
Exploded Views and Part Lists
10
Engine - Models: 10-73380-01 & 10-77659-01
10
Engine - Models: 103-119041-01 & 103-119041-05
13
Engine Overview
16
Bk3000/Bk5000 (no Battery Module)
17
Battery Module
21
System Connectors
23
Rear System Connectors
23
Gooseneck System Connector
24
Ground Protection
24
Special Tools and Equipment
25
Checking Procedure (Section 3)
25
Troubleshooting (Section 4)
25
Mechanical Parts (Section 6)
25
Electrical Safety Test (Section 7)
25
Section 4 Troubleshooting
31
Introduction
33
Tips for Troubleshooting Specific Problems
33
Transducer or Scanner Problem
33
Radial or Vertical Lines
33
Noise Pattern in the B-Image
33
License-Based Function Does Not Work
34
Finding the Scanner ID
34
Details and Actions
35
Accessing Setup Options
35
Setup Option Details
36
Service Mode
37
Entering Service Mode
37
Using Alt + X in Service Mode
38
Entering Service Mode
38
Setting the Scanner to Console Mode (Exiting Service Mode)
38
Accessing the Console Application for Service Use
39
Essential Operations
39
Opening Windows Explorer
40
Shutting down the Scanner
40
Searching Facility in Windows
40
Restarting the Scanner
40
Replacement Parts with Follow-Up Tasks
41
Tasks to Complete after Part Replacement
42
Changing the COM Express Carrier Board
42
Reprogramming the Serial Number
42
Changing Front End Beam Former (FEBF) or Scan Converter Processor (SCP)
45
Changing Monitor/Display Controller Module
45
If the ICM File Is NOT Being Transferred
46
Exchange the HDD
46
Exchange the SSD
46
Exchange the Pip Hardware
47
HIPAA (Health Insurance Portability and Accountability Act)
49
Enabling Access Control
49
Access Control User Profiles
50
Creating Users
50
Passwords
51
Dicom
51
Setting up the DICOM Host
51
Worklist Setup
53
MPPS (Modality Performed Procedure Steps) Setup
54
PACS Setup
55
Printers Setup
57
DICOM Troubleshooting
58
Testing Errors
58
Status
59
Ping
61
Database Crash Recoveries
62
Recovering a Crashed Main Database
62
Recovering the Patient Database after a System Crash
62
Log Files
63
Accessing Log Files Via Setup Options
63
Access Log Files During Red Screen Error
64
How to Read the Log Files
65
Configuring a Scanner to Archive to a Network Drive
67
Confirming Microsoft Windows-Based PC Status
67
Configuring a MS Windows-Based PC
69
Configuring the Network for an MS Windows-Based PC
70
Configuring the Network on the Scanner
71
Connecting to a Hidden Wifi Network
72
Disk Structure / Software
74
C:\ Drive (SSD SATA Hard Disk)
75
2300 Console Directory
76
Bodymarks
76
Codec
76
Dicom
76
Database
77
Archiving to CD/DVD from Stagingarea
77
Q:\ Drive (SATA HDD)
78
S:\ Drive (SATA HDD)
78
Hard Disk Maintenance
79
Error Checking a Hard Disk
79
Optimizing Hard Disk Performance
80
SSD SATA Hard Disk (C:\)
80
SATA HDD (S:\ and Q:\)
80
Remote Support
81
Accessing Remote Support
81
Accessing the BIOS
83
License Keys
84
Reinstalling Licenses
85
Access the Licenses for a Specific Scanner
85
Manually Reinstalling Licenses
85
Reinstalling Licenses from a File
85
Try & Buy License Codes
87
Video Output
88
Accessing Video out Setup Options
89
Enabling Video out
91
Office Printer
92
Section 6 Mechanical Parts
97
Contents
98
Disassembly/Reassembly Procedures
98
Endo Transducer Holder
98
Monitor
99
To Remove the Monitor
99
To Mount the Monitor
100
Disassembling/Reassembling Keyboard and Associated Parts
101
Keyboard
101
DVD Drive
103
Keyboard Controller
104
Accessing the Engine
106
Uninstalling the Power Cord and Bracket
106
Left Side Enclosure
110
Right Side Enclosure
110
The Engine Cassette
110
Accessing Boards Inside the Engine Pre Marts 2019 Sales (SN < 5014093)
113
Remove the Cover for the Computer Part (Left Side)
113
Video Grabber
113
GPU Card
114
SCP Card
114
Riser Card
116
Hard Disks
119
FEBF Assembly (Front End Beam Former)
121
FEPS (Front End Power Supply)
124
ATX Power Supply
126
Accessing the Boards Inside the Engine Produced after March 2019 (SN > 5014093)
128
Remove the Cover of the Computer Assembly
129
Option Boards (Video Grabber and ECG)
130
GPU Card
130
SCP Card
131
Riser Card
132
Fan on the Front Next to ATX Power Supply
133
FEPS2 (Front End Power Supply Ver. 2)
134
Interconnection Board
136
COM Express Carrier Assembly
136
Disk Drives
137
ATX Power Supply
138
FEBF Assembly (Front End Beam Former)
140
Connector Lock Handles
141
Bk5000 Battery Module
143
Disassemble the Battery Module
147
Disassembling/Reassembling the Goose Neck
154
Introduction
164
General Description
164
Block Diagram
165
Board Descriptions
166
Engine Module
166
Display Module
168
FEBF Board
169
SCP Card
172
Keyboard Module
174
Internal Power Distribution
175
BK Medical bk3000 User Manual (66 pages)
Ultrasound Systems
Brand:
BK Medical
| Category:
Medical Equipment
| Size: 2 MB
Table of Contents
Table of Contents
3
Chapter 1 General Information
5
Essential Performance
5
Intended Use
6
Environment
6
Modes of Operation
6
Indications for Use
7
Contraindications
7
Chapter 2 Safety Information
9
Safety Information
9
Safety Symbols and Information on the Equipment
9
General Safety Precautions
11
Mechanical Safety
12
Explosion Hazards
13
Electrical Safety
13
ESD Training
14
Interference
14
Electrical Noise
14
Electromagnetic Interference
14
RF (Radio Frequency) Interference
15
Installation
15
Connecting Other Equipment
16
Network Connection
16
Network Security
17
Network Printing
17
Connectors
18
EMC Requirements
21
Isolation of DICOM Network
22
Wireless Networks
22
Medical Equipment
24
Non-Medical Equipment
25
Remote Control
25
Battery Support System
26
Computer Security
26
Printer
26
Service and Repair
26
Transducers
26
During an Examination
27
Checking the Date
27
Verifying the Transducer Type
28
Measurements
28
Contrast Imaging
28
VFI - Vector Flow Imaging
29
Puncture and Brachytherapy
30
Bkfusion
31
Picture in Picture
33
Acoustic Output
33
General
33
Monitor Display
34
Thermal and Mechanical Indices
34
Acoustic Output Measurement
35
Functions Affecting Acoustic Output
35
Default Acoustic Output
36
Clinical Measurements: Ranges and Accuracies
36
Geometric Measurements
38
Time Measurements
38
Doppler Measurements
39
Battery Support
41
Before You Start
41
Imaging with Battery Support
41
Battery Location
41
Chapter 3 Battery Support
41
Power Supply
42
Plugging in the System
42
Charging the Battery
42
Battery Status
42
Information Available on the Monitor
42
Power Save Mode
43
Battery Life
44
Battery Support Setup
44
Cleaning and Disinfection
44
Remote Control
45
The Remote Control and Its Functions
45
Pairing the Remote Control with the System
45
Chapter 4 Remote Control
45
Calibrating the Remote Control
46
Sleep
46
Mouse Function
46
Replacing Batteries
47
Cleaning and Disinfection
47
Getting Started
49
Chapter 5 Getting Started
49
Index
51
Appendix A Warnings and Cautions Displayed on the System
55
Advertisement
BK Medical bk3000 Getting Started (13 pages)
Ultrasound System
Brand:
BK Medical
| Category:
Medical Equipment
| Size: 3 MB
Table of Contents
Getting Started
1
Before You Start
3
Performing an Exam
4
System Busy
5
Monitor Controls
9
Your Notes
11
Advertisement
Related Products
BK Medical bk3500
BK Medical bk5000
BK Medical bkSpecto
BK Medical 2300 Series
BK Medical 8822
BK Medical 8823
BK Medical bkSpecto 1300
BK Medical E14C4t
BK Medical EB2300
BK Medical Falcon Premium 2101EXL
BK Medical Categories
Transducer
Medical Equipment
Diagnostic Equipment
Printer
Scanner
More BK Medical Manuals
Login
Sign In
OR
Sign in with Facebook
Sign in with Google
Upload manual
Upload from disk
Upload from URL