Sign In
Upload
Manuals
Brands
Belden Manuals
Monitor
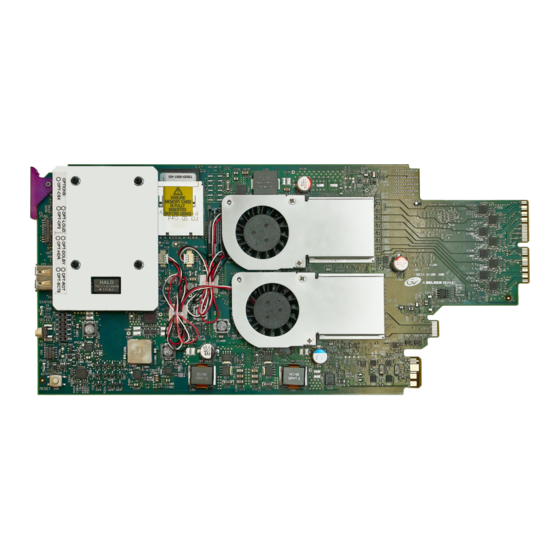
Grass Valley KMX-3921
Belden Grass Valley KMX-3921 Manuals
Manuals and User Guides for Belden Grass Valley KMX-3921. We have
1
Belden Grass Valley KMX-3921 manual available for free PDF download: Installation & Service Manual
Belden Grass Valley KMX-3921 Installation & Service Manual (156 pages)
SCALABLE KALEIDO MULTIVIEWER FOR DENSITÉ 3+
Brand:
Belden
| Category:
Monitor
| Size: 12 MB
Table of Contents
Table of Contents
7
1 Overview
11
Related Documentation
11
Software and Firmware Updates
11
Introduction
12
Features and Limitations
12
Feature Support
12
Supported Frames and Multiviewer Scaling
13
Current Limitations
14
KMX-3921 Models and Related Hardware
14
KMX-3921 Multiviewer Cards
15
KMX-3921 Rear Panels
16
Multiviewer Scaling
17
Compatible SFP Modules
20
Quad-Link 3G to HDMI 2.0 Converter
20
Multiviewer SDI / MADI Input Combinations
21
Optional Ancillary Equipment
21
How to Identify a Densité 3+ FR4 Frame's Controller Model
22
Kaleido Software Minimum Version Compatibility
25
Overview of the KMX-3921 System
26
Functional Block Diagram
26
2 Installation
27
Getting Organized / Unpacking
27
Required Tools
27
Required Material
27
Densité 3+ FR1 Frame Physical Interface
28
Densité 3+ FR4 Frame Physical Interface
29
Installation of the KMX-3921 in a Densité 3+ Frame
30
Installation Overview in a Densité 3+ FR1 Frame
30
Installation Overview in a Densité 3+ FR4 Frame
31
Where to Locate the KMX-3921 Card(S) in the Frame
36
Installation Requirements
37
Install the Multiviewer in a Frame
37
Install the SFP Module(S)
37
3 Multiviewer Cabling
39
Cabling Diagrams
39
Multiviewer Network Connections
42
Multiviewer SFP Module Mosaic Output to Display Input Cable Connections
42
Multiviewer SFP Module Mosaic Output to a 4K Display Input Cable Connections
45
Landscape Multiviewer Display Orientation
46
Portrait Multiviewer Display Orientation
46
About HDMI-Type Signal Connections
47
Commissioning the Multiviewer
47
Avoiding Networked Equipment IP Address Conflicts
47
To Make the Multiviewer Operational
48
4 Frame Operation and IP Network Setup
51
Card Interface and Troubleshooting
52
Using the Frame Control Panel
53
CPU-ETH2 Local Control Panel
53
CPU-ETH3 Local Control Panel
53
Navigating the Local Control Panel Menu
54
Local Control Panel Menu Structure
55
Changing the Mosaic Output Resolution
55
Enabling the Frame Controller's Automatic Restore Feature
57
Networking Essentials
57
Assigning an IP Address to each Device in Your System
57
Setting the Multiviewer's IP Addresses
58
Network Switch Considerations
58
Changing the Multiviewer's IP Address
58
Network Considerations
60
TCP/UDP Port Usage
60
Network Considerations for a Multiviewer Cluster
64
5 System Configuration
65
System Requirements for a Client PC
65
Frame Configuration Prerequisites
65
Multiviewer Model Representation in Xedit and Xadmin
65
Xedit Installation
67
Installing the Kaleido Software Client Applications
67
Installing Xedit from Your Multiviewer's Home Page
67
Uninstalling Xedit
71
Installing Router Control
72
Uninstalling Router Control
75
Installing Signal Path Viewer
75
Uninstalling Signal Path Viewer
77
Opening Xadmin
78
Connecting to a Multiviewer with a Different Xedit Version from Your Pc's Version
78
Ways to Access Xadmin
79
Opening Xadmin from a Browser
80
Opening Xadmin from Xedit
80
Opening Xadmin from Icontrol or Icontrol solo
82
Registering Your Multiviewer's Security Credentials with Your Browser
83
Enabling the Compatibility View in Internet Explorer
91
Xadmin Access Control
91
Enabling Xadmin Access Control
91
Changing the Xadmin Password
93
Disabling Xadmin Access Control
94
Closing a Password-Protected Xadmin Session
95
Opening Signal Path Viewer
96
Configuring a Multiviewer's IP Settings with Xadmin
96
Remote Control Using Icontrol
98
KMX-3921 Service Control Panels in Icontrol
98
Output Configuration Settings Panel
100
Input Status Panel
101
Network Settings Panel
102
Options Panel
102
Factory Panel
103
Alarm Configuration Panel
106
Information Panel
110
Genlocking the Multiviewer
112
Genlocking a Densité 3+ FR1 Frame
112
Genlocking a Densité 3+ FR4 Frame
112
Using a REF-1801 Card's LTC Time Code Input
113
Configuring the RCP-200
114
Configuring the RCP-200'S IP Settings
114
Specifying Multiviewers for the RCP-200
114
Specifying Lookup Servers for the RCP-200
114
Logging on to the RCP-200
115
Correlating Monitor Wall Destinations and KX Router Logical Routers for the RCP-200
116
Configuring the Kaleido-RCP2
117
Assigning a Static IP Address to the Kaleido-RCP2
118
Selecting a Room for the Kaleido-RCP2
118
Connecting the Kaleido-RCP2 to Other Kaleido Multiviewer Systems
118
Logging on to the Kaleido-RCP2
119
Available Hardware and Software Options
120
Enabling Options
121
6 Maintenance & Troubleshooting
123
System Verification
123
Verifying the KMX-3921 Multiviewer Status
123
Verifying the Kaleido-RCP2
125
Loading a Layout
125
Customizing Layouts, Logical Sources, and Other Kaleido-IP Elements
126
Finding the Multiviewer's IP Address and Application Version
126
Maintenance
127
Required Tools
127
Field Replaceable Units
127
Opening and Closing the Front Door
127
About Swapping KMX-3921 Cards into a Multiviewer
128
Replacing Cards
129
Cooling Fan Replacement
129
Replacing KMX-3921 Card Fans
132
Generating a System Snapshot
135
Upgrading the Multiviewer
136
Pre-Upgrade Checklist
137
Upgrade Oveview
137
Installing a Kaleido Software Upgrade
137
Troubleshooting
139
Troubleshooting with the Card's Front Edge USB Connector
139
Dashboard Messages
139
Troubleshooting Common Issues
140
7 Specifications
143
KMX-3921 Multiviewer Cards
143
Video Inputs
143
Discrete Audio Inputs
145
Miscellaneous Inputs/Output
145
Mosaic Outputs
146
Electrical
147
Physical
148
Multiviewer Integration with Other Systems and Equipment
149
Optional Drivers for Controlling Routing Devices from the Multiviewer
149
Drivers for Controlling Tally Interface Devices from the Multiviewer
150
Drivers for Timers
151
Built-In Communications Protocols
151
Appendix A Installing the SFP Output Module
153
Introduction
153
Installing an SFP Module
153
Connecting the Fiber Optic Cables
154
Removing the Fiber Optic Cables
154
Removing the SFP Module
155
Contact Us
156
Advertisement
Advertisement
Related Products
Belden KMX-3901-IN-8-D
Belden KMX-3901-IN-16-D-3QRP
Belden KMX-3901-IN-16-D-3+DRP
Belden KMX-3901-IN-16-Q
Belden KMX-3901-IN-16-Q-3+DRP
Belden KMX-3901-IN-IP-D-3+TRP
Belden KMX-3901-IN-M3-Q-3PRP
Belden KMX-3901-IN-M3-D-3+DRP
Belden KMX-3901-IN-M3-Q-3+DRP
Belden KMX-3901-OUT-S
Belden Categories
Switch
Monitor
Control Unit
Control Panel
Media Converter
More Belden Manuals
Login
Sign In
OR
Sign in with Facebook
Sign in with Google
Upload manual
Upload from disk
Upload from URL