Sign In
Upload
Manuals
Brands
Avid Technology Manuals
Music Mixer
S6L-16C
Avid Technology S6L-16C Manuals
Manuals and User Guides for Avid Technology S6L-16C. We have
4
Avid Technology S6L-16C manuals available for free PDF download: System Manual, Replacing, Installing
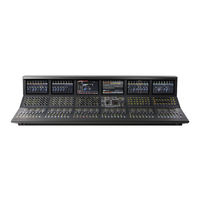
Avid Technology S6L-16C System Manual (574 pages)
Brand:
Avid Technology
| Category:
Music Mixer
| Size: 10 MB
Table of Contents
Table of Contents
3
Stage
16
Part I: Overview
29
Introduction to the VENUE | S6L System
30
Installation and Setup
30
S6L System Features
30
S6L System Processing
30
S6L System Recording and Playback Features
31
S6L Control Surface Features
31
S6L-48D
32
Stage
32
Using MADI Outs on Stage 64, Stage 48, and Stage
32
S6L-32D
33
S6L-24D
34
S6L-24C
35
S6L-16C
36
E6LX/E6L Engine Features
37
E6LX Engine Features
37
E6L Engine Features
38
Stage 64 I/O Rack Features
39
Stage 48 I/O Rack Features
40
Stage 32 I/O Rack Features
41
Stage 16 Remote IO Features
42
Local 16 I/O Features
43
What's Included
45
Expansion Options
45
Stage 64 Expansion
45
Stage 48
45
Local 16
45
E6L Expansion
45
Operational Requirements
46
Temperature and Ventilation
46
Water and Moisture
46
Cleaning and Maintenance
46
Cabling Requirements
46
Power Connections
46
Audio Network Connections
47
Pro Tools Connections
47
Ecx Ethernet Control Connections
47
System Requirements and Compatibility
47
Resources
47
Account Activation and Product Registration
47
Support and Downloads
48
Training and Education
48
Products and Developers
48
Activation
48
Conventions Used in this Guide
48
When Using a Mouse with S6L
49
S6L Control Surface Overview
50
S6L Control Surface Top Panel Overview
50
Fader Banks
51
Channel Menu
52
Channel Safe
53
Channel Display
54
Mute
54
Solo
54
Select
54
Attention
55
And y Switches
55
Channel and Gain Reduction Meters
55
Fader
57
Channel Color Switch
57
Channel Knob Modules (CKM)
57
Channel Strip Mode
59
Channel Control Mode
60
Encoder Color Coding
62
Display of Bus-To-Bus Routing
63
Channel Touch Module (CTM)
64
Meters View
64
Channel View (CTM)
67
Master Live Module (MLM)
69
Global Modifiers
70
Snapshot Controls
72
System Functions
73
Assignable Encoder
74
Monitoring Section
75
Flex Channels
76
Fader Banking Controls
77
Left Soft Keys
78
Right Soft Keys
78
CKM Control Switches
79
Transport/Function Switches
80
Master Touch Screen (MTS)
81
Universe View
81
Meters View (MTS)
84
Channel View (MTS)
86
S6L Control Surface Connections
87
Audio Connections
87
Network Connections
88
Control and Ancillary
89
S6L Control Surface Power Connections
90
S6L Front Panel Features
90
S6L Interior Secure USB Port
91
S6L-24C/16C Console Lamp Ports
91
E6LX Engine Overview
92
E6LX Engine Features
92
E6LX Cards and Features
94
HDX-192 DSP Expansion Cards
94
AVB-192 Network Cards
94
MADI-192 MADI Option Cards
94
WSG-HD Waves Soundgrid Option Card
94
MLN-192 Milan Option Card
94
Option Card Slot Guidelines
95
E6LX Front Panel
96
Status and System Leds
96
Shutdown (Reset)
96
Usb
96
E6LX Back Panel
97
E6LX Engine Audio, Control, and Synchronization Connections
97
E6LX Engine Power Connections
98
E6L Engine Overview
100
E6L Cards and Features
100
HDX-192 DSP Expansion Cards
100
AVB-192 Network Cards
100
MADI-192 MADI Option Cards
100
WSG-HD Waves Soundgrid Option Card
100
MLN-192 Milan Option Card
100
E6L Front Panel
101
E6L Back Panel
102
E6L Engine Audio, Control, and Synchronization Connections
102
E6L Engine Power Connections
103
Stage and Local I/O Rack Overview
105
Stage 64
105
Stage 16
106
Local 16
106
Stage 64 and Stage 32 I/O Card Features and Capabilities
107
SRI-192 Analog Input Card
107
DSI-192 Digital Input Card
107
SRO-192 Analog Output Card
107
DSO-192 Digital Output Card
107
DNT-192 Network Card
107
Stage 64 Front Panel
107
I/O Card Slots
108
Stage 64 Controller
109
Making Stage I/O Unit Connections
111
Connecting and Assigning Stage I/O Units
111
Patching Stage I/O
111
Stage 64 Controller Display
111
Stage 64 Controller Display HOME Page
111
Controller Main MENU
112
Controller MONITOR Menu
112
Controller SETTINGS Menu
113
Controller MUTE Menu
114
Controller STATUS Menu
114
Configuring Stage 64 and Stage 32 MADI Outs
116
Part II: Using S6L
118
Configuring System Audio
119
Powering the System up and down
119
Powering down the System
120
Confirming System Components
121
Pairing the E6L and S6L
122
Please Select Engine
122
Enabling Config Mode
124
Assigning Stage I/O Units
125
Identifying Stage I/O Units
127
Assigning Local 16
128
Using Multiple S6L Systems in Shared IO Configurations
129
Assigning Ownership of Output Slots
131
IO Sharing Example
132
Setting the System Clock
134
How to Proceed
134
Configuring Mains and MIX Buses
135
Configuring the Mains Bus
135
Configuring MIX Buses
136
Managing Connections
137
Naming System Components
137
Managing Stage I/O Unit Connections
137
Managing S6L-E6L Connections in Shared I/O Configurations
140
Managing E6L-Stage I/O Connections in Shared I/O Configurations
140
Show File Compatibility
141
External Display Position (Left, Right, or Above)
141
System ID and Serial Number in VENUE Software
142
How to Proceed
143
Banking Channels on the S6L Control Surface
144
Channel Banking Overview
145
Banking a Combination of Inputs and Outputs
145
Navigating the Left Soft Keys Display in Split Banking Mode
146
Banking Inputs in Split Banking Mode
146
Banking Outputs in Split Banking Mode
147
Banking Only User Layouts, Vcas, Inputs, or Outputs
149
Banking Horizontally (Nudging Channels)
150
Spill Mode for Outputs
150
User Layouts
151
Assigning Channels to a User Layout
151
Banking the User Layout
155
Working with User Layout Presets
155
Examples of Creating and Editing Layouts
156
Layouts View
157
Layouts, Snapshots and Show Files
158
Using Mains in a User Layout
159
Bank Safing Channels
159
Bank Safing Using the Channel Safe Switches/Button
159
Bank Safing Using the Channel Knob Module (CKM)
161
Bank Safing Using the Channel Menu
161
Special Cases Affecting Bank Safe
162
Dual-Operator Mode
162
Using Dual-Operator Mode
163
Banking and Spilling Within Fader Zones
165
Left Zone Navigation
165
Right Zone Navigation
166
Show Files, Events, and Dual Operator Mode
166
Event Actions for Zone Navigation
167
Using the Dual Operator Soft Keys for Right Zone Navigation
168
Selecting and Attentioning Channels
170
Selecting Channels
170
Selecting a Channel Using the Select Switch
170
Selecting a Channel from Meters View
171
Select Follows solo
172
Attentioning Channels
172
Attention on Fader
174
Selecting/Attentioning Multiple Channels (Multi-Select)
174
Mutli-Selecting Using Select
175
Mutli-Selecting Using Attention
175
Adjusting Channel Parameters
177
Configuring and Patching Channels
177
Assigning Channels to Outputs
177
Assigning Channels Using Multi-Assign
177
Assigning Channels to the Mains
178
Assigning Channels to Groups
179
Automix
180
Using Automix
180
Automix Attack and Release
182
Snapshots and Automix
182
Events and Automix
182
Assign Vcas and Mute Groups from Channel Control Encoders
183
Adjusting Input Parameters on the Control Surface
183
Adjusting Input Gain
184
20 Db Pad
187
Phantom Power)
188
Delay
188
Pan/Balance/Width
188
High- and Low-Pass Filters (HPF and LPF)
189
HEAT on Input Channels
190
Polarity Invert
192
Direct Outs
192
Pro Tools Input Source Toggle (Virtual Soundcheck Input)
193
Safe
193
Adjusting EQ on the Control Surface
194
Adjusting Channel EQ on the Control Surface
194
Parallel MIX Control on Built-In Channel EQ
196
Eq Pre Dyn
197
Adjusting Graphic EQ on the Control Surface
198
Adjusting Dynamics on the Control Surface
200
Sidechain
201
Parallel MIX Control on Channel Dynamics
203
Adjusting Plug-Ins on the Control Surface
204
Adjusting Inserted Plug-Ins
204
Adjusting Bus-Fed Plug-Ins (Effect Returns)
205
Using the CHANNEL Function
206
Accessing CHANNEL Parameters
206
Assigning Custom CHANNEL Parameters
207
Clearing CHANNEL Assignments
207
CKM Horizontal Mode and Overview Workflows
208
Horizontal Mode
208
Vertical Mode (no Channel Selected)
209
Flipping Parameters to Faders (Flip to Faders Mode)
210
Encoder Assign Mode
210
Make Stereo and Make Mono from the Control Surface
212
10 Working with Mains and Vcas
213
Working with Mains
213
Adjusting Mains Using the Flex Channels
213
Adjusting Mains from the Channel Strips
213
Using Mains in a User Layout
215
Linking/Unlinking Mains
215
Working with Vcas
216
Banking Vcas
216
VCA Members on MTS/CTM Meters View
217
Meters for Vcas and Monitor Buses
218
Channel Strips Show VCA Contribution
218
11 Working with aux Sends
220
Adjusting aux Sends in Channel Control Mode
220
Selecting aux Pre-Fader Pickoff Points
222
Adjusting Stereo Sends in Channel Control Mode
223
Adjusting aux Sends in Channel Strip Mode
224
Adjusting aux Sends on Faders (Sends on Faders Mode)
224
Using Direct Sends on Faders Mode
225
Using Sends on Faders Follows AFL Mode
226
Adjusting Stereo Sends in Sends on Faders Modes
228
Vcas Trim aux Sends in Sends on Faders Mode
228
Adjusting aux Sends on the External Screen
229
Expanded aux Sends View on the External Screen
230
Set All Members Pre/Post for Auxes
231
Send Levels Shown in Members List
232
Copy Color to Members
232
Bus-To-Bus Routing
233
Assigning a Bus to a Bus Using the External Screen
233
Assigning a Bus to a Bus Using the Control Surface
234
Auto-Mute Feedback Loops
235
Classifying Auxes for Snapshots
235
12 Matrix Mixers
236
Matrix Mixers Overview
236
Assigning Input Sources to Matrix Mixers
237
Adjusting Matrix Mixer Input Controls
238
Adjusting Matrix Mixer Input Level
238
Linking and Unlinking Adjacent Matrix Inputs
240
Matrix Mixer Input Polarity Switch
240
Resetting Matrix Mixer Input Paramters
240
Clearing Matrix Mixer Input Assignments
241
Copying Matrix Mixer Input Settings
241
Delay Compensation with Matrix Mixers
241
Adjusting Matrix Mixer Output Controls
241
Accessing Matrix Mixer Output Processing on the External Screen
242
Snapshot Data and Parameters for Matrix Mixers
242
13 Muting and Mute Groups
243
Muting Individual Channels
243
Mute Groups
245
Assigning Channels to Mute Groups
245
Toggling Mute Groups On/Off
249
Explicit and Implicit Channel Mute with Mute Groups and Vcas
251
Snapshot Data and Parameters for Mute
251
14 Soloing and the Monitor Buses
253
Configuring the Monitor Buses and solo Options
253
Selecting a solo Mode
253
Sends on Faders Follow AFL
254
AFL Follows Sends on Faders
254
Select Follows solo
254
Auto Cancel and Input Priority
254
Sending the Mains MIX to Monitors
255
Listen to Monitors
255
Any MIX to Monitors
255
Adjusting Monitor Buses
256
Routing Channels to the Monitor Buses
257
Adjusting Monitor Bus Level
257
Delaying a Monitor Bus
258
Routing the Monitor Bus to Outputs and Plug-Ins
258
Meters for Vcas and Monitor Buses
259
Soloing Channels
259
Momentary and Latching Switch Operation
259
Soloing Single Channels
259
Soloing Multiple Channels
260
Toggling the solo Status of Multiple Channels
261
Soloing Vcas
261
Clearing Solos
261
Solo Bus Metering
261
Trimming solo Bus Level
261
Solo Safing Channels
262
Using the Headphone Outputs
263
Configuring the Headphones Outputs
263
Adjusting Headphone Level
263
Part III: External VENUE Software Screen
264
15 External VENUE Software Screen Overview
265
Viewing Pages and Tabs
265
Using the External Screen
265
Using Switches on the MLM
266
Using the Computer Keyboard
267
Overview of Software Pages
268
Overview
268
Inputs and Outputs Pages
268
Filing
269
Snapshots
269
Patchbay
270
Plug-Ins
270
Control
271
Options
271
Banner Display
272
Type Text Search
273
Channel Numbers and Names
273
Overview, Inputs, and Outputs
274
Navigating the Overview, Inputs, Outputs Pages
274
Universe View
274
Attentioning Channels from the External Screen
275
Adjusting Parameters on the External Screen
277
Adjusting Faders on the External Screen
277
Adjusting Encoders on the External Screen
277
Adjusting Values on the External Screen
277
Toggling Buttons on the External Screen
278
Resetting Channels and Parameters from the External Screen
278
Assigning Input Source from the External Screen
278
Working with EQ and Dynamics on the External Screen
279
Adjusting Channel EQ on the External Screen
279
Adjusting Graphic EQ on the External Screen
281
Adjusting Dynamics on the External Screen
282
Sidechain
282
Dynamics MIX and EQ PRE DYN
284
Input Direct
285
Copying and Pasting Settings
285
Copying and Pasting Channel Settings
285
Copying and Pasting EQ Settings
286
Copying and Pasting Dynamics Settings
287
Configuring Channels on the External Screen
288
Naming Channels
288
Make Selected Mono Strips Stereo/Make Selected Stereo Strip Mono
288
Move Selected Strip
290
Inserting Blank Strips
290
Reordering Channels Using Drag and Drop
292
Inserting Plug-Ins on Channels
293
Input Channel, EQ, and Dynamics Presets
293
Input Channel Presets
293
Presets for Built-In Channel Eqs, Graphic Eqs, and Dynamics
295
Assigning Channels to Buses and Vcas on the External Screen
296
Managing Output Channel Assignments (Members)
298
Viewing Output Assignments
298
Expanded Groups View
299
Additional MIX Bus Configuration Choices
300
Removing and Resetting Assignments
300
Copying Assignments between Outputs
300
Color-Coding Channels from the External Screen
301
17 Filing
302
Creating Shows
302
Show Folders
302
Show Files
303
Loading a Show
304
System Configurations and Loading Shows
305
Working with Presets
305
Preset Folders
306
Preset Files
307
Transferring Settings, Shows and Presets
308
Synchronizing Settings, Shows and Presets
310
Import Snapshots and Events
311
Undoing Changes Using the History Feature
312
Show Folders in the History Tab
312
Show Files in the History Tab
312
Loading an Auto-Saved Show
313
Snapshots
314
18 Snapshots
315
Main, User aux Scope, and Recall Safe Tabs
315
Snapshots List
316
Snapshot Command Buttons
319
Snapshot Scope Controls
320
Channel Scope Controls
321
Snapshot Status Display
323
Creating Snapshots
323
Creating New Snapshots
323
Naming Snapshots
323
Adding Notes to Snapshots
324
Hierarchical Snapshots (Parent and Child Snapshots)
324
Designating Snapshots as Parent or Child
324
Store to Parent Snapshot
326
Collapsing and Expanding Parent/Child Views
326
Managing and Editing Hierarchical Snapshots
327
Momentary Snapshots
328
Creating Momentary Snapshots
328
Recalling Momentary Snapshots
329
Editing Momentary Snapshots
329
Snapshot Groups
329
Assigning Snapshots to Groups
330
Editing Grouped Snapshots
330
Select All Snapshots in a Group
330
Recalling Snapshots
331
Targeting Snapshots
331
Scoping Channels and Parameters
332
Recalling Snapshots
333
Managing Snapshots
335
Storing Snapshots
335
Locking Snapshots
335
Clearing Snapshots
337
Duplicating Snapshots
337
Deleting Snapshots
337
Moving Snapshots
338
Importing Snapshots
338
Making Changes to Snapshots
338
Using Edit Mode
339
Using Update Mode
340
Undoing Snapshot Commands
340
Disabling Snapshots
340
Preview Mode
341
Using Preview Mode
341
Undo and Preview Mode
342
Available and Unavailable Functions in Preview Mode
343
Adding MIDI, Plug-In, and USB Data to Snapshots
345
Adding MIDI Data to Snapshots
345
Adding Plug-In Data to Snapshots
347
Adding USB Playback and Recording Commands to Snapshots
349
Adding Tempo Data to Snapshots
350
Adding Pro Tools Markers Using Snapshots
351
Snapshot Options
351
Center Last Recalled Snapshot
351
Confirm Snapshot Recall
352
Enable Strip Control on Snapshots Tab
352
Crossfade Time
352
Pre Settings
353
Classifying aux Sends
353
User aux Scope
353
User aux Scope Example
354
Using the User aux Scope Grid
355
Using aux User Presets
356
User aux Scope Displays and Controls
357
Recall Safe
359
Recall Safe Displays and Controls
360
Using Recall Safe
362
Using Scope Sets
364
Automation Safing Channels
365
Automation Safing Using the Channel Safe Switches/Button
365
Automation Safing Using the Channel Knob Module (CKM)
366
Automation Safing Using the Channel Menu
367
Snapshot Data Types and Parameters
368
19 Patchbay
370
Accessing the Patchbay
370
Overview of the Patchbay
370
I/O Tabs
371
Hardware Tabs
371
Channel Type Tabs
372
Patching Grid
372
Visual Indicators and Displays
373
Patching Input Sources to Input Channels
373
Patching Output Channels to Hardware Outputs
375
Patching Direct Outputs
376
Direct Output Pickoff Points
377
Unpatching and Clearing Assignments
377
Multiple Input and Output Patching
378
Warning When Stealing Inputs or Outputs in the Patchbay
379
Shortcut for Locating Assignments
380
Naming Channels from the Patchbay
380
Type Text Search
380
Patch List Export
381
Contents of Exported Patchbay Information
381
20 Plug-Ins
383
Plug-Ins Quick Start
383
Using Config and Show Modes for Plug-Ins
383
Installing and Authorizing Plug-Ins
384
Transferring Plug-In Installers to USB
384
Installing Plug-Ins
384
Uninstalling Plug-Ins
385
Installing Plug-Ins Manually
386
Authorizing Plug-Ins
387
Enabling and Disabling Installed Plug-Ins
387
Automatically Removing Plug-Ins During Show Load
388
Manually Removing Unavailable Plug-Ins from the Racks
388
Plug-In Version Checker
388
Using System Info to View Plug-In Version Information
389
Plug-In Racks
389
Naming Plug-In Racks
390
Rack Views
390
Collapsed View
391
Jump To" Plug-Ins
392
Pinning a Plug-In View
393
Identifying Rack Slots
394
Display of Unavailable or Inactive Plug-Ins
394
Scope Indication in the Plug-Ins Page
395
Rack Slots
395
Rack Slot Controls
395
Assigning Plug-Ins to Rack Slots
396
Plug-In Formats (Mono/Stereo)
397
Moving and Copying Plug-Ins
398
Activating and Deactivating Plug-Ins
398
Routing Plug-Ins
398
Inserting Plug-Ins on Channels
398
Routing Plug-Ins as Bus Processors (Effect Send/Return)
400
Routing Channel Direct Outs to Plug-Ins
401
Sidechain Routing
401
Pre- and Post-Fader Inserts
402
Inserting Plug-Ins Post-Fader
402
Post-Fader HW Inserts in the Patchbay
404
Snapshots and Post-Fader Inserts
404
Show Files and Post-Fader Inserts
404
CKM Plug-Ins Mode with Pre- and Post-Fader Inserts
404
Assign and Insert Plug-Ins ("+")
406
Adjusting Plug-Ins on the External Screen
406
Plug-In Zoom View Via CKM Plug-In Switch
406
Bypassing Plug-Ins
406
Plug-In Presets and Snapshots
407
Plug-Ins and Presets
407
Plug-Ins in Snapshots
408
Plug-In DSP Usage
409
Plug-In Levels
409
Plug-In Latency and Processing Delay
410
Initializing the Plug-In Racks
410
Tap Tempo for Plug-Ins
410
Using Tap Tempo
410
Tips for Using Tap Tempo
411
Snapshots and Tempo Sync
411
WSG-HD Waves Soundgrid Option Card and Waves Plug-Ins
411
Setup and Configuration
412
Preparing and Connecting the VENUE System for Waves Installation
412
Downloading and Preparing the Waves Installer
412
Transferring Licenses
412
Using Soundgrid Plug-Ins
415
Control (Events, Mute Groups, Playback, and Record)
419
Events
419
Terminology
419
Important Information about Snapshots and Events
420
The Events Tab
420
Event List
421
Event List Commands
422
Triggers
422
Actions
423
Footswitch Status Display
424
GPI I/O Status Display
424
Creating Events
424
Adding an Event
425
Selecting Events
425
Moving Events
425
Managing Events in the Event List
426
Enabling and Disabling Events
427
Events and Smart Duplicates
427
Smart Duplicate
428
Using Smart Duplicate
429
Events Presets
433
Creating Triggers
435
Adding Triggers to an Event
435
Editing Trigger Type and Properties
436
Managing Triggers in the Triggers List
436
Channel X / y Function Switches
438
System Values as Triggers
438
Creating Actions
438
Adding Actions to an Event
439
Editing an Action Type and Properties
439
Selecting Actions
441
Managing Actions in the Actions List
441
Testing Events
441
Resetting Events
441
Snapshots and Events
442
Snapshot Modes and Event Status
442
Avoid Feedback Loops
442
Default Settings, Templates and Examples
443
Default Events
443
Examples
444
Templates
445
Examples of Logical Operators
446
22 Options
448
Overview of Options
448
System
448
System Configuration
449
System
450
Troubleshooting
452
VENUE Software
454
Buses
454
Auxiliaries
454
Solo and Monitor Operations
455
Headphones
455
Panning (Mains Center Divergence)
455
Auto
455
Automix Attack and Release
456
Delay Compensation
456
Primary Settings
456
Additional Settings
457
About Delay Compensation and Bus-To-Bus Routing
458
Align Total Input Delay on Attentioned Channels
458
Signal Routing Guidelines for ADC
459
Hardware Inserts
460
Plug-In Latency, Processing, and Routing Delay
460
Snapshots
460
Snapshot General Preferences
461
Pre
461
Aux Scope Configuration
462
Time Code
462
MIDI
462
Misc
462
Oscillator
463
Talkback
464
2-Track Inputs
465
Tap Tempo
466
Channel Delay Unit Display
466
System Clock
466
Mouse
466
Interaction
467
Channel Selection
467
Ethernet Control
469
Metering
469
Channel Safe Switches
470
Fader Configuration
470
Lights
471
Devices
472
Engine
473
Hdx Dsp
473
Network
473
Information
474
Managing I/O from the Devices Page
475
AVB Network Card Port Indicators
476
Plug-Ins
476
Help
476
Using the Help Resources
477
Part IV: Recording and Playback
479
23 Pro Tools Recording and Playback
480
Pro Tools Compatibility
481
Important Requirements and Optimizations for a Mac with Pro Tools AVB
481
Part V: Reference
482
24 Synchronization
483
Clock Synchronization Overview
484
Time Code Overview
484
Synchronizing External Devices Using Word Clock
484
Syncing External Devices to an S6L System Using Word Clock
485
Syncing an S6L System to an External Device Using Word Clock
486
Important: Synchronization in Shared I/O Configurations
486
Using a Distributed External Master Clock to Synchronize Multiple Devices
488
Synchronizing Using AES/ADAT or MADI Clock
488
Synchronizing AES/ADAT Digital Audio Inputs (SRC)
489
Working with DSI-192 Digital Inputs
489
Synchronizing MADI Devices
490
Time Code
493
Automating Recall of Snapshots with Time Code
493
Assigning Time Code Values to Snapshots
495
Sorting Snapshots by Time Code Value
496
Enabling Snapshots for Automated Recall
496
Snapshot Chase to Time Code
496
Remote Control of Snapshot Recall
496
Triggering of External Devices on Snapshot Recall
497
Sending MIDI Messages on Snapshot Recall
498
Connecting and Using the MADI-192 MADI Option Card
499
Making Audio Connections
499
Sending Audio
499
Receiving Audio
499
Using MADI
499
Assignable Mode
499
Pro Tools Input Mode
500
Redundant Outputs
500
Assignable I/O
500
Hardware Inserts
500
Enabling Virtual Soundcheck Recording
500
Performing a Virtual Soundcheck Using MADI-192
501
VENUE 7.2.4 and Lower
502
Enabling Redundant Outputs
502
Using MADI for Hardware Inserts
503
26 MLN-192 Milan Option Card
504
Milan Mode
504
AVB-HD Mode
504
System Requirements and Compatibility
505
Milan Mode
505
Using the MLN-192 Milan Option Card (Milan Mode)
505
Milan Configuration Examples
506
Single S6L System: MLN-192 Connected Directly to Milan Devices
506
Single S6L System: MLN-192 to a Switch to Milan Devices
506
Multiple S6L Systems: Redundant Star, MLN-192 to Milan Devices
507
Milan Communication between S6L Systems
507
Milan Switch Connections
508
27 Hardware Inserts
510
Connecting External Hardware
510
Assigning Hardware Inserts to Channels
510
Reassigning Hardware Inserts
512
Activating and Bypassing Hardware Inserts
512
Setting the Hardware Insert Location
512
GPI Port Reference
514
GPI Input Specifications
514
GPI Input Connector Pin Assignments
514
Pinout for GPI Input Connector
514
GPI Output Specifications
515
GPI Output Power Specification
515
GPI Output Ground Connections
515
GPI Output Connector Pin Assignments
515
DB25F Pinout
516
GPI Wiring Diagrams
516
GPI Input Examples
516
GPI Output Examples
517
29 Troubleshooting
521
Problem Solving
522
Plug-In Compatibility Information
527
Restarting Your System
527
Additional Reset Options
527
Resetting Hardware Components
528
Resetting Channel Touch Modules (Ctms)
528
Offline or Unavailable Devices
530
Hardware Monitoring Window
530
Accessing Hardware Monitoring
530
Collecting Log Files
530
E6L Engine Emergency Shutdown
531
E6LX "Remote" Mode
531
Utility Mode
532
Resetting the Plug-In Racks
533
Using the System Restore Software
533
Updating HDX-192 DSP Card Firmware
534
Updating MADI-192 MADI Option Card Firmware
534
Updating MLN-192 Milan Option Card Firmware
535
Updating MLN-192 Milan Option Card Firmware (VENUE 7.2.4 and Lower)
535
Configuring S6L Master Touch Screen (MTS) and External Monitor
536
LED Brightness
536
System Test
538
Running System Test Diagnostics
538
Loopback Tests
540
Exiting System Test
540
Release Notes for System Test
541
Part VI: Specifications
542
30 Mechanical Specifications
543
S6L-16C Control Surface
544
S6L-24C Control Surface
545
S6L-24/24D Control Surface
546
S6L-32D Control Surface
547
S6L-48D Control Surface
548
E6LX Engine
549
E6L Engine
550
Stage 64
551
Stage 32
553
Local 16 I/O
555
S6L System Components LED Codes
556
E6L Engine
556
Stage 64 and Stage 32
556
Network Port Act and Sig Leds
557
Replacing S6L and E6L Psus
557
S6L Internal USB Port
558
Remove the S6L Back Cover
558
Internal USB Port
560
Making Fiber-Optic Connections
561
31 Audio Specifications
563
System Processing
563
Analog MIC/Line Inputs
563
Analog MIC/Line Outputs
564
S6L Control Surface Digital I/O
564
DSI-192 Digital Input Card
565
DSO-192 Digital Output Card
565
Headphone Outputs
566
32 Signal Flow Diagrams
567
Input Channel Signal Flow
567
Output Channel Signal Flow
568
Part VII: Appendices
570
Environmental Compliance
571
EMC (Electromagnetic Compliance)
572
Advertisement
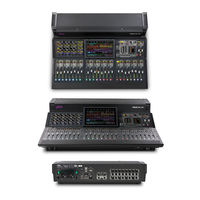
Avid Technology S6L-16C Replacing (31 pages)
Replacing the SBC Motherboard
Brand:
Avid Technology
| Category:
Music Mixer
| Size: 10 MB
Avid Technology S6L-16C Installing (18 pages)
RAM Expansion
Brand:
Avid Technology
| Category:
Music Mixer
| Size: 7 MB
Table of Contents
To Determine the Currently Installed Amount of RAM
1
Prepare the Control Surface
2
To Remove the Covers
3
Disconnect Light Cables
6
Remove the SBC Tray
7
Install RAM
14
Reinstall the SBC Tray
15
Complete the Installation
16
Confirm the Installation
16
System Clock (Time and Time Zone)
17
Advertisement
Avid Technology S6L-16C Replacing (17 pages)
Brand:
Avid Technology
| Category:
Music Mixer
| Size: 5 MB
Advertisement
Related Products
Avid Technology S6L Control Surface
Avid Technology S6L-32D
Avid Technology S6L-24D
Avid Technology S6L-48D
Avid Technology S6L-24C
Avid Technology S6 M10
Avid Technology S6 M40
Avid Technology VENUE SC48
Avid Technology S1
Avid Technology S4
Avid Technology Categories
Recording Equipment
Music Mixer
Server
Accessories
Desktop
More Avid Technology Manuals
Login
Sign In
OR
Sign in with Facebook
Sign in with Google
Upload manual
Upload from disk
Upload from URL