Sign In
Upload
Manuals
Brands
AudioCodes Manuals
Controller
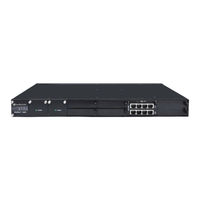
Mediant 2600 SBC
AudioCodes Mediant 2600 SBC Manuals
Manuals and User Guides for AudioCodes Mediant 2600 SBC. We have
1
AudioCodes Mediant 2600 SBC manual available for free PDF download: Hardware Installation Manual
AudioCodes Mediant 2600 SBC Hardware Installation Manual (44 pages)
Session Border Controllers
Brand:
AudioCodes
| Category:
Controller
| Size: 1 MB
Table of Contents
Table of Contents
3
Introduction
9
Unpacking the Device
11
Physical Description
13
Physical Dimensions
13
Front Panel Description
13
Figure 3-1: Front Panel
13
Table 3-1: Physical Dimensions
13
Table 3-2: Front-Panel Description
13
Fan Tray Module
14
Power Supply Modules
14
Power LED Description
15
E-SBC Module
15
Ports Description
15
Figure 3-2: E-SBC Module Ports
15
Table 3-3: Power Supply Module LED Description
15
Leds Description
16
Figure 3-3: E-SBC Module Leds
16
Table 3-4: E-SBC Module Ports Description
16
Table 3-5: E-SBC Module Leds Description
16
Media Processing Module
18
Figure 3-4: MPM Leds
18
Table 3-6: MPM Leds Description
18
Rear Panel Description
19
Figure 3-5: Rear Panel
19
Table 3-7: Rear-Panel Description
19
Mounting the Device
21
Desktop Mounting
21
Figure 4-1: Rubber Feet Locations
21
Rack Mounting
22
Mounting in a 19-Inch Rack Using a Pre-Installed Rack Shelf
23
Mounting in a 19-Inch Rack Using Front and Rear Brackets
23
Figure 4-2: Rear-Mounting Brackets Attached to Rear-Rack Posts (60 CM)
25
Figure 4-3: Rear-Mounting Brackets Attached to Rear-Rack Posts (> 70 CM)
25
Figure 4-4: Attaching Rear-Mounting Flange to Chassis' Rear-Side Mounting Holes (60 CM)
26
Figure 4-5: Attaching Rear-Mounting Flange to Chassis' Rear-Side Mounting Holes (> 70 CM)
26
Figure 4-6: Sliding Rear-Mounting Flanges into the Rear-Mounting Brackets (60 CM)
27
Figure 4-7: Sliding Rear-Mounting Flanges into the Rear-Mounting Brackets (> 70 CM)
27
Figure 4-8: Fastening Rear-Mounting Flange to Rear-Mounting Bracket (60 CM)
28
Figure 4-9: Fastening Rear-Mounting Flange to Rear-Mounting Bracket (> 70 CM)
28
Figure 4-10: Front-Mounting Brackets Flush and Aligned with Front-Rack Posts (60 CM)
29
Figure 4-11: Front-Mounting Brackets Flush and Aligned with Front-Rack Posts (> 70 CM)
29
Cabling the Device
31
Grounding the Device
31
Figure 5-1: Grounding the Device
31
Connecting the Ethernet Ports
32
RJ-45 LAN Connector Pinouts
32
Figure 5-2: Connecting the LAN Interface
32
Table 5-1: RJ-45 Connector Pinouts
32
Deployment of a Standalone Device
33
Figure 5-3: Ethernet Port Pairs
33
Figure 5-4: Cabling for 1+1 Ethernet-Port Redundancy (Example)
33
Deployment of Two Devices for High Availability
34
Figure 5-5: Cabling for High Availability (Example)
34
Connecting the Serial Interface to a Computer
35
Figure 5-6: Serial Interface Cable Adapter and Connector Pinouts
35
Figure 5-7: Connecting the Serial Interface
35
Connecting to Power
36
Table 5-2: Power Specifications
36
Figure 5-8: Connecting to Power
37
Hardware Maintenance
39
Prerequisites
39
Grounding the Device
39
Preventing Electrostatic Discharge Damage
39
Replacing the E-SBC Module
40
Figure 6-1: Connecting ESD Wrist Strap to Chassis ESD Lug
40
Figure 6-2: Module Handle Partially Pulled out (Top View)
40
Installing the MPM
41
Figure 6-3: Module Handle Pushed in (Top View)
41
Figure 6-4: Extracted Blank AMC Module (Top View)
41
Figure 6-5: Slot Assignment for MPM (and E-SBC Module)
41
Replacing the Fan Tray and Power Supply Modules
42
Advertisement
Advertisement
Related Products
AudioCodes Mediant 2600
AudioCodes Mediant 500
AudioCodes Mediant 4000B SBC
AudioCodes Mediant 9000 SBC
AudioCodes Mediant 9000 Rev. B
AudioCodes Mediant 9030
AudioCodes Mediant 9080
AudioCodes Mediant 9000
AudioCodes Mediant 4000B
AudioCodes Mediant E-SBC
AudioCodes Categories
Gateway
IP Phone
Controller
Network Router
Conference System
More AudioCodes Manuals
Login
Sign In
OR
Sign in with Facebook
Sign in with Google
Upload manual
Upload from disk
Upload from URL