Sign In
Upload
Manuals
Brands
Atlas IED Manuals
Speakers
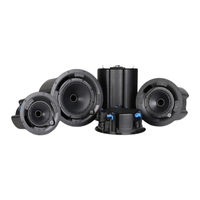
Atlas+Fyne IsoFlare FC-6T
Atlas IED Atlas+Fyne IsoFlare FC-6T Manuals
Manuals and User Guides for Atlas IED Atlas+Fyne IsoFlare FC-6T. We have
1
Atlas IED Atlas+Fyne IsoFlare FC-6T manual available for free PDF download: Installation Manual
Atlas IED Atlas+Fyne IsoFlare FC-6T Installation Manual (43 pages)
Brand:
Atlas IED
| Category:
Speakers
| Size: 6 MB
Table of Contents
Table of Contents
3
Blind Mount - Drop Ceiling Tile Installation
4
Summary of Steps - Blind Mount Ceiling Tile Installation
4
Tools Required - Blind Mount Ceiling Tile Installation
4
Step 1 - Remove Ceiling Tile
4
Step 2 - Mark Cutout Hole on Ceiling Tile
5
Step 3 - Cut Hole in Ceiling Tile
6
Step 4 - Replace Ceiling Tile & Assemble Tile Bridge C-Ring Assembly
7
Step 5 - Bring Cables through Loudspeaker Hole
8
Step 6 - Connect Safety Tether to Loudspeaker
9
Step 7 - Terminate & Connect Loudspeaker Wire to Loudspeaker
10
Step 8 - Insert Loudspeaker through Front of Tile & Secure in Place
11
Step 9 - Select Transformer Tap Setting
13
Step 10 - Install Magnetic Grille
14
Blind Mount - Drywall Installation
15
Summary of Steps - Blind Mount Drywall Installation
15
Tools Required - Blind Mount Drywall Installation
15
Step 1 - Mark Hole on Ceiling
15
Figure 16
15
C-Ring
15
Euroblock Connector
15
Grille (Round White)
15
Required Tools
15
Small Flathead Screwdriver
15
Step 2 - Cut Hole in Ceiling
16
Step 3 - Place C-Ring into Ceiling and Place Around Loudspeaker Hole
17
Step 4 - Bring Cables through Loudspeaker Hole
18
Step 5 - Connect Safety Tether to Loudspeaker
19
Step 6 - Terminate & Connect Loudspeaker Wire to Loudspeaker
20
Step 7 - Insert Loudspeaker through Front of Drywall and Secure in Place
21
Step 8 - Select Transformer Tap Setting
23
Step 9 - Install Magnetic Grille
24
Pre-Install - Installation
25
Summary of Steps - Pre-Install Installation
25
Tools Required - Pre-Install Installation
25
Step 1 - Connect Safety Tether to Back Can
25
Step 2 - Connect Conduit or Prepare Other Wiring Method to Back Can
26
Step 3 - Terminate & Connect Loudspeaker Wire to Loudspeaker
27
Step 4 - Affix Loudspeaker Back Can To Desired Location
28
Step 5 - Mark Cutout Circle and Cut Hole
31
Step 6 - Wire Driver Assembly to Back Can
32
Step 7 - Install Driver Assembly into the Back Can
33
Step 8 - Select Transformer Tap Setting
35
Step 9 - Install Magnetic Grille
36
Loudspeaker Removal
37
Step 1 - Disengage T Handle
37
Step 2 - Slide Clamp Release Button
38
Step 3 - Repeat for Remaining and Remove Loudspeaker
38
Painting Instructions
39
Summary of Steps - Painting Instructions
39
Tools Required - Painting Instructions
39
Step 1 - Remove Grille Cloth
39
Step 2 - Remove Logo
40
Step 3 - Clean the Grille
40
Step 4 - Prepare the Painting Area
40
Step 5 - Paint the Grille
41
Step 6 - Replace Grille Cloth
42
Step 7 - Install Magnetic Grille
43
Advertisement
Advertisement
Related Products
Atlas IED FS12TEN-99
Atlas IED Atlas+Fyne IsoFlare FC-4T
Atlas IED Atlas+Fyne IsoFlare FC-4TLP
Atlas IED Atlas+Fyne IsoFlare FC-8T
Atlas IED Atlas+Fyne IsoFlare FC-8ST
Atlas IED Atlas+Fyne IsoFlare FC-6TPI
Atlas IED Atlas+Fyne IsoFlare FC-8TPI
Atlas IED Atlas+Fyne IsoFlare FC-6TPIC
Atlas IED Atlas+Fyne IsoFlare FC-8TPIC
Atlas IED Atlas+Fyne IsoFlare FC Series
Atlas IED Categories
Speakers
Amplifier
Power distribution unit
Signal Processors
Racks & Stands
More Atlas IED Manuals
Login
Sign In
OR
Sign in with Facebook
Sign in with Google
Upload manual
Upload from disk
Upload from URL