Sign In
Upload
Manuals
Brands
Atlas IED Manuals
Speakers
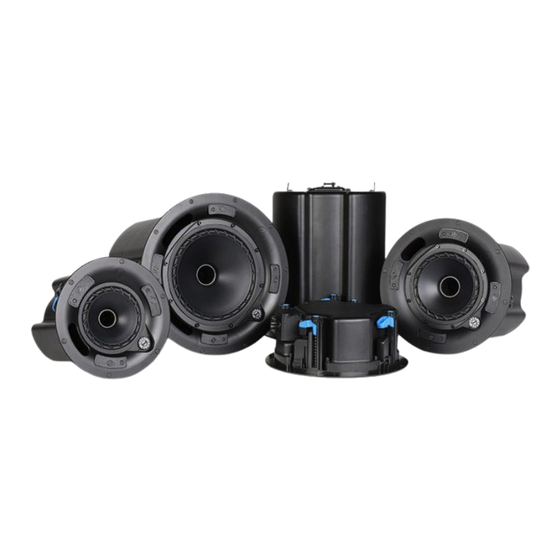
Atlas+Fyne IsoFlare FC Series
Atlas IED Atlas+Fyne IsoFlare FC Series Manuals
Manuals and User Guides for Atlas IED Atlas+Fyne IsoFlare FC Series. We have
1
Atlas IED Atlas+Fyne IsoFlare FC Series manual available for free PDF download: Installation Manual
Atlas IED Atlas+Fyne IsoFlare FC Series Installation Manual (43 pages)
Brand:
Atlas IED
| Category:
Speakers
| Size: 6 MB
Table of Contents
Table of Contents
3
Blind Mount - Drop Ceiling Tile Installation
4
Summary of Steps - Blind Mount Ceiling Tile Installation
4
Tools Required - Blind Mount Ceiling Tile Installation
4
Step 1 - Remove Ceiling Tile
4
Step 2 - Mark Cutout Hole on Ceiling Tile
5
Step 3 - Cut Hole in Ceiling Tile
6
Step 4 - Replace Ceiling Tile & Assemble Tile Bridge C-Ring Assembly
7
Step 5 - Bring Cables through Loudspeaker Hole
8
Step 6 - Connect Safety Tether to Loudspeaker
9
Step 7 - Terminate & Connect Loudspeaker Wire to Loudspeaker
10
Step 8 - Insert Loudspeaker through Front of Tile & Secure in Place
11
Step 9 - Select Transformer Tap Setting
13
Step 10 - Install Magnetic Grille
14
Blind Mount - Drywall Installation
15
Summary of Steps - Blind Mount Drywall Installation
15
Tools Required - Blind Mount Drywall Installation
15
Step 1 - Mark Hole on Ceiling
15
Figure 16
15
C-Ring
15
Euroblock Connector
15
Grille (Round White)
15
Required Tools
15
Small Flathead Screwdriver
15
Step 2 - Cut Hole in Ceiling
16
Step 3 - Place C-Ring into Ceiling and Place Around Loudspeaker Hole
17
Step 4 - Bring Cables through Loudspeaker Hole
18
Step 5 - Connect Safety Tether to Loudspeaker
19
Step 6 - Terminate & Connect Loudspeaker Wire to Loudspeaker
20
Step 7 - Insert Loudspeaker through Front of Drywall and Secure in Place
21
Step 8 - Select Transformer Tap Setting
23
Step 9 - Install Magnetic Grille
24
Pre-Install - Installation
25
Summary of Steps - Pre-Install Installation
25
Tools Required - Pre-Install Installation
25
Step 1 - Connect Safety Tether to Back Can
25
Step 2 - Connect Conduit or Prepare Other Wiring Method to Back Can
26
Step 3 - Terminate & Connect Loudspeaker Wire to Loudspeaker
27
Step 4 - Affix Loudspeaker Back Can To Desired Location
28
Step 5 - Mark Cutout Circle and Cut Hole
31
Step 6 - Wire Driver Assembly to Back Can
32
Step 7 - Install Driver Assembly into the Back Can
33
Step 8 - Select Transformer Tap Setting
35
Step 9 - Install Magnetic Grille
36
Loudspeaker Removal
37
Step 1 - Disengage T Handle
37
Step 2 - Slide Clamp Release Button
38
Step 3 - Repeat for Remaining and Remove Loudspeaker
38
Painting Instructions
39
Summary of Steps - Painting Instructions
39
Tools Required - Painting Instructions
39
Step 1 - Remove Grille Cloth
39
Step 2 - Remove Logo
40
Step 3 - Clean the Grille
40
Step 4 - Prepare the Painting Area
40
Step 5 - Paint the Grille
41
Step 6 - Replace Grille Cloth
42
Step 7 - Install Magnetic Grille
43
Advertisement
Advertisement
Related Products
Atlas IED ALX-D Series
Atlas IED ALX-4D
Atlas IED ALX-8D
Atlas IED ALX-16D
Atlas IED ALX-24D
Atlas IED ALX-32D
Atlas IED ALX-40D
Atlas IED ALX-48D
Atlas IED Atmosphere Zone Master
Atlas IED ASP-MG24
Atlas IED Categories
Speakers
Amplifier
Power distribution unit
Signal Processors
Controller
More Atlas IED Manuals
Login
Sign In
OR
Sign in with Facebook
Sign in with Google
Upload manual
Upload from disk
Upload from URL