Sign In
Upload
Manuals
Brands
Aruba Manuals
Switch
8400 Series
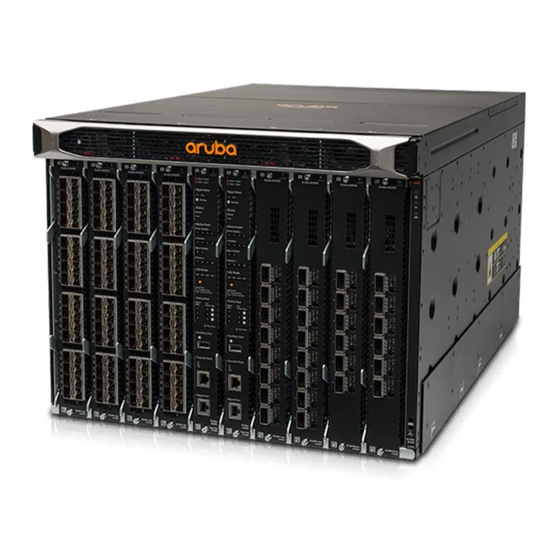
Aruba 8400 Series Manuals
Manuals and User Guides for Aruba 8400 Series. We have
2
Aruba 8400 Series manuals available for free PDF download: Installation And Getting Started Manual, Hardware Setup Manual
Aruba 8400 Series Installation And Getting Started Manual (121 pages)
Brand:
Aruba
| Category:
Switch
| Size: 26 MB
Table of Contents
Table of Contents
3
Chapter 1 About this Document
6
Applicable Products
6
Part Number
6
Related Publications
7
Switch Prompts in Examples
7
Chapter 2 Installation Precautions and Guidelines
9
Chapter 2 Installation Precautions and Guidelines
11
Chapter 3 Site Preparation
13
Safety Recommendations
13
General Safety Recommendations
13
Electricity Safety
13
Handling Safety
13
Preventing Electrostatic Discharge Damage
14
Laser Safety
15
Examining the Installation Site
15
Weight Support
15
Temperature
15
Humidity
16
Cleanliness
16
Humidity Cleanliness
16
Emi
17
Grounding
17
Power
18
Cooling
18
Grounding
18
Space
19
Recommended Screwdrivers for Switch Installation
19
Shipping a Rack-Mounted Aruba 8400 Series Switch
20
Space
20
Chapter 4 Introducing the Aruba 8400 Switch Series
21
Overview of the Aruba 8400 Switch
21
Front of the Switch
22
Front Chassis Leds
23
Power Supply Unit (PSU) Slots
24
Management Module (MM) Slots
26
Space
27
Line Module (LM) Slots
30
Rear of the Switch
32
Grounding
32
Fan Tray and Fan Modules
33
Grounding
33
Space
34
Fabric Module (FM) Slot
35
Rear Panel Leds
35
Space
35
Applicable Products
36
Switch Software Features
36
Chapter 5 Unpacking, Lifting, and Moving the Chassis
37
Unpacking the Switch Components
37
Power Cord Information
39
Attaching an ESD Wrist Strap
39
Removing Installed Components from the Chassis
40
Remove Installed Power Supply Units
40
Remove any Installed Line Modules
41
Remove Two Fan Trays
41
Move the Chassis to the Mounting Location
42
Manually Moving the Chassis
42
Space
43
Using a Mechanical Lift to Move the Chassis
44
Space
44
Chapter 6 Mounting the Chassis
45
(Optional) Installing the Chassis in a Non-Rack Mounted Position
45
Manually Positioning the Chassis on a Non-Rack Mount Surface
46
Using a Mechanical Lift to Position the Chassis on a Non Rack Mount Surface
47
Mounting the Chassis in a Rack
47
Shipping a Rack-Mounted Aruba 8400 Switch Chassis
47
Using a Two-Post Rack Mount
48
Installing the Included JL374A Aruba X462 Two-Post Rack Mount Kit
48
Preparing the Chassis for Two-Post Rack Mounting
49
Space
49
Manually Mounting the Chassis in a Two-Post Rack
50
Space
50
Space
51
Using a Mechanical Lift to Mount the Chassis in a 2-Post Rack
52
Using a Four-Post Rack Mount
52
Installing the Optional JL373A Aruba X464 4-Post Rack Rail Kit
53
Space
53
Space
54
Space
55
Space
56
Space
57
Manually Mounting the Chassis in a Four-Post Rack
58
Space
59
Using a Mechanical Lift to Mount the Chassis in a Four-Post Rack
60
Grounding the Chassis
61
Chapter 7 Installing Components
63
Protect the Switch and Components from Damage Caused by ESD (Electrostatic Discharge)
63
Installing a New Power Supply Unit in an Empty Slot
64
Install Management Modules in Slots 5 and 6
67
Space
67
Install up to Eight Line Modules
68
Installing or Removing Transceivers
68
Grounding
69
Installing Fabric Modules if Not Already Installed
70
(Optional) Install a Fabric Module in an Empty Fabric Module Slot
70
Grounding
70
Installing a Fan Tray in any Empty Fan Tray Slot
71
Space
71
Installing the Cable Manager
72
Installing the Cable Manager in a Two-Post Rack
73
Installing the Cable Manager in a Four-Post Rack
73
Space
73
Attaching the Touch Fasteners to the Cable Manager Blocks
74
Attaching the Cable Manager Blocks to the Cable Manager Mount
75
Space
75
Space
76
Chapter 8 Activating the Switch
77
Power-On and NOS (Network Operating System) Boot-Up
77
Chassis Leds Indicating Normal Operation
78
Management Module Leds, Reset Button, and Physical Ports
78
Line Module Port Leds
82
Rear Panel Leds
83
Connect a Console Cable and Display the Console Prompt
83
Where to Go from here
84
Chapter 9 Adding or Replacing Switch Components
85
Protect the Switch and Components from Damage Caused by ESD (Electrostatic Discharge)
85
Adding or Replacing Switch Modules with Controlled Shutdown or Hot Swap Methods
85
Space
85
Using Controlled Shut down to Add or Replace Line Modules
86
Adding a Line Module to an Empty, Unconfigured Slot
86
Replacing a Line Module with Another of the same Type
86
Replacing a Line Module with Another of a Different Type
87
Using Controlled Shutdown to Add or Replace Fabric Modules
88
Removing or Replacing a Standby Management Module
88
Space
89
Removing or Replacing an Active Management Module
90
Removing or Replacing a Fabric Module
91
Removing a Fan Tray before Installing or Replacing a Fabric Module
91
Removing a Fabric Module
93
Space
93
Installing the Replacement Fabric Module
94
Space
94
Space
95
Removing or Replacing a Line Module
96
Space
96
Replacing a Fan Tray
97
Removing the Fan Tray
98
Space
98
Installing the Replacement Fan Tray
99
Installing or Replacing a Fan Module
99
Space
100
Chapter 10 Troubleshooting
101
Protect the Switch and Components from Damage Caused by ESD (Electrostatic Discharge)
101
Basic Troubleshooting Tips
101
Functions of the Management Module Reset Button
102
Space
102
Diagnosing with Leds
103
LED States
103
Chassis LED Behavior
104
Power Supply LED Behavior
105
Management Module LED Behavior
105
Line Module LED Behavior
108
Fabric Module LED Behavior
109
Fan Module LED Behavior
110
Rear Panel LED Behavior
110
Aruba Networking Tools
111
Space
112
Chapter 11 Websites
113
Chapter 12 Support and Other Resources
114
Accessing Hewlett Packard Enterprise Support
114
Accessing Updates
114
Customer Self Repair
115
Remote Support
115
Warranty Information
115
Regulatory Information
116
Documentation Feedback
116
Specifications
117
Product Weights
117
Product Dimensions
117
Fabric Module Line Rate Support
118
System Power Consumption
119
Ordering Additional Accessory Parts
121
Advertisement
Aruba 8400 Series Hardware Setup Manual (40 pages)
Brand:
Aruba
| Category:
Switch
| Size: 9 MB
Table of Contents
Table of Contents
4
Chapter 1 Before You Begin
6
Site Preparation
6
Installation Overview
6
General Procedure
7
Related Information
7
Installation Precautions and Guidelines
7
Chapter 2 Unpacking the Switch Components
11
Unpacking the Switch Components
11
Product Weights
13
Chapter 3 Lifting and Moving the Chassis
14
Remove Installed Components from the Chassis
14
Remove Installed Power Supply Units
14
Remove any Installed Line Modules
14
Remove Two Fan Trays
15
Move the Chassis to the Mounting Location
16
Manually Moving the Chassis
16
Using a Mechanical Lift to Move the Chassis
17
Chapter 4 Mounting the Chassis
18
(Optional) Installing the Chassis in a Non-Rack Mounted Position
18
Manually Positioning the Chassis on a Non-Rack Mount Surface
18
Using a Mechanical Lift to Position the Chassis on a Non Rack Mount Surface
19
Mounting the Chassis in a Rack
19
Using a Two-Post Rack Mount
19
Manually Mounting the Chassis in the Rack
21
Using a Mechanical Lift to Mount the Chassis
22
Using a Four-Post Rack Mount
23
Ground the Switch
23
Install Switch Components
24
Install Power Supplies
24
Install Management Modules in Slots 5 and 6
25
Install up to Eight Line Modules
26
Install the Cable Manager
26
Installing Fabric Modules if Not Already Installed
26
Installing a Fan Tray in any Empty Fan Tray Slot
27
Chapter 5 Activating the Switch
29
Power-On and NOS (Network Operating System) Boot-Up
29
Chassis Leds Indicating Normal Operation
29
Management Module Leds, Reset Button, and Physical Ports
30
Line Module Port Leds
33
Rear Panel Leds
34
Connect a Console Cable and Display the Console Prompt
34
Where to Go from here
35
Chapter 6 Initial Hardware Setup Safety and Regulatory Information
36
Environmental, Safety, and Electrical Information
36
Power Cord Information
37
Indoor Cables
38
Indoor Wiring Warning
38
Servicing
38
Australia/Eu/New Zealand EMC Class a Warning
38
Belarus Kazakhstan Russian Marking
38
Brazil Statement and Contact Information
38
China Altitude Warning
39
Chinese Safety Warning
39
European Community
39
Japan VCCI Class a
39
Korea EMC Class a Statement
40
Taiwan EMC Warning
40
Documentation Feedback
40
Advertisement
Related Products
Aruba 8325 Series
Aruba 8325-48Y8C
Aruba 8325-32C
Aruba 8360 Series
Aruba 8360 48XT4C
Aruba 8360 12C
Aruba 8360 24XF2C
Aruba 8320
Aruba 8360-32Y4C v2
Aruba 8360-48XT4C
Aruba Categories
Wireless Access Point
Switch
Racks & Stands
Controller
Network Router
More Aruba Manuals
Login
Sign In
OR
Sign in with Facebook
Sign in with Google
Upload manual
Upload from disk
Upload from URL