Art G 463 Manuals
Manuals and User Guides for Art G 463. We have 5 Art G 463 manuals available for free PDF download: Installation Manual
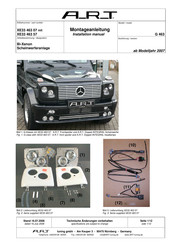
Art G 463 Installation Manual (12 pages)
Brand: Art
|
Category: Automobile Accessories
|
Size: 1 MB
Advertisement

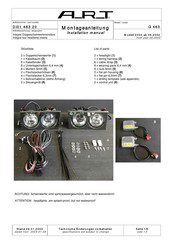
Art G 463 Installation Manual (4 pages)
Integral four headlamp inserts LHD From year 06.2002
Brand: Art
|
Category: Automobile Accessories
|
Size: 0 MB
Table of Contents

Art G 463 Installation Manual (4 pages)
Rear light Integral
Brand: Art
|
Category: Automobile Parts
|
Size: 0 MB
Table of Contents
Advertisement
Art G 463 Installation Manual (5 pages)
Integral four headlamp inserts
Brand: Art
|
Category: Automobile Accessories
|
Size: 0 MB
Table of Contents

Art G 463 Installation Manual (2 pages)
Brand: Art
|
Category: Automobile Accessories
|
Size: 0 MB