Sign In
Upload
Manuals
Brands
AP Diving Manuals
Power Tool
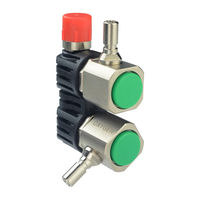
RBV07/DUAL
AP Diving RBV07/DUAL Manuals
Manuals and User Guides for AP Diving RBV07/DUAL. We have
1
AP Diving RBV07/DUAL manual available for free PDF download: Maintenance Manual
AP Diving RBV07/DUAL Maintenance Manual (50 pages)
Swivel Inflator
Brand:
AP Diving
| Category:
Power Tool
| Size: 22 MB
Table of Contents
Table of Contents
2
1 Introduction
4
Functional Description
4
Servicing
4
Warranty
4
Copyright and Applicable Law
4
RBV07 Swivel Inflator Range Exploded Diagrams and Parts Lists
5
RBV07(A) Single Swivel Inflator Main Assembly
5
RBV07(A)/DUAL Dual Swivel Inflator Main Assembly
6
RBV07(A)/SO Single Swivel Inflator with Shutoff Valve Main Assembly
7
RBV07(A)/DUAL/SO Dual Swivel Inflator with Shutoff Valve Main Assembly
8
3 General Information
9
Four Versions
9
Gas Flow Paths
9
Single Swivel Inflators - RBV07 & RBV07A
9
Dual Swivel Inflators - RBV07/DUAL & RBV07A/DUAL
10
Single Swivel Inflators with Flowstop Shutoff - RBV07/SO & RBV07A/SO
11
Dual Swivel Inflators with Shutoff - RBV07/DUAL/SO & RBV07A/DUAL/SO
12
Recommended Position of the Collar of the GC3 Flowstop
13
4 Service Kit Contents and Tools
14
Service Kit Contents
14
Tools Needed
15
5 Disassembly Instructions
16
General Overview: Main Disassembly Steps
16
Unscrew the 5/16" Inflator Stem(S) from the Inflator Body
16
Unscrew the GC3 Flowstop Isolator from the 5/16"-9/16" Adapter
17
Unscrew the 5/16"-9/16" Adapter(S) from the Outlet Body or Inflator Body
18
Remove the Inflator Body from the Outlet Body
19
Unscrew the Blue or Green Push Button from the Inflator Spindle
21
Remove the O-Ring from the Inflator Body
23
Remove Low Profile Counterlung Inlet Elbow from Counterlung
26
Remove O-Rings from MP Counterlung Inflator Hose
27
When GC3 Flowstop Is Fitted: Remove O-Rings from both Ends of MP Hose27
27
AP50 Medium Pressure (MP) Hose Disassembly
28
Remove Circlip from Snap Connector Body
28
Remove Sliding Collar from Snap Connector Body
28
Remove Spring from Snap Connector Body
28
Remove 4 Ball Bearings from Snap Connector Body
29
Unscrew Schraeder Valve from Snap Connector Body
29
Remove O-Ring from Snap Connector Body
30
6 Clean and Replace Service Parts
31
Ultrasonically Clean Deposits from All Metal Parts
33
Replace All O-Rings with New Ones from the Service Kit
34
How to Lightly Grease O-Rings
34
7 Assembly Instructions
36
General Overview: Main Assembly Steps
36
Place a New O-Ring into the Inflator Body
36
Screw the Blue or Green Push Button Onto the Inflator Spindle
37
Fit a New O-Ring Onto the Inflator Body and Locking Ring
39
Connect the Inflator Body to the Outlet Body
40
Screw the 5/16"-9/16" Adapter(S) Back into the Outlet Body or Inflator Body
41
Screw the GC3 Flowstop Isolator Back into the 5/16"-9/16" Adapter
43
Screw the 5/16" Inflator Stem(S) Back into the Inflator Body
43
Fit New O-Rings to MP Counterlung Inflator Hose
44
Fit Low Profile Counterlung Inlet Elbow Back Onto Counterlung
45
When a GC3 Flowstop Is Fitted: Fit New O-Rings to both Ends of MP Hose
46
Place the Yellow Locking Strap Back Onto the GC3 Isolator
47
AP50 Hose Assembly
47
Fit New O-Ring Inside Snap Connector Body
47
Screw New Schraeder Valve into Snap Connector Body
48
Push 4 Ball Bearings Back into Snap Connector Body
48
Put Spring Onto Snap Connector Body
48
Push Sliding Collar Onto Snap Connector Body
49
Refit Circlip Onto Snap Connector Body
49
8 Testing Instructions
50
Test for Leaks and Proper Operation
50
Advertisement
Advertisement
Related Products
AP Diving RBV07 Series
AP Diving RBV07ADUAL
AP Diving RBV07ASO
AP Diving RBV07A/DUAL/SO
AP Diving RBV07/SO
AP Diving RBV07/DUAL/SO
AP Diving RB05
AP Diving RB05C
AP Diving RB05D
AP Diving RB07/02
AP Diving Categories
Diving Instrument
Power Tool
Monitor
Tools
Battery Pack
More AP Diving Manuals
Login
Sign In
OR
Sign in with Facebook
Sign in with Google
Upload manual
Upload from disk
Upload from URL